
Jeffu
-
Posts
42 -
Joined
-
Last visited
Content Type
Profiles
Forums
Events
Downloads
Gallery
Articles
AVCS Bug Reports (automated)
AVCS Bug Reports (manual)
VG Wiki
Blogs
Store
Everything posted by Jeffu
-

Important Changes and New Features in BMS 4.36
Jeffu posted a blog entry in How 2 git gud at Falcon BMS
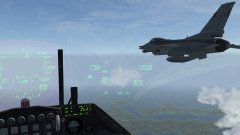
From the BMS forums: Required fixes! Following the following the report of multiple issues: Loss of flight performance in MP with some loadouts Graphical bug on missile trail launch Please apply the following lines on your “falcon BMS user.cfg” (User/config folder): https://forum.falcon-bms.com/topic/22302/temporary-fixes-for-4-36-0 There is also a setting to enable a click sound for the afterburner detent: A-G Radar Changes (-34) The basic A-G systems have been made more realistic. They need range information in order to work correctly. The system can calculate the information it needs by using altitude information, or it can rely on a ranging sensor (A-G radar lock, TGP) to get the information it needs. (2.4.6, 4.2.9, 4.2.18) For visual modes (CCIP, DTOS), FCR slant range calculation uses either barometric altitude or the radar altimiter (BARO or RALT). For CCRP it will be best to use either precision steerpoints, or a sensor (A-G radar lock, TGP). The air to ground radar now has antenna elevation and azimuth control modeled. The A-G FCR will change the elevation automatically based on the cursor position and the plane's current altitude, but it is pilot adjustable if required. Antenna elevation can be calculated using either barometric altitude or the radar altimeter. (2.4.7) CCRP Changes (-34, 4.2.2, 4.2.13) Bomb lofting cues have been added. Laser Mavericks (-34, 4.3.10) The AGM-65L recreates the traditional Maverick MFD cues, despite not having an imaging sensor. The Maverick laser code must match the emitting laser, and the normal launch constraints of the AGM-65 still apply. The target must be lased for the entirety of the missiles flight. To change the laser code: Set the missile to BORE. Unlock the laser code by slewing the gimbal indicator over the "L" and pressing TMS Up. The L will change to a U. Using either TMS Left or OSB 7 (right side, second button), cycle through the polarity and after a few presses you will get to select the first number. The number will cycle automatically, select the correct number by pressing TMS Left or OSB 7 at the correct time. For each number you must cycle through the polarity again. Afterwards, press TMS Up again to lock the laser code. The U will be replaced by an L. HARM threat tables (-34, 4.4.1) Threat Tables are now customizable through either the DED or the data cartridge. HMCS RWR indicator (-34, 2.11.6.10) The HMCS now includes a directional RWR indicator. The gap in the circle represents your view, and the diamond represents the direction of the emitting radar. HMCS Alignment, A/G Markpoints (-34, 2.11.2, 2.11.6) The HMCS must now be aligned using the HMCS DED page (List->0->RCL->SEQ) For coarse alignment, press M-Sel (0), then align the HMCS cross with the cross on the hud and press Cursor Enable (Insert). Press M-Sel again to exit. For the other two alignments, press M-Sel to start, then slew the cross with the cursor until it is lined up, and then press M-Sel again to exit. https://www.youtube.com/watch?v=acciwGQDlVE Lighting The exterior lighting panel is now fully implemented. Anti-Collision now supports all settings. 1 through 4 are flashes in sequence, A through C are in Morse code. Wing/Tail and Fuselage settings are now separate, and both bright and dim settings are supported. Formation light brightness is implemented. Covert settings are implemented. ALL sets all lights to covert, A-C sets the anti-collision light to covert, FORM sets the formation and Wing-Tail lights to covert. The Aerial Refueling light will activate when the knob is turned up and the refueling door is open. Gunsight Changes (-34, 2.4.5) https://www.youtube.com/watch?v=6-Ma3l9onjw Drogue refuelling https://www.youtube.com/watch?v=mjlUeAStyzw JTAC Too long to cover here, see BMS-Training.pdf Mission 27. -
Falcon BMS Keybindings for New Players
Jeffu commented on Jeffu's blog entry in How 2 git gud at Falcon BMS
Thanks for letting me know, I've rewritten that section and updated the links. UOAF has moved to Discord, but their Wiki is still around.- 3 comments
-
- 1
-

-
- falcon bms
- noobs
- (and 1 more)
-
I write this so we have something to point new people to. This will be a quick how-to regarding keybindings for players new to BMS and unsure of what controls need to be bound. Also explained will be a vital control mechanic in BMS known as the Pinky Shift button, and how this will help you when you don't have $500 to blow on a new stick. Anybody used to a universal "do this" buttons as found in any normal video game needs to know that every in-game control mimics a control in the real F-16, and many of them serve multiple purposes. Attached in image format is a list of buttons on the real F-16 HOTAS, their functions and their in-game callbacks. For those who don't yet know what the above is and what it means for you, below is a basic rundown of callbacks, how important they are and what they do. As I rarely use the keyboard, I can't say what the keyboard binding for any of these would be. For those with not enough buttons it's perfectly fine to put things wherever you want them, as long as they're easy to remember and (preferably) make sense logically: Vital keys: SimTriggerSecondDetent = Gun SimPickle = Weapon Release SimTMSUp = Target Select / "Do" button SimTMSDown = Target Deselect / "Undo" Button SimDMSDown = Switch SOI (Switch MFD) SimMissileStep = Change weapon / pylon / bombing mode SimRadarElevationUp = Raise Radar Altitude SimRadarElevationDown = Lower Radar Altitude SimDropProgrammed/SimCMSUp = Drop countermeasure prgms. 1-4 SimToggleMissileCage = Cage / Uncage Sidewinder seeker, remove maverick cover SimHotasPinkyShift = Zoom / change FOV when press, acts as shift button when held SimCMSRight = ECM Standby SimCMSDown = ECM Consent SimSelectSRMOverride = Dogfight override mastermode SimDeselectOverride = Cancel override Hat Switch: SimCursorUp = Radar cursor SimCursorDown SimcursorLeft SimCursorRight (Recommendation) Shifted Hat Switch: SimTransmitCom2 = Transmit VHF Radio SimTransmitCom1 = Transmit UHF Radio SimCommsSwitchLeft = A-A Datalink Transmit (not as important for beginner) SimCommsSwitchRight = A-G Datalink Transmit (not important for beginner) Brakes: SimWheelBrakes = Wheelbrakes (K by default) AFBrakesToggle = Toggle airbrakes Or: AFBrakesIn = Airbrakes retract AFBrakesOut = Airbrakes extend Useful, not vital: SimDMSLeft = Cycle left MFD pages SimDMSRight = Cycle right MFD pages SimSelectMRMOverride = Missile override mastermode, for quick A-A use SimSpotLight = Cockpit spotlight, comes on with battery power, recommend bind to keyboard Things I've never used: SimDMSUp = Change SOI to HUD For users with no head tracking I highly recommend never using the hat switch for viewing and learning to use the mouse effectively instead, as it frees up the hat switch for vital functions. By default, one can look around by holding down the right mouse button, and can drag the head around using the middle mouse button. The pinky shift mechanic in BMS allows the pinky button on the F-16 HOTAS to function similar to the shift button on your keyboard, or the function button on some laptops. Just as the keyboard shift button allows other buttons to have multiple uses, the pinky shift mechanic allows you to effectively have two callbacks assigned to one joystick button and allows you to access the second callback by holding down SimHotasPinkyShift and pressing the desired button. SimHotasPinkyShift must be assigned twice to the desired shift button, as the act of pressing the shift button will shift the shift button too, and the game will not recognize the release of the button unless the callback is present in both the normal and shifted states. The only issue is that this mechanic is not accessible through the in-game setup screen (the in-game editor has other issues as well, one being that it does not actually show the correct callback names). To make use of it, one has to resort to using spreadsheets included with the game, third party editors (linked below), or modifying the keyfile by hand. The best way of binding your controls is currently the Alternative Launcher, which takes the place of the stock BMS launcher and has more functionality. https://github.com/chihirobelmo/FalconBMS-Alternative-Launcher/releases Other References: https://codex.uoaf.net/index.php/Controllers Quick HOTAS Setup.key See Also:
- 3 comments
-
- 6
-

-
- falcon bms
- noobs
- (and 1 more)
-
Important Changes and New Features in BMS 4.35 (Part 1)
Jeffu posted a blog entry in How 2 git gud at Falcon BMS
The release of 4.35 brings updates to realism to the aircraft, weather and A-G combat. In this post I'll cover the basic things necessary to get people flying in the new release. All images are from BMS manuals. Part 1: Procedural changes Canopy update (-1, 1.2.1.16): Canopy switch and yellow spider are now separate. The canopy switch is no longer a toggle, the canopy is now raised with a left click and lowered with a right click. Clicking on the yellow spider inflates the seal around the canopy to allow for cockpit pressurization, and also acts as a safeguard for the canopy switch. Please note the switch is not visible after a left click. JFS 1&2 (-1, 1.2.1.13): Both Jet Fuel Starter switch positions are now modeled. The JFS works by venting one or both hydraulic accumulators to a hydraulic start motor. The START1 setting is less powerful as it uses only one hydraulic accumulator at a time, and has a 50/50 chance of starting the engine successfully. Using only one accumulator at a time means that you get a second chance at starting the engine. The START2 setting uses both hydraulic accumulators and has a higher chance of starting the engine, but this means you only have one chance at engine startup before you need to ask ground crew to recharge the JFS. A solid green JFS run light after ~15 seconds indicates a good JFS start. No green light after engaging the JFS means it has failed to reach operating speed. A slow JFS light flash (1/sec) indicates JFS overheating, and a fast flashing light indicates JFS failure. Anti-Ice (-1, 1.2.5.10, 1.6.4): Engine icing is now implemented. The ANTI-ICE panel has a three-position switch to control engine anti-ice (OFF-AUTO-ON). Anti-ice is turned on manually during engine start to verify operation, and set to Auto for flight. Use of engine anti-ice will lead to higher engine temperatures (FTIT) and lower engine performance. Brakes & Hydraulics (-1, 1.2.2.6, 1.13): DN LOCK REL button is now implemented. This button is a bypass for the safety mechanism (a solenoid) that prevents raising the landing gear while on the ground. In the event that the safety mechanism fails it may prevent lowering of the landing gear in-flight. BRAKES channel switch is now implemented. Both Channels 1 and 2 are redundant, but only Channel 2 has an alternate power source. The PARKING BRAKE switch ANTI-SKID option is now implemented. The middle position is anti-skid on, the down position turns off all anti-skid functions for brake channel 2 and turns off only touchdown anti-skid for channel 1. Anti-skid is only available once exceeding 12 kts ground speed and will stay available until under 5 kts. Maximum braking at slow speed will not trigger anti-skid and may blow a tire. Arrestor cables now implemented. BMS 4.35 implements working arrestor cable systems at non-generic airbases. -
Gaming on Linux has largely turned to virtual machines. It is possible to hand a GPU over to a virtual machine to allow it to play games and use hardware acceleration for programs at native performance.
-
I used both VirtualBox and VMWare when I still used Windows. VMWare came across as a more polished product, but either will work fine for what you need it to do.
-
VG Air Force - Group Discussion
Jeffu replied to =VG= SemlerPDX's topic in VG Air Force's Officers Club
I don't see a problem with it if they become active in the community and are showing progress in learning the game. The only basic game requirements that I can think of would be to know how to map and test your controls, and to be able to get into 3D. -
Here's my proficiency rating proposal, complete with appropriate manual references for future training purposes. It might be interesting to have an accompanying document reader that could interact with the list. The levels can be renamed or reworked. Please chime in if you see something missing or think something is in the wrong place. A-A Bronze Basic knowledge of FCR: Range-while-scan, Targeting, Antenna elevation (-34, 1.4.4) Basic employment of AIM-120 and AIM-9 with radar targeting (-34, 2.1) Basic missile defense, use of countermeasures (Chaff, Flares) (-34, 1.7) Engagement: RWR, Fight or Flight, Target sorting (-34, 1.4.4.1, 1.6.1.4 to 1.67) Aircraft Identification using TGP (-34, 1.10.7.5.1) Silver Intermediate FCR, sorting and assigning datalink contacts (-34, 1.5.5) IFF Basics (-1, 1.16, 1.16.4.2) Engagement: Threat Assessment Missile launch cues (-34, 2.1.3) Intermediate missile defense, ECM (-1 1.2.1.8), (-34 1.7 ) Dogfight master mode, helmet radar sighting (-34, 1.11) Gold Advanced FCR, all modes (-34, 1.4.4.1.3) Engagement: Knowledge of common weapons and flight profiles of threat aircraft Group BVR tactics Basic Dogfight Proficiency Full A-A Datalink Proficiency (-34 1.5) A-G Bronze A-G FCR (-34, 1.4.5) TGP Basics (-34, 1.10) CCRP and CCIP(-1 1.4.5.2) Dumb bombs Cluster munition settings (-1 1.4.5.2) GPS/JDAMs/SDBs (-34, 3.4) Basic HARM, HAD, HTS pod (-34, 3.3) Silver Marking target areas with Steerpoint Lines and Pre-Planned Threat points (in map) TGP Lasing (-1, 1.2.3.1) (-34 1.10.4) Laser guided bombs (-34, 1.10) Adv HARM, WPN Page (-34, 3.3) Basic Mavs, without handoff (-34, 3.2) AG Datalink cursor (-34, 1.5.6) Gold Advanced TGP features: LST, Buddy Lasing, Frag Circle (-34, 1.10.7.4, ) Mavs w/ handoff (-34, 1.10.8, 3.2.8, 3.2.9) Advanced bomb delivery: Popup, Toss Markpoints (-1, 1.3.10) AG Datalink Steerpoints (-34, 1.5.6) Low level delivery of retarded weapons (Mk82 Air, Mk82 SE, Mk84 Air, BLU) F-16 Bronze Working IVC (Technical Manual 18.1, 9.1) Maintain contact with flight lead after takeoff Singleplayer basics: Training TE01 (Training Manual Mission 01) (BMS Comms-Nav Part 1) Ramp Start (-1, 2.1) Communicating with tower using radio presets, (Technical Manual, 9.1), (-1, 1.3.13, 1.3.14) Taxi (-1, 1.13) Takeoff, Departure Steerpoint Navigation (-1, 1.3.4, 1.4.3, 1.5) Contacting approach, Landing (-1, 1.5.3, 1.13, 2.3) Silver Basic airmanship: Level turns, speed control, loose formation, formation knowledge All the Controls (-34 1.1.1.4) Recovering from a hot start (-1, 3.5) Learning the instruments (-1, 1.2.3.2 to 1.2.3.22) Visualizing the Bullseye ILS Basics (-1, 1.3.5) Advanced Radio Management & Controls, entering manual frequencies, verifying and changing presets in-flight (BMS Comms-Nav Part 2) (-1, 1.3.13, 1.3.14) DED (-1, 1.3) Using Master Modes (-34 1.1.2), (-1 1.4.18) MFD Controls, Pages (-1 1.4) Datalink basics: modes, sending information (-34 1.5.5.1, 1.5.7) Gold Advanced airmanship: Tight formation, flying as #1, leading a flight Deep Stall Recovery (-1, 4.4) Flying on instruments, inclement weather approach and landing, HSI proficiency (-1 1.2.3.14-15) (-34 1.3) (BMS Comms-Nav Part 3 & 4) Aerial Refueling Advanced recovery: formation landing and overhead break (BMS-Comms-Nav 1.4.1, 1.4.3)
- 10 replies
-
- 5
-

-
-
- vg air force
- vgaf
- (and 4 more)
-
I think a proficiency rating system for different combat roles and aircraft would be good. Something like a bronze, silver and gold for A-A, A-G and for various aircraft would help people track their progression in the game as well as help instructors with what topics to cover.
- 10 replies
-
- 2
-
-
- vg air force
- vgaf
- (and 4 more)
-
Server restarted, still day 5. I'll let Semler make his campaign changes and reset it to day 1 whenever he has time.
- 1 reply
-
- 2
-
-
Restarted, currently on day 6.
-
New version came out in April: https://www.benchmarksims.org/forum/showthread.php?35505-Falcon-BMS-4-34-Full-Installer
-
What exactly do you guys need from a guide? I made a stripped down ramp start video in 4.33 a few years ago but never made it public. It covers the basics of starting the jet and powering up the systems as well as radio basics. It needs revision, doing the throttle movement part in 4.34 will lead to engine failure on startup. In 4.34 it needs to be kept stationary until the throttle detent is clicked.
-
Hello, I've been flying in the FO event as well. I'll have to try and hop on with you guys.
-
Click the Comm Plan button and read the briefing. Ground control is UHF 2, Tower is UHF 3, Approach/Departure is UHF 4, AWACS is UHF 6, AI flight members are on VHF 15.
-
I think all controls from 4.33 are still present. The main issue is that there are older legacy callbacks pre-4.33 that have been removed in 4.34 and this could cause issues with the game.
-
You can transfer the keyfile, but you will need to set almost everything else up from scratch.
-
Important Changes and New Features in BMS 4.34
Jeffu posted a blog entry in How 2 git gud at Falcon BMS
Airbases, Datalink changes, IFF and more. Airbase operations An expected update, airbases now have dedicated ground, tower, and arrival/departure frequencies and menus. Airbases now handle traffic differently, both on the ground and in the air. Airbase ground control will issue better taxi instructions, and will hand you off to the tower frequency when you reach the runway. This is all handled automatically through the briefing process, using the data cartridge to assign each frequency to a predetermined preset, which you can view in the briefing window in brackets. From the manual: "#2, #3, #4 for communicating with the home airbase as you fly out #5, #6 for communicating in flight on the tactical net with AWACS for instance (with #13 if doing an AAR) #4, #3, #2 for communicating with the home airbase ATC upon your return." In addition to the chocks holding the aircraft in place, there is also an EPU ground safety pin that must be pulled before takeoff in the ground control menu. Once you take off, you will be handed off to the departure frequency where you inform them of your flights airborne status and receive departure instructions. Engine temperatures The engine starting procedure can now fail due to pilot error. Moving the throttle out off the cutoff position before the engine reaches 25% RPM will cause a hot start condition with engine temperatures exceeding ~700C, requiring the engine to be shut off and allowed to cool. To cool off the engine, you can return the throttle below idle cutoff and leave the JFS running. There is also a chance that this may happen randomly, so you need to keep an eye on engine temperatures during startup. The JFS can run for 4 minutes before overheating and 8 minutes before failing. It can now be recharged by the ground crew. Engine Oil Engine oil pressure can fail to rise high enough to run the engine. If the HYD/OIL stays illuminated and the oil pressure stays below 15 psi then the engine must be shut down and allowed to cool before attempting to restart. IFF has now been added IFF is meant to determine friendly or bogey status, and has two separate parts: an interrogator that asks for IFF codes from airborne contacts, and a transponder that responds to requests from other aircraft. TL;DR Leave the knob on Norm when in flight. IFF requests are made using TMS Left when the FCR is selected. You can change mode requests on the left side of the FCR near the bottom. Options are M1, M2, M3, M4 and M+ (which requests all 4). The most useful modes will be M1 and M4. Correct responses will be green circles, incorrect responses will be yellow squares. Incorrect responses do not mean that a contact is an enemy. IFF codes will change over time. Your transponder will take care of this on its own, but to make sure you interrogate for the latest codes make sure you go to the INTG page in the DED (LIST -> RCL) and hit 9 so that the DCPL in the bottom right changes to ALL. This will couple the interrogator to your transponder. Manual time for nerds: M1 is assigned to a team. All the allies share the same code, which is changed every hour as stated in the TIME events. M2 is specific to each aircraft. All aircraft have a different M2 code, which does not change. M3 is specific to each aircraft as well but (unlike M2) rotates every hour. M4 is always assigned per team and the encryption key rotates every 24 hours. If a contact responds to interrogation correctly then a green circle with the requested mode will appear in the contacts location on the FCR and HSD. The contact does not have to be visible on radar to respond. Note that some modes listed above are per team, and others are per aircraft. A contact that you interrogate will not respond correctly to M2 or M3 requests unless you tell your interrogator to look for the response from that specific aircraft. This means that a friendly aircraft might respond to M1 and M4 requests correctly, but not M2 or M3. IFF codes change over time, you can see the full details in your briefing screen, but long story short is you don't have to worry about it: Luckily you do not have to manually input all these settings in the jet; your DTC is pre-programmed with all the briefed settings. Therefore if you do not change any IFF settings manually, the time and position criteria will be defined as per the brief and the IFF settings will change accordingly. All you have to do is turn the IFF MASTER knob to STBY at ramp and turn it to NORM upon taking off. Datalink changes mean scrubs need to git gud The -34 includes the following line in section 1.5.2: Note: IDM operates over VHF or UHF radio, so you cannot transmit on VHF or UHF and send/receive data link transmissions over the same radio at the same time. This means that you cannot rely on the continuous datalink mode available on the FCR page to do everything for you if you want to use the radio, and you will have to request datalink info manually with Comms Left. The manual says: Once powered up, LIST → ENTR will select the A-G DL page. There are now 4 selectable options on this page: COMM (UHF/VHF): this option toggles which radio A-G datalink messages will be transmitted over. Note: everyone must be on the same frequency, whichever radio is used. By default VHF is used for A-G datalink, with UHF used for A-A (INTRAFLIGHT) datalink messages. This can be toggled by moving the * * asterisks around VHF/UHF using the DCS switch and pressing a number key 1-9 on the ICP. Note: while humans can use any radio/frequency, AI are always on UHF TACTICAL (UHF PRESET 6 by default). More to come. -
Some mods or changes to the game will affect the files that contain data for aircraft, most servers will not allow modified files to help prevent cheating. Do you have any mods installed? Have you made any changes using the Avionics configurator?
-
Updated for 4.34 Text about purpose of blog post One aspect of getting involved in Falcon that can't be learned or prepared for in single player is the configuration and use of voice comms. Here I attempt to describe basic and advanced configuration and use of IVC. Setting up the IVC Client Basic Setup Input and Output In the "Sound Devices" section at bottom of IVC Client program, select your microphone in "Capture" list and speakers/headphones in "Playback" list. This is usually the only required setup step, and if you have the correct things set as the default devices to use then even this should take care of itself. Advanced Setup, in \Bin\x64\IVC\IVC Client.ini Inserted at the bottom of this section is my own configuration file Sidetone and sidetone accesories We can add a Sidetone that will let us hear our own voice when we transmit. We use the "tone = " option in the .ini, and set it to "loop:#", where # is a number. To find this number, right-click on the volume icon and select playback devices. Click on your playback device of choice (here it is "Speakers"), and in the "levels" tab find your microphone. Each entry has a number starting from 0 at the top, and in this instance our microphone would be 1. Following the above, we would set our loopback in the .ini file using "tone = loop:1". We can also use "toneVol" option to raise or lower the sidetone volume. Usable values as defined in the manual are +6 to -6. I use "toneVol = +6". Loudness Setting "loudness = 1" adds compression to incoming audio, making it easier to hear other players. Outsiders Using "outsiders = all" is the best option for listening to players who are in 2D while we are flying. Other options are detailed in BMS-Manual.pdf on pages 257-258. Using IVC in the map screen Connecting When connecting to the server, enter the IP address of the IVC server as well. Once clicking connect, the game should take control of the IVC Client window and connect to the IVC server automatically. For most users it's not necessary to touch the IVC Client window beyond the initial setup steps. F1 and F2 Once in-game and connected to the server in 2D, the F1 and F2 keys let us communicate by voice to others who are either in 2D with us, or in the cockpit and have their UHF radios tuned to preset 14. F1 will communicate with anybody in-flight who is on the UHF 14 preset, F2 is for people hanging out at the map screen only. Make sure you use the right one, if you have a conversation in 2D using F1 then people in-flight will be able to hear you. Using IVC in flight Coordinating with other players None of this is useful unless everybody knows how stay in contact with everybody else. Members of each flight need to know what VHF channel to use to talk to one another, and multiple flights should know which UHF channel to use to coordinate with one another. Using preset channels We normally use preset channels for radio comms. By default the F16 has a frequency assigned to each preset, we don't normally change any presets after the 4.34 update. To change preset using the ICP, press COM1 for UHF or COM2 for VHF and type in a preset, 1 to 20, and press ENTR. For most uses UHF is set to 6 normally, or 14 to talk to people in 2D. Using frequencies We use sometimes use frequencies when having radio problems, sometimes there are issues with somebody's presets and they have a preset assigned to a different frequency. To change frequency, press COM1 for UHF or COM2 for VHF and type in a frequency, without the decimal point. For example, to dial in the Kunsan tower frequency (292.3) we would type in 2923 and press ENTR. Talking Once we're in the cockpit, we use the Comm switch to broadcast on UHF or VHF. When we do, either UHF or VHF will be highlighted in the DED depending on which one we're using. See the first "Keybindings for new players" post for more details on the Comm switch. Comms volume Comm1 volume is for UHF, used mainly for inter-flight comms and for AWACS. Comm2 is VHF and is used for communicating with your flight. The tiny volume knob on the backup UHF panel balances the volume between AI radio comms and player voice comms. Guard frequency UHF guard frequency is 243.0 MHz, all UHF receivers also listen to guard frequency by default, making it useful if we need to transmit to as many people as possible. VHF has a guard frequency as well but people must choose to listen to it. We can transmit on Guard by switching either COMM mode knob to "GD". Backup Radio 87th Tripp made a good video on the backup radio.
-
No, the AI exist just to make things explode when they feel like it.
-
Hello, I don't think mouse control is possible because it's used to look around and click cockpit buttons. Keyboard flight controls can be set in-game, in section 6.03. Double click on the binding you want to change and press whatever key you want.

-
The F-16 drains centerline tank first by default. Know and love the Fuel QTY SEL panel, the switch toggles external tank behaviour, rotating the knob will display the amount of fuel remaining in whatever you select using the needles on the fuel indicator.
-
I use the HOTAS X, basically the same stick, with mouselook and a separate program called joy2key to map the lever on the back of the throttle to the airbrake. Keyfile is attached (BMS - Basicnew.key). In this image (template from a forum somewhere), the first command for each button is in the normal state, the second command is used by holding the pinky switch on the back of the throttle. I also overrode some of the default keys (numpad is ICP, Enter and . work to enter and delete data, + and - for data up and down, spacebar activates the maintenance light when battery is on) The only thing I don't have on here are toe brakes and landing gear (I use racing wheel pedals for differential braking, and I've had one too many incidents accidentally lowering gear at speed), but this should keep him on the stick 99% of the time and not having to reach for the keyboard. BMS - Basicnew.key