-
Recent Forum Topics
-
- 2 replies
- 65 views
-
- 8 replies
- 484 views
-
- 1 reply
- 306 views
-
- 21 replies
- 895 views
-
- 9 replies
- 906 views
-
- 2 replies
- 341 views
-
- 43 replies
- 2,734 views
-
- 16 replies
- 1,526 views
-
- 2 replies
- 471 views
-
- 31 replies
- 2,323 views
-
- 9 replies
- 4,403 views
-
- 29 replies
- 4,950 views
-
- 0 replies
- 585 views
-
- 2 replies
- 540 views
-
- 23 replies
- 2,017 views
-
-
Recently Closed Topics
-
- 4 replies
- 381 views
-
- 1 reply
- 311 views
-
- 1 reply
- 600 views
-
-
Featured Blogs
-

- 10
entries - 62
comments - 14427
views
Recent Entries
 Latest Entry
Arma 3 server possibilities?
Sup everyone,
So I've noticed our Arma servers don't get much use. I think the stuff we host just isn't interesting enough for people to want to play. i've been trying to figure out the best way for us to transform these servers into something people use, so I've checked out a few other popular servers and noticed a few things.
There is a server running annex/invade but they have it set up so good that the people that play there are basically like the folks that play PR here. That server lets players know once they're in the game what to do by going to these different stations, which finally places you into a squad where you wait to be picked up. They have static pilots, everyone is geared properly, missions are executed with precision, I love it! You get shuttled into the fight join up with your squad and do the mission. After mission everyone extracts to the same bird, returns to base, debrief, etc... And then get ready to go again. it'really freaking cool! But it can be a little slow at times waiting on people to get ready.
I'd love to get our own VG custom A3 server that is all our own development, gfx, in-game stuff, etc.. However, I do not know anything about making custom A3 maps, but I'd be willing to do whatever I could to help make it happen and contribute where I can. I'm fairly savvy, if someone taught me "imma fast learner".
Is there anyone else that has thought about this other than me? Do we have anyone at VG with the skills and knowledge enough to make something like this happen?
If you want to get together and think this through let's do it! Post up your thoughts and ideas, experience, etc.. let's see if we can do this for at least one of the servers.
Think about it!
Blud
- 10
-

- 8
entries - 57
comments - 16560
views
Recent Entries
 Latest Entry
StrategicAreas Template 2K Maps
rem *** Create strategic areas ***
aiStrategicArea.create 1 -1014/-1014 -934/-934 35 50
aiStrategicArea.layer 1

aiStrategicArea.create 10 514/-1014 594/-934 35 50
aiStrategicArea.layer 1

aiStrategicArea.create 100 -506/346 -426/426 35 50
aiStrategicArea.layer 1

aiStrategicArea.create 101 -336/346 -256/426 35 50
aiStrategicArea.layer 1

aiStrategicArea.create 102 -166/346 -86/426 35 50
aiStrategicArea.layer 1

aiStrategicArea.create 103 4/346 84/426 35 50
aiStrategicArea.layer 1

aiStrategicArea.create 104 174/346 254/426 35 50
aiStrategicArea.layer 1

aiStrategicArea.create 105 344/346 424/426 35 50
aiStrategicArea.layer 1

aiStrategicArea.create 106 514/346 594/426 35 50
aiStrategicArea.layer 1

aiStrategicArea.create 107 684/346 764/426 35 50
aiStrategicArea.layer 1

aiStrategicArea.create 108 854/346 934/426 35 50
aiStrategicArea.layer 1

aiStrategicArea.create 109 -1014/516 -934/596 35 50
aiStrategicArea.layer 1

aiStrategicArea.create 11 684/-1014 764/-934 35 50
aiStrategicArea.layer 1

aiStrategicArea.create 110 -844/516 -764/596 35 50
aiStrategicArea.layer 1

aiStrategicArea.create 111 -674/516 -594/596 35 50
aiStrategicArea.layer 1

aiStrategicArea.create 112 -504/516 -424/596 35 50
aiStrategicArea.layer 1

aiStrategicArea.create 113 -334/516 -254/596 35 50
aiStrategicArea.layer 1

aiStrategicArea.create 114 -166/516 -86/596 35 50
aiStrategicArea.layer 1

aiStrategicArea.create 115 4/516 84/596 35 50
aiStrategicArea.layer 1

aiStrategicArea.create 116 174/516 254/596 35 50
aiStrategicArea.layer 1

aiStrategicArea.create 117 344/516 424/596 35 50
aiStrategicArea.layer 1

aiStrategicArea.create 118 514/516 594/596 35 50
aiStrategicArea.layer 1

aiStrategicArea.create 119 684/516 764/596 35 50
aiStrategicArea.layer 1

aiStrategicArea.create 12 854/-1014 934/-934 35 50
aiStrategicArea.layer 1

aiStrategicArea.create 120 854/516 934/596 35 50
aiStrategicArea.layer 1

aiStrategicArea.create 121 -1014/686 -934/766 35 50
aiStrategicArea.layer 1

aiStrategicArea.create 122 -844/686 -764/766 35 50
aiStrategicArea.layer 1

aiStrategicArea.create 123 -674/686 -594/766 35 50
aiStrategicArea.layer 1

aiStrategicArea.create 124 -504/686 -424/766 35 50
aiStrategicArea.layer 1

aiStrategicArea.create 125 -336/686 -256/766 35 50
aiStrategicArea.layer 1

aiStrategicArea.create 126 -166/686 -86/766 35 50
aiStrategicArea.layer 1

aiStrategicArea.create 127 4/686 84/766 35 50
aiStrategicArea.layer 1

aiStrategicArea.create 128 174/686 254/766 35 50
aiStrategicArea.layer 1

aiStrategicArea.create 129 344/686 424/766 35 50
aiStrategicArea.layer 1

aiStrategicArea.create 13 -1014/-844 -934/-764 35 50
aiStrategicArea.layer 1

aiStrategicArea.create 130 514/686 594/766 35 50
aiStrategicArea.layer 1

aiStrategicArea.create 131 684/686 764/766 35 50
aiStrategicArea.layer 1

aiStrategicArea.create 132 854/686 934/766 35 50
aiStrategicArea.layer 1

aiStrategicArea.create 133 -1014/856 -934/936 35 50
aiStrategicArea.layer 1

aiStrategicArea.create 134 -844/856 -764/936 35 50
aiStrategicArea.layer 1

aiStrategicArea.create 135 -674/856 -594/936 35 50
aiStrategicArea.layer 1

aiStrategicArea.create 136 -504/856 -424/936 35 50
aiStrategicArea.layer 1

aiStrategicArea.create 137 -334/856 -254/936 35 50
aiStrategicArea.layer 1

aiStrategicArea.create 138 -166/856 -86/936 35 50
aiStrategicArea.layer 1

aiStrategicArea.create 139 4/856 84/936 35 50
aiStrategicArea.layer 1

aiStrategicArea.create 14 -844/-844 -764/-764 35 50
aiStrategicArea.layer 1

aiStrategicArea.create 140 174/856 254/936 35 50
aiStrategicArea.layer 1

aiStrategicArea.create 141 344.01/856 424.01/936 35 50
aiStrategicArea.layer 1

aiStrategicArea.create 142 514/856 594/936 35 50
aiStrategicArea.layer 1

aiStrategicArea.create 143 684/856 764/936 35 50
aiStrategicArea.layer 1

aiStrategicArea.create 144 854/856 934/936 35 50
aiStrategicArea.layer 1

aiStrategicArea.create 15 -674/-844 -594/-764 35 50
aiStrategicArea.layer 1

aiStrategicArea.create 16 -504/-844 -424/-764 35 50
aiStrategicArea.layer 1

aiStrategicArea.create 17 -334/-844 -254/-764 35 50
aiStrategicArea.layer 1

aiStrategicArea.create 18 -166/-844 -86/-764 35 50
aiStrategicArea.layer 1

aiStrategicArea.create 19 4/-844 84/-764 35 50
aiStrategicArea.layer 1

aiStrategicArea.create 2 -844/-1014 -764/-934 35 50
aiStrategicArea.layer 1

aiStrategicArea.create 20 174/-844 254/-764 35 50
aiStrategicArea.layer 1

aiStrategicArea.create 21 344/-844 424/-764 35 50
aiStrategicArea.layer 1

aiStrategicArea.create 22 514/-844 594/-764 35 50
aiStrategicArea.layer 1

aiStrategicArea.create 23 684/-844 764/-764 35 50
aiStrategicArea.layer 1

aiStrategicArea.create 24 854/-844 934/-764 35 50
aiStrategicArea.layer 1

aiStrategicArea.create 25 -1014/-674 -934/-594 35 50
aiStrategicArea.layer 1

aiStrategicArea.create 26 -844/-674 -764/-594 35 50
aiStrategicArea.layer 1

aiStrategicArea.create 27 -674/-674 -594/-594 35 50
aiStrategicArea.layer 1

aiStrategicArea.create 28 -504/-674 -424/-594 35 50
aiStrategicArea.layer 1

aiStrategicArea.create 29 -336/-674 -256/-594 35 50
aiStrategicArea.layer 1

aiStrategicArea.create 3 -674/-1014 -594/-934 35 50
aiStrategicArea.layer 1

aiStrategicArea.create 30 -166/-674 -86/-594 35 50
aiStrategicArea.layer 1

aiStrategicArea.create 31 4/-674 84/-594 35 50
aiStrategicArea.layer 1

aiStrategicArea.create 32 174/-674 254/-594 35 50
aiStrategicArea.layer 1

aiStrategicArea.create 33 344/-674 424/-594 35 50
aiStrategicArea.layer 1

aiStrategicArea.create 34 514/-674 594/-594 35 50
aiStrategicArea.layer 1

aiStrategicArea.create 35 684/-674 764/-594 35 50
aiStrategicArea.layer 1

aiStrategicArea.create 36 854/-674 934/-594 35 50
aiStrategicArea.layer 1

aiStrategicArea.create 37 -1014/-504 -934/-424 35 50
aiStrategicArea.layer 1

aiStrategicArea.create 38 -844/-504 -764/-424 35 50
aiStrategicArea.layer 1

aiStrategicArea.create 39 -674/-504 -594/-424 35 50
aiStrategicArea.layer 1

aiStrategicArea.create 4 -504/-1014 -424/-934 35 50
aiStrategicArea.layer 1

aiStrategicArea.create 40 -506/-504 -426/-424 35 50
aiStrategicArea.layer 1

aiStrategicArea.create 41 -336/-504 -256/-424 35 50
aiStrategicArea.layer 1

aiStrategicArea.create 42 -166/-504 -86/-424 35 50
aiStrategicArea.layer 1

aiStrategicArea.create 43 4/-504 84/-424 35 50
aiStrategicArea.layer 1

aiStrategicArea.create 44 174/-504 254/-424 35 50
aiStrategicArea.layer 1

aiStrategicArea.create 45 344/-504 424/-424 35 50
aiStrategicArea.layer 1

aiStrategicArea.create 46 514/-504 594/-424 35 50
aiStrategicArea.layer 1

aiStrategicArea.create 47 684/-504 764/-424 35 50
aiStrategicArea.layer 1

aiStrategicArea.create 48 854/-504 934/-424 35 50
aiStrategicArea.layer 1

aiStrategicArea.create 49 -1014/-334 -934/-254 35 50
aiStrategicArea.layer 1

aiStrategicArea.create 5 -334/-1014 -254/-934 35 50
aiStrategicArea.layer 1

aiStrategicArea.create 50 -844/-334 -764/-254 35 50
aiStrategicArea.layer 1

aiStrategicArea.create 51 -674/-334 -594/-254 35 50
aiStrategicArea.layer 1

aiStrategicArea.create 52 -504/-334 -424/-254 35 50
aiStrategicArea.layer 1

aiStrategicArea.create 53 -336/-334 -256/-254 35 50
aiStrategicArea.layer 1

aiStrategicArea.create 54 -166/-334 -86/-254 35 50
aiStrategicArea.layer 1

aiStrategicArea.create 55 4/-334 84/-254 35 50
aiStrategicArea.layer 1

aiStrategicArea.create 56 174/-334 254/-254 35 50
aiStrategicArea.layer 1

aiStrategicArea.create 57 344/-334 424/-254 35 50
aiStrategicArea.layer 1

aiStrategicArea.create 58 514/-334 594/-254 35 50
aiStrategicArea.layer 1

aiStrategicArea.create 59 684/-334 764/-254 35 50
aiStrategicArea.layer 1

aiStrategicArea.create 6 -164/-1014 -84/-934 35 50
aiStrategicArea.layer 1

aiStrategicArea.create 60 854/-334 934/-254 35 50
aiStrategicArea.layer 1

aiStrategicArea.create 61 -1014/-164 -934/-84 35 50
aiStrategicArea.layer 1

aiStrategicArea.create 62 -844/-164 -764/-84 35 50
aiStrategicArea.layer 1

aiStrategicArea.create 63 -674/-164 -594/-84 35 50
aiStrategicArea.layer 1

aiStrategicArea.create 64 -504/-164 -424/-84 35 50
aiStrategicArea.layer 1

aiStrategicArea.create 65 -334/-164 -254/-84 35 50
aiStrategicArea.layer 1

aiStrategicArea.create 66 -166/-164 -86/-84 35 50
aiStrategicArea.layer 1

aiStrategicArea.create 67 4/-164 84/-84 35 50
aiStrategicArea.layer 1

aiStrategicArea.create 68 174/-164 254/-84 35 50
aiStrategicArea.layer 1

aiStrategicArea.create 69 344/-164 424/-84 35 50
aiStrategicArea.layer 1

aiStrategicArea.create 7 4/-1014 84/-934 35 50
aiStrategicArea.layer 1

aiStrategicArea.create 70 514/-164 594/-84 35 50
aiStrategicArea.layer 1

aiStrategicArea.create 71 684/-164 764/-84 35 50
aiStrategicArea.layer 1

aiStrategicArea.create 72 854/-164 934/-84 35 50
aiStrategicArea.layer 1

aiStrategicArea.create 73 -1014/6 -934/86 35 50
aiStrategicArea.layer 1

aiStrategicArea.create 74 -844/6 -764/86 35 50
aiStrategicArea.layer 1

aiStrategicArea.create 75 -674/6 -594/86 35 50
aiStrategicArea.layer 1

aiStrategicArea.create 76 -504/6 -424/86 35 50
aiStrategicArea.layer 1

aiStrategicArea.create 77 -336/6 -256/86 35 50
aiStrategicArea.layer 1

aiStrategicArea.create 78 -166/6 -86/86 35 50
aiStrategicArea.layer 1

aiStrategicArea.create 79 4/6 84/86 35 50
aiStrategicArea.layer 1

aiStrategicArea.create 8 174/-1014 254/-934 35 50
aiStrategicArea.layer 1

aiStrategicArea.create 80 174/6 254/86 35 50
aiStrategicArea.layer 1

aiStrategicArea.create 81 344/6 424/86 35 50
aiStrategicArea.layer 1

aiStrategicArea.create 82 514/6 594/86 35 50
aiStrategicArea.layer 1

aiStrategicArea.create 83 684/6 764/86 35 50
aiStrategicArea.layer 1

aiStrategicArea.create 84 854/6 934/86 35 50
aiStrategicArea.layer 1

aiStrategicArea.create 85 -1017/173 -934/256 35 50
aiStrategicArea.layer 1

aiStrategicArea.create 86 -844/176 -764/256 35 50
aiStrategicArea.layer 1

aiStrategicArea.create 87 -674/176 -594/256 35 50
aiStrategicArea.layer 1

aiStrategicArea.create 88 -506/176 -426/256 35 50
aiStrategicArea.layer 1

aiStrategicArea.create 89 -336/176 -256/256 35 50
aiStrategicArea.layer 1

aiStrategicArea.create 9 344/-1014 424/-934 35 50
aiStrategicArea.layer 1

aiStrategicArea.create 90 -166/176 -86/256 35 50
aiStrategicArea.layer 1

aiStrategicArea.create 91 4/176 84/256 35 50
aiStrategicArea.layer 1

aiStrategicArea.create 92 174/176 254/256 35 50
aiStrategicArea.layer 1

aiStrategicArea.create 93 344/176 424/256 35 50
aiStrategicArea.layer 1

aiStrategicArea.create 94 514/176 594/256 35 50
aiStrategicArea.layer 1

aiStrategicArea.create 95 684/176 764/256 35 50
aiStrategicArea.layer 1

aiStrategicArea.create 96 854/176 934/256 35 50
aiStrategicArea.layer 1

aiStrategicArea.create 97 -1014/346 -934/426 35 50
aiStrategicArea.layer 1

aiStrategicArea.create 98 -844/346 -764/426 35 50
aiStrategicArea.layer 1

aiStrategicArea.create 99 -676/346 -596/426 35 50
aiStrategicArea.layer 1

aiStrategicArea.setActive 1
AIStrategicArea.setOrderPosition Infantry -932.538/35/-935.289
AIStrategicArea.setOrderPosition Vehicle -935.184/35/-935.13
aiStrategicArea.setSide 0
aiStrategicArea.setTakeable 1 1
aiStrategicArea.setTakeable 2 1
aiStrategicArea.vehicleSearchRadius 0.4

aiStrategicArea.setActive 10
AIStrategicArea.setOrderPosition Infantry 598.447/35/-938.588
AIStrategicArea.setOrderPosition Vehicle 586.665/35/-939.03
aiStrategicArea.setSide 0
aiStrategicArea.setTakeable 1 1
aiStrategicArea.setTakeable 2 1
aiStrategicArea.vehicleSearchRadius 0.4

aiStrategicArea.setActive 100
AIStrategicArea.setOrderPosition Infantry -421.971/35/426.014
AIStrategicArea.setOrderPosition Vehicle -429.953/35/425.988
aiStrategicArea.setSide 0
aiStrategicArea.setTakeable 1 1
aiStrategicArea.setTakeable 2 1
aiStrategicArea.vehicleSearchRadius 0.4

aiStrategicArea.setActive 101
AIStrategicArea.setOrderPosition Infantry -251.969/35/425.998
AIStrategicArea.setOrderPosition Vehicle -260.032/35/425.962
aiStrategicArea.setSide 0
aiStrategicArea.setTakeable 1 1
aiStrategicArea.setTakeable 2 1
aiStrategicArea.vehicleSearchRadius 0.4

aiStrategicArea.setActive 102
AIStrategicArea.setOrderPosition Infantry -81.9137/35/426.008
AIStrategicArea.setOrderPosition Vehicle -90.0523/35/426.007
aiStrategicArea.setSide 0
aiStrategicArea.setTakeable 1 1
aiStrategicArea.setTakeable 2 1
aiStrategicArea.vehicleSearchRadius 0.4

aiStrategicArea.setActive 103
AIStrategicArea.setOrderPosition Infantry 88.027/35/425.977
AIStrategicArea.setOrderPosition Vehicle 80.0116/35/425.993
aiStrategicArea.setSide 0
aiStrategicArea.setTakeable 1 1
aiStrategicArea.setTakeable 2 1
aiStrategicArea.vehicleSearchRadius 0.4

aiStrategicArea.setActive 104
AIStrategicArea.setOrderPosition Infantry 258.009/35/426.009
AIStrategicArea.setOrderPosition Vehicle 249.966/35/425.972
aiStrategicArea.setSide 0
aiStrategicArea.setTakeable 1 1
aiStrategicArea.setTakeable 2 1
aiStrategicArea.vehicleSearchRadius 0.4

aiStrategicArea.setActive 105
AIStrategicArea.setOrderPosition Infantry 428.018/35/426.001
AIStrategicArea.setOrderPosition Vehicle 419.995/35/425.986
aiStrategicArea.setSide 0
aiStrategicArea.setTakeable 1 1
aiStrategicArea.setTakeable 2 1
aiStrategicArea.vehicleSearchRadius 0.4

aiStrategicArea.setActive 106
AIStrategicArea.setOrderPosition Infantry 598.024/35/425.968
AIStrategicArea.setOrderPosition Vehicle 589.997/35/426
aiStrategicArea.setSide 0
aiStrategicArea.setTakeable 1 1
aiStrategicArea.setTakeable 2 1
aiStrategicArea.vehicleSearchRadius 0.4

aiStrategicArea.setActive 107
AIStrategicArea.setOrderPosition Infantry 768.054/35/425.967
AIStrategicArea.setOrderPosition Vehicle 759.998/35/426.047
aiStrategicArea.setSide 0
aiStrategicArea.setTakeable 1 1
aiStrategicArea.setTakeable 2 1
aiStrategicArea.vehicleSearchRadius 0.4

aiStrategicArea.setActive 108
AIStrategicArea.setOrderPosition Infantry 938.016/35/425.973
AIStrategicArea.setOrderPosition Vehicle 930.023/35/425.996
aiStrategicArea.setSide 0
aiStrategicArea.setTakeable 1 1
aiStrategicArea.setTakeable 2 1
aiStrategicArea.vehicleSearchRadius 0.4

aiStrategicArea.setActive 109
AIStrategicArea.setOrderPosition Infantry -929.975/35/596.005
AIStrategicArea.setOrderPosition Vehicle -937.971/35/595.979
aiStrategicArea.setSide 0
aiStrategicArea.setTakeable 1 1
aiStrategicArea.setTakeable 2 1
aiStrategicArea.vehicleSearchRadius 0.4

aiStrategicArea.setActive 11
AIStrategicArea.setOrderPosition Infantry 763.641/35/-941.073
AIStrategicArea.setOrderPosition Vehicle 751.246/35/-940.867
aiStrategicArea.setSide 0
aiStrategicArea.setTakeable 1 1
aiStrategicArea.setTakeable 2 1
aiStrategicArea.vehicleSearchRadius 0.4

aiStrategicArea.setActive 110
AIStrategicArea.setOrderPosition Infantry -759.995/35/596.005
AIStrategicArea.setOrderPosition Vehicle -768.001/35/595.973
aiStrategicArea.setSide 0
aiStrategicArea.setTakeable 1 1
aiStrategicArea.setTakeable 2 1
aiStrategicArea.vehicleSearchRadius 0.4

aiStrategicArea.setActive 111
AIStrategicArea.setOrderPosition Infantry -589.999/35/595.983
AIStrategicArea.setOrderPosition Vehicle -597.979/35/595.999
aiStrategicArea.setSide 0
aiStrategicArea.setTakeable 1 1
aiStrategicArea.setTakeable 2 1
aiStrategicArea.vehicleSearchRadius 0.4

aiStrategicArea.setActive 112
AIStrategicArea.setOrderPosition Infantry -419.982/35/595.964
AIStrategicArea.setOrderPosition Vehicle -428.014/35/596.009
aiStrategicArea.setSide 0
aiStrategicArea.setTakeable 1 1
aiStrategicArea.setTakeable 2 1
aiStrategicArea.vehicleSearchRadius 0.4

aiStrategicArea.setActive 113
AIStrategicArea.setOrderPosition Infantry -249.977/35/595.99
AIStrategicArea.setOrderPosition Vehicle -257.98/35/596
aiStrategicArea.setSide 0
aiStrategicArea.setTakeable 1 1
aiStrategicArea.setTakeable 2 1
aiStrategicArea.vehicleSearchRadius 0.4

aiStrategicArea.setActive 114
AIStrategicArea.setOrderPosition Infantry -81.9769/35/595.993
AIStrategicArea.setOrderPosition Vehicle -90.0087/35/596.005
aiStrategicArea.setSide 0
aiStrategicArea.setTakeable 1 1
aiStrategicArea.setTakeable 2 1
aiStrategicArea.vehicleSearchRadius 0.4

aiStrategicArea.setActive 115
AIStrategicArea.setOrderPosition Infantry 88.0618/35/595.962
AIStrategicArea.setOrderPosition Vehicle 80.0587/35/595.966
aiStrategicArea.setSide 0
aiStrategicArea.setTakeable 1 1
aiStrategicArea.setTakeable 2 1
aiStrategicArea.vehicleSearchRadius 0.4

aiStrategicArea.setActive 116
AIStrategicArea.setOrderPosition Infantry 257.999/35/595.987
AIStrategicArea.setOrderPosition Vehicle 250.01/35/595.997
aiStrategicArea.setSide 0
aiStrategicArea.setTakeable 1 1
aiStrategicArea.setTakeable 2 1
aiStrategicArea.vehicleSearchRadius 0.4

aiStrategicArea.setActive 117
AIStrategicArea.setOrderPosition Infantry 428.03/35/595.982
AIStrategicArea.setOrderPosition Vehicle 420.009/35/595.987
aiStrategicArea.setSide 0
aiStrategicArea.setTakeable 1 1
aiStrategicArea.setTakeable 2 1
aiStrategicArea.vehicleSearchRadius 0.4

aiStrategicArea.setActive 118
AIStrategicArea.setOrderPosition Infantry -9.99951/0/-9.98877
AIStrategicArea.setOrderPosition Vehicle -9.99951/0/-9.98877
aiStrategicArea.setSide 0
aiStrategicArea.setTakeable 1 1
aiStrategicArea.setTakeable 2 1
aiStrategicArea.vehicleSearchRadius 0.4

aiStrategicArea.setActive 119
AIStrategicArea.setOrderPosition Infantry 768.029/35/595.96
AIStrategicArea.setOrderPosition Vehicle 759.979/35/596.01
aiStrategicArea.setSide 0
aiStrategicArea.setTakeable 1 1
aiStrategicArea.setTakeable 2 1
aiStrategicArea.vehicleSearchRadius 0.4

aiStrategicArea.setActive 12
AIStrategicArea.setOrderPosition Infantry 946.757/35/-935.592
AIStrategicArea.setOrderPosition Vehicle 929.235/35/-934.364
aiStrategicArea.setSide 0
aiStrategicArea.setTakeable 1 1
aiStrategicArea.setTakeable 2 1
aiStrategicArea.vehicleSearchRadius 0.4

aiStrategicArea.setActive 120
AIStrategicArea.setOrderPosition Infantry 938.085/35/595.996
AIStrategicArea.setOrderPosition Vehicle 930.036/35/595.996
aiStrategicArea.setSide 0
aiStrategicArea.setTakeable 1 1
aiStrategicArea.setTakeable 2 1
aiStrategicArea.vehicleSearchRadius 0.4

aiStrategicArea.setActive 121
AIStrategicArea.setOrderPosition Infantry -929.985/35/765.982
AIStrategicArea.setOrderPosition Vehicle -937.946/35/765.992
aiStrategicArea.setSide 0
aiStrategicArea.setTakeable 1 1
aiStrategicArea.setTakeable 2 1
aiStrategicArea.vehicleSearchRadius 0.4

aiStrategicArea.setActive 122
AIStrategicArea.setOrderPosition Infantry -759.94/35/766.022
AIStrategicArea.setOrderPosition Vehicle -767.983/35/766.012
aiStrategicArea.setSide 0
aiStrategicArea.setTakeable 1 1
aiStrategicArea.setTakeable 2 1
aiStrategicArea.vehicleSearchRadius 0.4

aiStrategicArea.setActive 123
AIStrategicArea.setOrderPosition Infantry -589.982/35/765.994
AIStrategicArea.setOrderPosition Vehicle -598.001/35/765.996
aiStrategicArea.setSide 0
aiStrategicArea.setTakeable 1 1
aiStrategicArea.setTakeable 2 1
aiStrategicArea.vehicleSearchRadius 0.4

aiStrategicArea.setActive 124
AIStrategicArea.setOrderPosition Infantry -419.992/35/765.998
AIStrategicArea.setOrderPosition Vehicle -427.994/35/766.008
aiStrategicArea.setSide 0
aiStrategicArea.setTakeable 1 1
aiStrategicArea.setTakeable 2 1
aiStrategicArea.vehicleSearchRadius 0.4

aiStrategicArea.setActive 125
AIStrategicArea.setOrderPosition Infantry -251.969/35/766.015
AIStrategicArea.setOrderPosition Vehicle -260.013/35/766.022
aiStrategicArea.setSide 0
aiStrategicArea.setTakeable 1 1
aiStrategicArea.setTakeable 2 1
aiStrategicArea.vehicleSearchRadius 0.4

aiStrategicArea.setActive 126
AIStrategicArea.setOrderPosition Infantry -81.9877/35/766.017
AIStrategicArea.setOrderPosition Vehicle -89.9995/35/766.038
aiStrategicArea.setSide 0
aiStrategicArea.setTakeable 1 1
aiStrategicArea.setTakeable 2 1
aiStrategicArea.vehicleSearchRadius 0.4

aiStrategicArea.setActive 127
AIStrategicArea.setOrderPosition Infantry 87.9988/35/766.04
AIStrategicArea.setOrderPosition Vehicle 80.0347/35/766.001
aiStrategicArea.setSide 0
aiStrategicArea.setTakeable 1 1
aiStrategicArea.setTakeable 2 1
aiStrategicArea.vehicleSearchRadius 0.4

aiStrategicArea.setActive 128
AIStrategicArea.setOrderPosition Infantry 258.02/35/766.009
AIStrategicArea.setOrderPosition Vehicle 249.999/35/765.988
aiStrategicArea.setSide 0
aiStrategicArea.setTakeable 1 1
aiStrategicArea.setTakeable 2 1
aiStrategicArea.vehicleSearchRadius 0.4

aiStrategicArea.setActive 129
AIStrategicArea.setOrderPosition Infantry 428.032/35/765.995
AIStrategicArea.setOrderPosition Vehicle 420.026/35/765.989
aiStrategicArea.setSide 0
aiStrategicArea.setTakeable 1 1
aiStrategicArea.setTakeable 2 1
aiStrategicArea.vehicleSearchRadius 0.4

aiStrategicArea.setActive 13
AIStrategicArea.setOrderPosition Infantry -928.494/35/-765.997
AIStrategicArea.setOrderPosition Vehicle -937.866/35/-765.573
aiStrategicArea.setSide 0
aiStrategicArea.setTakeable 1 1
aiStrategicArea.setTakeable 2 1
aiStrategicArea.vehicleSearchRadius 0.4

aiStrategicArea.setActive 130
AIStrategicArea.setOrderPosition Infantry 598.072/35/765.964
AIStrategicArea.setOrderPosition Vehicle 590.044/35/765.952
aiStrategicArea.setSide 0
aiStrategicArea.setTakeable 1 1
aiStrategicArea.setTakeable 2 1
aiStrategicArea.vehicleSearchRadius 0.4

aiStrategicArea.setActive 131
AIStrategicArea.setOrderPosition Infantry 768.024/35/765.951
AIStrategicArea.setOrderPosition Vehicle 760.036/35/765.95
aiStrategicArea.setSide 0
aiStrategicArea.setTakeable 1 1
aiStrategicArea.setTakeable 2 1
aiStrategicArea.vehicleSearchRadius 0.4

aiStrategicArea.setActive 132
AIStrategicArea.setOrderPosition Infantry 938.022/35/765.978
AIStrategicArea.setOrderPosition Vehicle 930.012/35/766.019
aiStrategicArea.setSide 0
aiStrategicArea.setTakeable 1 1
aiStrategicArea.setTakeable 2 1
aiStrategicArea.vehicleSearchRadius 0.4

aiStrategicArea.setActive 133
AIStrategicArea.setOrderPosition Infantry -929.98/35/936.009
AIStrategicArea.setOrderPosition Vehicle -937.964/35/935.974
aiStrategicArea.setSide 0
aiStrategicArea.setTakeable 1 1
aiStrategicArea.setTakeable 2 1
aiStrategicArea.vehicleSearchRadius 0.4

aiStrategicArea.setActive 134
AIStrategicArea.setOrderPosition Infantry -759.995/35/935.997
AIStrategicArea.setOrderPosition Vehicle -767.98/35/935.998
aiStrategicArea.setSide 0
aiStrategicArea.setTakeable 1 1
aiStrategicArea.setTakeable 2 1
aiStrategicArea.vehicleSearchRadius 0.4

aiStrategicArea.setActive 135
AIStrategicArea.setOrderPosition Infantry -589.98/35/935.994
AIStrategicArea.setOrderPosition Vehicle -598.014/35/936.007
aiStrategicArea.setSide 0
aiStrategicArea.setTakeable 1 1
aiStrategicArea.setTakeable 2 1
aiStrategicArea.vehicleSearchRadius 0.4

aiStrategicArea.setActive 136
AIStrategicArea.setOrderPosition Infantry -419.959/35/936.025
AIStrategicArea.setOrderPosition Vehicle -428.043/35/935.965
aiStrategicArea.setSide 0
aiStrategicArea.setTakeable 1 1
aiStrategicArea.setTakeable 2 1
aiStrategicArea.vehicleSearchRadius 0.4

aiStrategicArea.setActive 137
AIStrategicArea.setOrderPosition Infantry -250.014/35/936.007
AIStrategicArea.setOrderPosition Vehicle -258.013/35/935.99
aiStrategicArea.setSide 0
aiStrategicArea.setTakeable 1 1
aiStrategicArea.setTakeable 2 1
aiStrategicArea.vehicleSearchRadius 0.4

aiStrategicArea.setActive 138
AIStrategicArea.setOrderPosition Infantry -81.9958/35/936.014
AIStrategicArea.setOrderPosition Vehicle -89.9825/35/935.99
aiStrategicArea.setSide 0
aiStrategicArea.setTakeable 1 1
aiStrategicArea.setTakeable 2 1
aiStrategicArea.vehicleSearchRadius 0.4

aiStrategicArea.setActive 139
AIStrategicArea.setOrderPosition Infantry 88.0266/35/936.007
AIStrategicArea.setOrderPosition Vehicle 80.0261/35/936.008
aiStrategicArea.setSide 0
aiStrategicArea.setTakeable 1 1
aiStrategicArea.setTakeable 2 1
aiStrategicArea.vehicleSearchRadius 0.4

aiStrategicArea.setActive 14
AIStrategicArea.setOrderPosition Infantry -759.26/35/-768.01
AIStrategicArea.setOrderPosition Vehicle -769.574/35/-766.993
aiStrategicArea.setSide 0
aiStrategicArea.setTakeable 1 1
aiStrategicArea.setTakeable 2 1
aiStrategicArea.vehicleSearchRadius 0.4

aiStrategicArea.setActive 140
AIStrategicArea.setOrderPosition Infantry 258.037/35/936.064
AIStrategicArea.setOrderPosition Vehicle 250.047/35/936.035
aiStrategicArea.setSide 0
aiStrategicArea.setTakeable 1 1
aiStrategicArea.setTakeable 2 1
aiStrategicArea.vehicleSearchRadius 0.4

aiStrategicArea.setActive 141
AIStrategicArea.setOrderPosition Infantry 428.019/35/936.004
AIStrategicArea.setOrderPosition Vehicle 420.009/35/935.988
aiStrategicArea.setSide 0
aiStrategicArea.setTakeable 1 1
aiStrategicArea.setTakeable 2 1
aiStrategicArea.vehicleSearchRadius 0.4

aiStrategicArea.setActive 142
AIStrategicArea.setOrderPosition Infantry 598.034/35/936.004
AIStrategicArea.setOrderPosition Vehicle 590.038/35/936.001
aiStrategicArea.setSide 0
aiStrategicArea.setTakeable 1 1
aiStrategicArea.setTakeable 2 1
aiStrategicArea.vehicleSearchRadius 0.4

aiStrategicArea.setActive 143
AIStrategicArea.setOrderPosition Infantry 768.032/35/935.997
AIStrategicArea.setOrderPosition Vehicle 759.972/35/936.029
aiStrategicArea.setSide 0
aiStrategicArea.setTakeable 1 1
aiStrategicArea.setTakeable 2 1
aiStrategicArea.vehicleSearchRadius 0.4

aiStrategicArea.setActive 144
AIStrategicArea.setOrderPosition Infantry 938.029/35/935.995
AIStrategicArea.setOrderPosition Vehicle 930.013/35/936.015
aiStrategicArea.setSide 0
aiStrategicArea.setTakeable 1 1
aiStrategicArea.setTakeable 2 1
aiStrategicArea.vehicleSearchRadius 0.4

aiStrategicArea.setActive 15
AIStrategicArea.setOrderPosition Infantry -589.939/35/-765.651
AIStrategicArea.setOrderPosition Vehicle -597.464/35/-765.522
aiStrategicArea.setSide 0
aiStrategicArea.setTakeable 1 1
aiStrategicArea.setTakeable 2 1
aiStrategicArea.vehicleSearchRadius 0.4

aiStrategicArea.setActive 16
AIStrategicArea.setOrderPosition Infantry -417.464/35/-768.7
AIStrategicArea.setOrderPosition Vehicle -431.093/35/-768.337
aiStrategicArea.setSide 0
aiStrategicArea.setTakeable 1 1
aiStrategicArea.setTakeable 2 1
aiStrategicArea.vehicleSearchRadius 0.4

aiStrategicArea.setActive 17
AIStrategicArea.setOrderPosition Infantry -244.165/35/-769.984
AIStrategicArea.setOrderPosition Vehicle -263.354/35/-770.066
aiStrategicArea.setSide 0
aiStrategicArea.setTakeable 1 1
aiStrategicArea.setTakeable 2 1
aiStrategicArea.vehicleSearchRadius 0.4

aiStrategicArea.setActive 18
AIStrategicArea.setOrderPosition Infantry -81.8506/35/-763.984
AIStrategicArea.setOrderPosition Vehicle -89.9832/35/-764.089
aiStrategicArea.setSide 0
aiStrategicArea.setTakeable 1 1
aiStrategicArea.setTakeable 2 1
aiStrategicArea.vehicleSearchRadius 0.4

aiStrategicArea.setActive 19
AIStrategicArea.setOrderPosition Infantry 88.1926/35/-763.97
AIStrategicArea.setOrderPosition Vehicle 79.9803/35/-763.865
aiStrategicArea.setSide 0
aiStrategicArea.setTakeable 1 1
aiStrategicArea.setTakeable 2 1
aiStrategicArea.vehicleSearchRadius 0.4

aiStrategicArea.setActive 2
AIStrategicArea.setOrderPosition Infantry -761.696/35/-935.73
AIStrategicArea.setOrderPosition Vehicle -765.261/35/-934.893
aiStrategicArea.setSide 0
aiStrategicArea.setTakeable 1 1
aiStrategicArea.setTakeable 2 1
aiStrategicArea.vehicleSearchRadius 0.4

aiStrategicArea.setActive 20
AIStrategicArea.setOrderPosition Infantry 258.036/35/-764.013
AIStrategicArea.setOrderPosition Vehicle 249.998/35/-764.028
aiStrategicArea.setSide 0
aiStrategicArea.setTakeable 1 1
aiStrategicArea.setTakeable 2 1
aiStrategicArea.vehicleSearchRadius 0.4

aiStrategicArea.setActive 21
AIStrategicArea.setOrderPosition Infantry 428.064/35/-763.998
AIStrategicArea.setOrderPosition Vehicle 420.045/35/-764.088
aiStrategicArea.setSide 0
aiStrategicArea.setTakeable 1 1
aiStrategicArea.setTakeable 2 1
aiStrategicArea.vehicleSearchRadius 0.4

aiStrategicArea.setActive 22
AIStrategicArea.setOrderPosition Infantry 598.057/35/-764.045
AIStrategicArea.setOrderPosition Vehicle 590.04/35/-764.01
aiStrategicArea.setSide 0
aiStrategicArea.setTakeable 1 1
aiStrategicArea.setTakeable 2 1
aiStrategicArea.vehicleSearchRadius 0.4

aiStrategicArea.setActive 23
AIStrategicArea.setOrderPosition Infantry 768.05/35/-764.045
AIStrategicArea.setOrderPosition Vehicle 759.97/35/-764.04
aiStrategicArea.setSide 0
aiStrategicArea.setTakeable 1 1
aiStrategicArea.setTakeable 2 1
aiStrategicArea.vehicleSearchRadius 0.4

aiStrategicArea.setActive 24
AIStrategicArea.setOrderPosition Infantry 938.096/35/-763.994
AIStrategicArea.setOrderPosition Vehicle 930.187/35/-764.075
aiStrategicArea.setSide 0
aiStrategicArea.setTakeable 1 1
aiStrategicArea.setTakeable 2 1
aiStrategicArea.vehicleSearchRadius 0.4

aiStrategicArea.setActive 25
AIStrategicArea.setOrderPosition Infantry -929.958/35/-594.011
AIStrategicArea.setOrderPosition Vehicle -938.045/35/-594.016
aiStrategicArea.setSide 0
aiStrategicArea.setTakeable 1 1
aiStrategicArea.setTakeable 2 1
aiStrategicArea.vehicleSearchRadius 0.4

aiStrategicArea.setActive 26
AIStrategicArea.setOrderPosition Infantry -759.919/35/-594.044
AIStrategicArea.setOrderPosition Vehicle -767.994/35/-594.013
aiStrategicArea.setSide 0
aiStrategicArea.setTakeable 1 1
aiStrategicArea.setTakeable 2 1
aiStrategicArea.vehicleSearchRadius 0.4

aiStrategicArea.setActive 27
AIStrategicArea.setOrderPosition Infantry -589.927/35/-594.01
AIStrategicArea.setOrderPosition Vehicle -598.141/35/-594.025
aiStrategicArea.setSide 0
aiStrategicArea.setTakeable 1 1
aiStrategicArea.setTakeable 2 1
aiStrategicArea.vehicleSearchRadius 0.4

aiStrategicArea.setActive 28
AIStrategicArea.setOrderPosition Infantry -419.972/35/-594.09
AIStrategicArea.setOrderPosition Vehicle -428.005/35/-594.075
aiStrategicArea.setSide 0
aiStrategicArea.setTakeable 1 1
aiStrategicArea.setTakeable 2 1
aiStrategicArea.vehicleSearchRadius 0.4

aiStrategicArea.setActive 29
AIStrategicArea.setOrderPosition Infantry -251.966/35/-594.035
AIStrategicArea.setOrderPosition Vehicle -260.064/35/-594.091
aiStrategicArea.setSide 0
aiStrategicArea.setTakeable 1 1
aiStrategicArea.setTakeable 2 1
aiStrategicArea.vehicleSearchRadius 0.4

aiStrategicArea.setActive 3
AIStrategicArea.setOrderPosition Infantry -588.533/35/-937.21
AIStrategicArea.setOrderPosition Vehicle -598.997/35/-936.534
aiStrategicArea.setSide 0
aiStrategicArea.vehicleSearchRadius 0.4

aiStrategicArea.setActive 30
AIStrategicArea.setOrderPosition Infantry -81.9293/35/-594.067
AIStrategicArea.setOrderPosition Vehicle -90.0386/35/-594.093
aiStrategicArea.setSide 0
aiStrategicArea.setTakeable 1 1
aiStrategicArea.setTakeable 2 1
aiStrategicArea.vehicleSearchRadius 0.4

aiStrategicArea.setActive 31
AIStrategicArea.setOrderPosition Infantry 88.0222/35/-593.998
AIStrategicArea.setOrderPosition Vehicle 80.0084/35/-594.015
aiStrategicArea.setSide 0
aiStrategicArea.setTakeable 1 1
aiStrategicArea.setTakeable 2 1
aiStrategicArea.vehicleSearchRadius 0.4

aiStrategicArea.setActive 32
AIStrategicArea.setOrderPosition Infantry 258.093/35/-594.015
AIStrategicArea.setOrderPosition Vehicle 250.048/35/-594.084
aiStrategicArea.setSide 0
aiStrategicArea.setTakeable 1 1
aiStrategicArea.setTakeable 2 1
aiStrategicArea.vehicleSearchRadius 0.4

aiStrategicArea.setActive 33
AIStrategicArea.setOrderPosition Infantry 428.03/35/-594.018
AIStrategicArea.setOrderPosition Vehicle 419.984/35/-593.994
aiStrategicArea.setSide 0
aiStrategicArea.setTakeable 1 1
aiStrategicArea.setTakeable 2 1
aiStrategicArea.vehicleSearchRadius 0.4

aiStrategicArea.setActive 34
AIStrategicArea.setOrderPosition Infantry 598.083/35/-594.085
AIStrategicArea.setOrderPosition Vehicle 589.964/35/-594.089
aiStrategicArea.setSide 0
aiStrategicArea.setTakeable 1 1
aiStrategicArea.setTakeable 2 1
aiStrategicArea.vehicleSearchRadius 0.4

aiStrategicArea.setActive 35
AIStrategicArea.setOrderPosition Infantry 768.03/35/-594.008
AIStrategicArea.setOrderPosition Vehicle 760/35/-594.001
aiStrategicArea.setSide 0
aiStrategicArea.setTakeable 1 1
aiStrategicArea.setTakeable 2 1
aiStrategicArea.vehicleSearchRadius 0.4

aiStrategicArea.setActive 36
AIStrategicArea.setOrderPosition Infantry 938.013/35/-594.034
AIStrategicArea.setOrderPosition Vehicle 930.196/35/-594.131
aiStrategicArea.setSide 0
aiStrategicArea.setTakeable 1 1
aiStrategicArea.setTakeable 2 1
aiStrategicArea.vehicleSearchRadius 0.4

aiStrategicArea.setActive 37
AIStrategicArea.setOrderPosition Infantry -930.009/35/-424.015
AIStrategicArea.setOrderPosition Vehicle -938.061/35/-424.039
aiStrategicArea.setSide 0
aiStrategicArea.setTakeable 1 1
aiStrategicArea.setTakeable 2 1
aiStrategicArea.vehicleSearchRadius 0.4

aiStrategicArea.setActive 38
AIStrategicArea.setOrderPosition Infantry -759.962/35/-424.078
AIStrategicArea.setOrderPosition Vehicle -768.015/35/-424.089
aiStrategicArea.setSide 0
aiStrategicArea.setTakeable 1 1
aiStrategicArea.setTakeable 2 1
aiStrategicArea.vehicleSearchRadius 0.4

aiStrategicArea.setActive 39
AIStrategicArea.setOrderPosition Infantry -589.992/35/-423.993
AIStrategicArea.setOrderPosition Vehicle -597.995/35/-424.023
aiStrategicArea.setSide 0
aiStrategicArea.setTakeable 1 1
aiStrategicArea.setTakeable 2 1
aiStrategicArea.vehicleSearchRadius 0.4

aiStrategicArea.setActive 4
AIStrategicArea.setOrderPosition Infantry -420.255/35/-940.52
AIStrategicArea.setOrderPosition Vehicle -427.308/35/-940.516
aiStrategicArea.setSide 0
aiStrategicArea.setTakeable 1 1
aiStrategicArea.setTakeable 2 1
aiStrategicArea.vehicleSearchRadius 0.4

aiStrategicArea.setActive 40
AIStrategicArea.setOrderPosition Infantry -421.943/35/-423.997
AIStrategicArea.setOrderPosition Vehicle -430.026/35/-423.98
aiStrategicArea.setSide 0
aiStrategicArea.setTakeable 1 1
aiStrategicArea.setTakeable 2 1
aiStrategicArea.vehicleSearchRadius 0.4

aiStrategicArea.setActive 41
AIStrategicArea.setOrderPosition Infantry -251.968/35/-424.016
AIStrategicArea.setOrderPosition Vehicle -260.03/35/-424.008
aiStrategicArea.setSide 0
aiStrategicArea.setTakeable 1 1
aiStrategicArea.setTakeable 2 1
aiStrategicArea.vehicleSearchRadius 0.4

aiStrategicArea.setActive 42
AIStrategicArea.setOrderPosition Infantry -81.908/35/-424.076
AIStrategicArea.setOrderPosition Vehicle -90.1356/35/-424.018
aiStrategicArea.setSide 0
aiStrategicArea.setTakeable 1 1
aiStrategicArea.setTakeable 2 1
aiStrategicArea.vehicleSearchRadius 0.4

aiStrategicArea.setActive 43
AIStrategicArea.setOrderPosition Infantry 87.9965/35/-424.013
AIStrategicArea.setOrderPosition Vehicle 80.0721/35/-424.133
aiStrategicArea.setSide 0
aiStrategicArea.setTakeable 1 1
aiStrategicArea.setTakeable 2 1
aiStrategicArea.vehicleSearchRadius 0.4

aiStrategicArea.setActive 44
AIStrategicArea.setOrderPosition Infantry 258.029/35/-424.035
AIStrategicArea.setOrderPosition Vehicle 250.01/35/-424.04
aiStrategicArea.setSide 0
aiStrategicArea.setTakeable 1 1
aiStrategicArea.setTakeable 2 1
aiStrategicArea.vehicleSearchRadius 0.4

aiStrategicArea.setActive 45
AIStrategicArea.setOrderPosition Infantry 428.043/35/-424
AIStrategicArea.setOrderPosition Vehicle 419.985/35/-424.016
aiStrategicArea.setSide 0
aiStrategicArea.setTakeable 1 1
aiStrategicArea.setTakeable 2 1
aiStrategicArea.vehicleSearchRadius 0.4

aiStrategicArea.setActive 46
AIStrategicArea.setOrderPosition Infantry 598.033/35/-423.997
AIStrategicArea.setOrderPosition Vehicle 589.964/35/-424.021
aiStrategicArea.setSide 0
aiStrategicArea.setTakeable 1 1
aiStrategicArea.setTakeable 2 1
aiStrategicArea.vehicleSearchRadius 0.4

aiStrategicArea.setActive 47
AIStrategicArea.setOrderPosition Infantry 768.031/35/-424.026
AIStrategicArea.setOrderPosition Vehicle 760.014/35/-424.028
aiStrategicArea.setSide 0
aiStrategicArea.setTakeable 1 1
aiStrategicArea.setTakeable 2 1
aiStrategicArea.vehicleSearchRadius 0.4

aiStrategicArea.setActive 48
AIStrategicArea.setOrderPosition Infantry 938.03/35/-424.018
AIStrategicArea.setOrderPosition Vehicle 930.015/35/-423.996
aiStrategicArea.setSide 0
aiStrategicArea.setTakeable 1 1
aiStrategicArea.setTakeable 2 1
aiStrategicArea.vehicleSearchRadius 0.4

aiStrategicArea.setActive 49
AIStrategicArea.setOrderPosition Infantry -929.967/35/-254.033
AIStrategicArea.setOrderPosition Vehicle -937.99/35/-254.032
aiStrategicArea.setSide 0
aiStrategicArea.setTakeable 1 1
aiStrategicArea.setTakeable 2 1
aiStrategicArea.vehicleSearchRadius 0.4

aiStrategicArea.setActive 5
AIStrategicArea.setOrderPosition Infantry -248.641/35/-943.106
AIStrategicArea.setOrderPosition Vehicle -259.792/35/-943.153
aiStrategicArea.setSide 0
aiStrategicArea.setTakeable 1 1
aiStrategicArea.setTakeable 2 1
aiStrategicArea.vehicleSearchRadius 0.4

aiStrategicArea.setActive 50
AIStrategicArea.setOrderPosition Infantry -759.981/35/-254.007
AIStrategicArea.setOrderPosition Vehicle -767.995/35/-254.018
aiStrategicArea.setSide 0
aiStrategicArea.setTakeable 1 1
aiStrategicArea.setTakeable 2 1
aiStrategicArea.vehicleSearchRadius 0.4

aiStrategicArea.setActive 51
AIStrategicArea.setOrderPosition Infantry -589.947/35/-253.984
AIStrategicArea.setOrderPosition Vehicle -598.013/35/-254.01
aiStrategicArea.setSide 0
aiStrategicArea.setTakeable 1 1
aiStrategicArea.setTakeable 2 1
aiStrategicArea.vehicleSearchRadius 0.4

aiStrategicArea.setActive 52
AIStrategicArea.setOrderPosition Infantry -420.061/35/-254.025
AIStrategicArea.setOrderPosition Vehicle -427.967/35/-254.024
aiStrategicArea.setSide 0
aiStrategicArea.setTakeable 1 1
aiStrategicArea.setTakeable 2 1
aiStrategicArea.vehicleSearchRadius 0.4

aiStrategicArea.setActive 53
AIStrategicArea.setOrderPosition Infantry -251.988/35/-254.018
AIStrategicArea.setOrderPosition Vehicle -260.019/35/-253.998
aiStrategicArea.setSide 0
aiStrategicArea.setTakeable 1 1
aiStrategicArea.setTakeable 2 1
aiStrategicArea.vehicleSearchRadius 0.4

aiStrategicArea.setActive 54
AIStrategicArea.setOrderPosition Infantry -81.9733/35/-254.037
AIStrategicArea.setOrderPosition Vehicle -89.9825/35/-254.005
aiStrategicArea.setSide 0
aiStrategicArea.setTakeable 1 1
aiStrategicArea.setTakeable 2 1
aiStrategicArea.vehicleSearchRadius 0.4

aiStrategicArea.setActive 55
AIStrategicArea.setOrderPosition Infantry 88.0145/35/-254.01
AIStrategicArea.setOrderPosition Vehicle 80.0101/35/-254.014
aiStrategicArea.setSide 0
aiStrategicArea.setTakeable 1 1
aiStrategicArea.setTakeable 2 1
aiStrategicArea.vehicleSearchRadius 0.4

aiStrategicArea.setActive 56
AIStrategicArea.setOrderPosition Infantry 258.014/35/-254.037
AIStrategicArea.setOrderPosition Vehicle 249.962/35/-254.022
aiStrategicArea.setSide 0
aiStrategicArea.setTakeable 1 1
aiStrategicArea.setTakeable 2 1
aiStrategicArea.vehicleSearchRadius 0.4

aiStrategicArea.setActive 57
AIStrategicArea.setOrderPosition Infantry 428.018/35/-254.004
AIStrategicArea.setOrderPosition Vehicle 420.001/35/-254.024
aiStrategicArea.setSide 0
aiStrategicArea.setTakeable 1 1
aiStrategicArea.setTakeable 2 1
aiStrategicArea.vehicleSearchRadius 0.4

aiStrategicArea.setActive 58
AIStrategicArea.setOrderPosition Infantry 598.026/35/-253.99
AIStrategicArea.setOrderPosition Vehicle 590.003/35/-254.022
aiStrategicArea.setSide 0
aiStrategicArea.setTakeable 1 1
aiStrategicArea.setTakeable 2 1
aiStrategicArea.vehicleSearchRadius 0.4

aiStrategicArea.setActive 59
AIStrategicArea.setOrderPosition Infantry 768.021/35/-254.011
AIStrategicArea.setOrderPosition Vehicle 760.019/35/-254.016
aiStrategicArea.setSide 0
aiStrategicArea.setTakeable 1 1
aiStrategicArea.setTakeable 2 1
aiStrategicArea.vehicleSearchRadius 0.4

aiStrategicArea.setActive 6
AIStrategicArea.setOrderPosition Infantry -80.5629/35/-936.821
AIStrategicArea.setOrderPosition Vehicle -85.8587/35/-938.901
aiStrategicArea.setSide 0
aiStrategicArea.setTakeable 1 1
aiStrategicArea.setTakeable 2 1
aiStrategicArea.vehicleSearchRadius 0.4

aiStrategicArea.setActive 60
AIStrategicArea.setOrderPosition Infantry 938.018/35/-254.021
AIStrategicArea.setOrderPosition Vehicle 930.045/35/-254.048
aiStrategicArea.setSide 0
aiStrategicArea.setTakeable 1 1
aiStrategicArea.setTakeable 2 1
aiStrategicArea.vehicleSearchRadius 0.4

aiStrategicArea.setActive 61
AIStrategicArea.setOrderPosition Infantry -929.993/35/-83.9982
AIStrategicArea.setOrderPosition Vehicle -937.998/35/-84.0037
aiStrategicArea.setSide 0
aiStrategicArea.setTakeable 1 1
aiStrategicArea.setTakeable 2 1
aiStrategicArea.vehicleSearchRadius 0.4

aiStrategicArea.setActive 62
AIStrategicArea.setOrderPosition Infantry -759.963/35/-84.0248
AIStrategicArea.setOrderPosition Vehicle -767.971/35/-84.0168
aiStrategicArea.setSide 0
aiStrategicArea.setTakeable 1 1
aiStrategicArea.setTakeable 2 1
aiStrategicArea.vehicleSearchRadius 0.4

aiStrategicArea.setActive 63
AIStrategicArea.setOrderPosition Infantry -589.994/35/-84.0317
AIStrategicArea.setOrderPosition Vehicle -598.006/35/-84.0103
aiStrategicArea.setSide 0
aiStrategicArea.setTakeable 1 1
aiStrategicArea.setTakeable 2 1
aiStrategicArea.vehicleSearchRadius 0.4

aiStrategicArea.setActive 64
AIStrategicArea.setOrderPosition Infantry -419.986/35/-84.0042
AIStrategicArea.setOrderPosition Vehicle -427.994/35/-84.0021
aiStrategicArea.setSide 0
aiStrategicArea.setTakeable 1 1
aiStrategicArea.setTakeable 2 1
aiStrategicArea.vehicleSearchRadius 0.4

aiStrategicArea.setActive 65
AIStrategicArea.setOrderPosition Infantry -249.986/35/-84.0069
AIStrategicArea.setOrderPosition Vehicle -257.99/35/-84.0051
aiStrategicArea.setSide 0
aiStrategicArea.setTakeable 1 1
aiStrategicArea.setTakeable 2 1
aiStrategicArea.vehicleSearchRadius 0.4

aiStrategicArea.setActive 66
AIStrategicArea.setOrderPosition Infantry -81.9915/35/-83.9739
AIStrategicArea.setOrderPosition Vehicle -90.0094/35/-84.0193
aiStrategicArea.setSide 0
aiStrategicArea.setTakeable 1 1
aiStrategicArea.setTakeable 2 1
aiStrategicArea.vehicleSearchRadius 0.4

aiStrategicArea.setActive 67
AIStrategicArea.setOrderPosition Infantry 88.0079/35/-84.0001
AIStrategicArea.setOrderPosition Vehicle 80.0177/35/-84.0056
aiStrategicArea.setSide 0
aiStrategicArea.setTakeable 1 1
aiStrategicArea.setTakeable 2 1
aiStrategicArea.vehicleSearchRadius 0.4

aiStrategicArea.setActive 68
AIStrategicArea.setOrderPosition Infantry 258.009/35/-83.9991
AIStrategicArea.setOrderPosition Vehicle 249.985/35/-83.9967
aiStrategicArea.setSide 0
aiStrategicArea.setTakeable 1 1
aiStrategicArea.setTakeable 2 1
aiStrategicArea.vehicleSearchRadius 0.4

aiStrategicArea.setActive 69
AIStrategicArea.setOrderPosition Infantry 428.038/35/-84.0072
AIStrategicArea.setOrderPosition Vehicle 420.047/35/-84.0204
aiStrategicArea.setSide 0
aiStrategicArea.setTakeable 1 1
aiStrategicArea.setTakeable 2 1
aiStrategicArea.vehicleSearchRadius 0.4

aiStrategicArea.setActive 7
AIStrategicArea.setOrderPosition Infantry 86.1765/35/-934.045
AIStrategicArea.setOrderPosition Vehicle 82.0851/35/-933.918
aiStrategicArea.setSide 0
aiStrategicArea.setTakeable 1 1
aiStrategicArea.setTakeable 2 1
aiStrategicArea.vehicleSearchRadius 0.4

aiStrategicArea.setActive 70
AIStrategicArea.setOrderPosition Infantry 598.032/35/-83.9974
AIStrategicArea.setOrderPosition Vehicle 590.017/35/-84.0228
aiStrategicArea.setSide 0
aiStrategicArea.setTakeable 1 1
aiStrategicArea.setTakeable 2 1
aiStrategicArea.vehicleSearchRadius 0.4

aiStrategicArea.setActive 71
AIStrategicArea.setOrderPosition Infantry 768.032/35/-84.0175
AIStrategicArea.setOrderPosition Vehicle 760.036/35/-84.0299
aiStrategicArea.setSide 0
aiStrategicArea.setTakeable 1 1
aiStrategicArea.setTakeable 2 1
aiStrategicArea.vehicleSearchRadius 0.4

aiStrategicArea.setActive 72
AIStrategicArea.setOrderPosition Infantry 938.03/35/-84.0281
AIStrategicArea.setOrderPosition Vehicle 930.039/35/-83.9782
aiStrategicArea.setSide 0
aiStrategicArea.setTakeable 1 1
aiStrategicArea.setTakeable 2 1
aiStrategicArea.vehicleSearchRadius 0.4

aiStrategicArea.setActive 73
AIStrategicArea.setOrderPosition Infantry -929.964/35/85.974
AIStrategicArea.setOrderPosition Vehicle -937.981/35/85.9904
aiStrategicArea.setSide 0
aiStrategicArea.setTakeable 1 1
aiStrategicArea.setTakeable 2 1
aiStrategicArea.vehicleSearchRadius 0.4

aiStrategicArea.setActive 74
AIStrategicArea.setOrderPosition Infantry -760.007/35/85.9852
AIStrategicArea.setOrderPosition Vehicle -767.998/35/85.9884
aiStrategicArea.setSide 0
aiStrategicArea.setTakeable 1 1
aiStrategicArea.setTakeable 2 1
aiStrategicArea.vehicleSearchRadius 0.4

aiStrategicArea.setActive 75
AIStrategicArea.setOrderPosition Infantry -590.049/35/85.9741
AIStrategicArea.setOrderPosition Vehicle -597.969/35/85.9409
aiStrategicArea.setSide 0
aiStrategicArea.setTakeable 1 1
aiStrategicArea.setTakeable 2 1
aiStrategicArea.vehicleSearchRadius 0.4

aiStrategicArea.setActive 76
AIStrategicArea.setOrderPosition Infantry -419.988/35/85.9615
AIStrategicArea.setOrderPosition Vehicle -427.983/35/86.0072
aiStrategicArea.setSide 0
aiStrategicArea.setTakeable 1 1
aiStrategicArea.setTakeable 2 1
aiStrategicArea.vehicleSearchRadius 0.4

aiStrategicArea.setActive 77
AIStrategicArea.setOrderPosition Infantry -251.98/35/85.9941
AIStrategicArea.setOrderPosition Vehicle -260.014/35/85.9596
aiStrategicArea.setSide 0
aiStrategicArea.setTakeable 1 1
aiStrategicArea.setTakeable 2 1
aiStrategicArea.vehicleSearchRadius 0.4

aiStrategicArea.setActive 78
AIStrategicArea.setOrderPosition Infantry -81.9713/35/85.9808
AIStrategicArea.setOrderPosition Vehicle -89.9855/35/85.9985
aiStrategicArea.setSide 0
aiStrategicArea.setTakeable 1 1
aiStrategicArea.setTakeable 2 1
aiStrategicArea.vehicleSearchRadius 0.4

aiStrategicArea.setActive 79
AIStrategicArea.setOrderPosition Infantry 88.0331/35/86.0081
AIStrategicArea.setOrderPosition Vehicle 80.0197/35/85.9966
aiStrategicArea.setSide 0
aiStrategicArea.setTakeable 1 1
aiStrategicArea.setTakeable 2 1
aiStrategicArea.vehicleSearchRadius 0.4

aiStrategicArea.setActive 8
AIStrategicArea.setOrderPosition Infantry 256.126/35/-934.443
AIStrategicArea.setOrderPosition Vehicle 253.225/35/-934.479
aiStrategicArea.setSide 0
aiStrategicArea.setTakeable 1 1
aiStrategicArea.setTakeable 2 1
aiStrategicArea.vehicleSearchRadius 0.4

aiStrategicArea.setActive 80
AIStrategicArea.setOrderPosition Infantry 258.03/35/85.9695
AIStrategicArea.setOrderPosition Vehicle 250.003/35/85.967
aiStrategicArea.setSide 0
aiStrategicArea.setTakeable 1 1
aiStrategicArea.setTakeable 2 1
aiStrategicArea.vehicleSearchRadius 0.4

aiStrategicArea.setActive 81
AIStrategicArea.setOrderPosition Infantry 428.037/35/85.9886
AIStrategicArea.setOrderPosition Vehicle 420.016/35/85.9839
aiStrategicArea.setSide 0
aiStrategicArea.setTakeable 1 1
aiStrategicArea.setTakeable 2 1
aiStrategicArea.vehicleSearchRadius 0.4

aiStrategicArea.setActive 82
AIStrategicArea.setOrderPosition Infantry 598.063/35/85.9854
AIStrategicArea.setOrderPosition Vehicle 589.981/35/86.0029
aiStrategicArea.setSide 0
aiStrategicArea.setTakeable 1 1
aiStrategicArea.setTakeable 2 1
aiStrategicArea.vehicleSearchRadius 0.4

aiStrategicArea.setActive 83
AIStrategicArea.setOrderPosition Infantry 768.001/35/85.9817
AIStrategicArea.setOrderPosition Vehicle 760.003/35/85.9844
aiStrategicArea.setSide 0
aiStrategicArea.setTakeable 1 1
aiStrategicArea.setTakeable 2 1
aiStrategicArea.vehicleSearchRadius 0.4

aiStrategicArea.setActive 84
AIStrategicArea.setOrderPosition Infantry 937.998/35/85.9949
AIStrategicArea.setOrderPosition Vehicle 929.996/35/86.016
aiStrategicArea.setSide 0
aiStrategicArea.setTakeable 1 1
aiStrategicArea.setTakeable 2 1
aiStrategicArea.vehicleSearchRadius 0.4

aiStrategicArea.setActive 85
AIStrategicArea.setOrderPosition Infantry -929.936/35/255.961
AIStrategicArea.setOrderPosition Vehicle -937.952/35/255.947
aiStrategicArea.setSide 0
aiStrategicArea.setTakeable 1 1
aiStrategicArea.setTakeable 2 1
aiStrategicArea.vehicleSearchRadius 0.4

aiStrategicArea.setActive 86
AIStrategicArea.setOrderPosition Infantry -759.967/35/256.01
AIStrategicArea.setOrderPosition Vehicle -767.986/35/255.949
aiStrategicArea.setSide 0
aiStrategicArea.setTakeable 1 1
aiStrategicArea.setTakeable 2 1
aiStrategicArea.vehicleSearchRadius 0.4

aiStrategicArea.setActive 87
AIStrategicArea.setOrderPosition Infantry -590.014/35/256.028
AIStrategicArea.setOrderPosition Vehicle -9.9989/0/-10.0051
aiStrategicArea.setSide 0
aiStrategicArea.setTakeable 1 1
aiStrategicArea.setTakeable 2 1
aiStrategicArea.vehicleSearchRadius 0.4

aiStrategicArea.setActive 88
AIStrategicArea.setOrderPosition Infantry -421.96/35/255.988
AIStrategicArea.setOrderPosition Vehicle -429.981/35/255.993
aiStrategicArea.setSide 0
aiStrategicArea.setTakeable 1 1
aiStrategicArea.setTakeable 2 1
aiStrategicArea.vehicleSearchRadius 0.4

aiStrategicArea.setActive 89
AIStrategicArea.setOrderPosition Infantry -252.016/35/255.981
AIStrategicArea.setOrderPosition Vehicle -260.045/35/256.014
aiStrategicArea.setSide 0
aiStrategicArea.setTakeable 1 1
aiStrategicArea.setTakeable 2 1
aiStrategicArea.vehicleSearchRadius 0.4

aiStrategicArea.setActive 9
AIStrategicArea.setOrderPosition Infantry 429.758/35/-936.22
AIStrategicArea.setOrderPosition Vehicle 421.075/35/-934.749
aiStrategicArea.setSide 0
aiStrategicArea.setTakeable 1 1
aiStrategicArea.setTakeable 2 1
aiStrategicArea.vehicleSearchRadius 0.4

aiStrategicArea.setActive 90
AIStrategicArea.setOrderPosition Infantry -81.9817/35/255.995
AIStrategicArea.setOrderPosition Vehicle -89.9777/35/255.971
aiStrategicArea.setSide 0
aiStrategicArea.setTakeable 1 1
aiStrategicArea.setTakeable 2 1
aiStrategicArea.vehicleSearchRadius 0.4

aiStrategicArea.setActive 91
AIStrategicArea.setOrderPosition Infantry 88.052/35/255.968
AIStrategicArea.setOrderPosition Vehicle 80.0042/35/255.991
aiStrategicArea.setSide 0
aiStrategicArea.setTakeable 1 1
aiStrategicArea.setTakeable 2 1
aiStrategicArea.vehicleSearchRadius 0.4

aiStrategicArea.setActive 92
AIStrategicArea.setOrderPosition Infantry 258.027/35/255.98
AIStrategicArea.setOrderPosition Vehicle 249.99/35/255.965
aiStrategicArea.setSide 0
aiStrategicArea.setTakeable 1 1
aiStrategicArea.setTakeable 2 1
aiStrategicArea.vehicleSearchRadius 0.4

aiStrategicArea.setActive 93
AIStrategicArea.setOrderPosition Infantry 428.045/35/255.993
AIStrategicArea.setOrderPosition Vehicle 420.032/35/255.949
aiStrategicArea.setSide 0
aiStrategicArea.setTakeable 1 1
aiStrategicArea.setTakeable 2 1
aiStrategicArea.vehicleSearchRadius 0.4

aiStrategicArea.setActive 94
AIStrategicArea.setOrderPosition Infantry 597.982/35/255.971
AIStrategicArea.setOrderPosition Vehicle 590.048/35/255.973
aiStrategicArea.setSide 0
aiStrategicArea.setTakeable 1 1
aiStrategicArea.setTakeable 2 1
aiStrategicArea.vehicleSearchRadius 0.4

aiStrategicArea.setActive 95
AIStrategicArea.setOrderPosition Infantry 768.018/35/255.999
AIStrategicArea.setOrderPosition Vehicle 760.027/35/255.994
aiStrategicArea.setSide 0
aiStrategicArea.setTakeable 1 1
aiStrategicArea.setTakeable 2 1
aiStrategicArea.vehicleSearchRadius 0.4

aiStrategicArea.setActive 96
AIStrategicArea.setOrderPosition Infantry 938.021/35/256.021
AIStrategicArea.setOrderPosition Vehicle 930.019/35/255.979
aiStrategicArea.setSide 0
aiStrategicArea.setTakeable 1 1
aiStrategicArea.setTakeable 2 1
aiStrategicArea.vehicleSearchRadius 0.4

aiStrategicArea.setActive 97
AIStrategicArea.setOrderPosition Infantry -929.984/35/425.988
AIStrategicArea.setOrderPosition Vehicle -937.992/35/425.978
aiStrategicArea.setSide 0
aiStrategicArea.setTakeable 1 1
aiStrategicArea.setTakeable 2 1
aiStrategicArea.vehicleSearchRadius 0.4

aiStrategicArea.setActive 98
AIStrategicArea.setOrderPosition Infantry -759.952/35/426.002
AIStrategicArea.setOrderPosition Vehicle -767.967/35/425.976
aiStrategicArea.setSide 0
aiStrategicArea.setTakeable 1 1
aiStrategicArea.setTakeable 2 1
aiStrategicArea.vehicleSearchRadius 0.4

aiStrategicArea.setActive 99
AIStrategicArea.setOrderPosition Infantry -591.973/35/425.975
AIStrategicArea.setOrderPosition Vehicle -600/35/425.992
aiStrategicArea.setSide 0
aiStrategicArea.setTakeable 1 1
aiStrategicArea.setTakeable 2 1
aiStrategicArea.vehicleSearchRadius 0.4

rem *** Create strategic areas ***
aiStrategicArea.create 1 -1014/-1014 -934/-934 35 50
aiStrategicArea.layer 1

aiStrategicArea.create 10 514/-1014 594/-934 35 50
aiStrategicArea.layer 1

aiStrategicArea.create 100 -506/346 -426/426 35 50
aiStrategicArea.layer 1

aiStrategicArea.create 101 -336/346 -256/426 35 50
aiStrategicArea.layer 1

aiStrategicArea.create 102 -166/346 -86/426 35 50
aiStrategicArea.layer 1

aiStrategicArea.create 103 4/346 84/426 35 50
aiStrategicArea.layer 1

aiStrategicArea.create 104 174/346 254/426 35 50
aiStrategicArea.layer 1

aiStrategicArea.create 105 344/346 424/426 35 50
aiStrategicArea.layer 1

aiStrategicArea.create 106 514/346 594/426 35 50
aiStrategicArea.layer 1

aiStrategicArea.create 107 684/346 764/426 35 50
aiStrategicArea.layer 1

aiStrategicArea.create 108 854/346 934/426 35 50
aiStrategicArea.layer 1

aiStrategicArea.create 109 -1014/516 -934/596 35 50
aiStrategicArea.layer 1

aiStrategicArea.create 11 684/-1014 764/-934 35 50
aiStrategicArea.layer 1

aiStrategicArea.create 110 -844/516 -764/596 35 50
aiStrategicArea.layer 1

aiStrategicArea.create 111 -674/516 -594/596 35 50
aiStrategicArea.layer 1

aiStrategicArea.create 112 -504/516 -424/596 35 50
aiStrategicArea.layer 1

aiStrategicArea.create 113 -334/516 -254/596 35 50
aiStrategicArea.layer 1

aiStrategicArea.create 114 -166/516 -86/596 35 50
aiStrategicArea.layer 1

aiStrategicArea.create 115 4/516 84/596 35 50
aiStrategicArea.layer 1

aiStrategicArea.create 116 174/516 254/596 35 50
aiStrategicArea.layer 1

aiStrategicArea.create 117 344/516 424/596 35 50
aiStrategicArea.layer 1

aiStrategicArea.create 118 514/516 594/596 35 50
aiStrategicArea.layer 1

aiStrategicArea.create 119 684/516 764/596 35 50
aiStrategicArea.layer 1

aiStrategicArea.create 12 854/-1014 934/-934 35 50
aiStrategicArea.layer 1

aiStrategicArea.create 120 854/516 934/596 35 50
aiStrategicArea.layer 1

aiStrategicArea.create 121 -1014/686 -934/766 35 50
aiStrategicArea.layer 1

aiStrategicArea.create 122 -844/686 -764/766 35 50
aiStrategicArea.layer 1

aiStrategicArea.create 123 -674/686 -594/766 35 50
aiStrategicArea.layer 1

aiStrategicArea.create 124 -504/686 -424/766 35 50
aiStrategicArea.layer 1

aiStrategicArea.create 125 -336/686 -256/766 35 50
aiStrategicArea.layer 1

aiStrategicArea.create 126 -166/686 -86/766 35 50
aiStrategicArea.layer 1

aiStrategicArea.create 127 4/686 84/766 35 50
aiStrategicArea.layer 1

aiStrategicArea.create 128 174/686 254/766 35 50
aiStrategicArea.layer 1

aiStrategicArea.create 129 344/686 424/766 35 50
aiStrategicArea.layer 1

aiStrategicArea.create 13 -1014/-844 -934/-764 35 50
aiStrategicArea.layer 1

aiStrategicArea.create 130 514/686 594/766 35 50
aiStrategicArea.layer 1

aiStrategicArea.create 131 684/686 764/766 35 50
aiStrategicArea.layer 1

aiStrategicArea.create 132 854/686 934/766 35 50
aiStrategicArea.layer 1

aiStrategicArea.create 133 -1014/856 -934/936 35 50
aiStrategicArea.layer 1

aiStrategicArea.create 134 -844/856 -764/936 35 50
aiStrategicArea.layer 1

aiStrategicArea.create 135 -674/856 -594/936 35 50
aiStrategicArea.layer 1

aiStrategicArea.create 136 -504/856 -424/936 35 50
aiStrategicArea.layer 1

aiStrategicArea.create 137 -334/856 -254/936 35 50
aiStrategicArea.layer 1

aiStrategicArea.create 138 -166/856 -86/936 35 50
aiStrategicArea.layer 1

aiStrategicArea.create 139 4/856 84/936 35 50
aiStrategicArea.layer 1

aiStrategicArea.create 14 -844/-844 -764/-764 35 50
aiStrategicArea.layer 1

aiStrategicArea.create 140 174/856 254/936 35 50
aiStrategicArea.layer 1

aiStrategicArea.create 141 344.01/856 424.01/936 35 50
aiStrategicArea.layer 1

aiStrategicArea.create 142 514/856 594/936 35 50
aiStrategicArea.layer 1

aiStrategicArea.create 143 684/856 764/936 35 50
aiStrategicArea.layer 1

aiStrategicArea.create 144 854/856 934/936 35 50
aiStrategicArea.layer 1

aiStrategicArea.create 15 -674/-844 -594/-764 35 50
aiStrategicArea.layer 1

aiStrategicArea.create 16 -504/-844 -424/-764 35 50
aiStrategicArea.layer 1

aiStrategicArea.create 17 -334/-844 -254/-764 35 50
aiStrategicArea.layer 1

aiStrategicArea.create 18 -166/-844 -86/-764 35 50
aiStrategicArea.layer 1

aiStrategicArea.create 19 4/-844 84/-764 35 50
aiStrategicArea.layer 1

aiStrategicArea.create 2 -844/-1014 -764/-934 35 50
aiStrategicArea.layer 1

aiStrategicArea.create 20 174/-844 254/-764 35 50
aiStrategicArea.layer 1

aiStrategicArea.create 21 344/-844 424/-764 35 50
aiStrategicArea.layer 1

aiStrategicArea.create 22 514/-844 594/-764 35 50
aiStrategicArea.layer 1

aiStrategicArea.create 23 684/-844 764/-764 35 50
aiStrategicArea.layer 1

aiStrategicArea.create 24 854/-844 934/-764 35 50
aiStrategicArea.layer 1

aiStrategicArea.create 25 -1014/-674 -934/-594 35 50
aiStrategicArea.layer 1

aiStrategicArea.create 26 -844/-674 -764/-594 35 50
aiStrategicArea.layer 1

aiStrategicArea.create 27 -674/-674 -594/-594 35 50
aiStrategicArea.layer 1

aiStrategicArea.create 28 -504/-674 -424/-594 35 50
aiStrategicArea.layer 1

aiStrategicArea.create 29 -336/-674 -256/-594 35 50
aiStrategicArea.layer 1

aiStrategicArea.create 3 -674/-1014 -594/-934 35 50
aiStrategicArea.layer 1

aiStrategicArea.create 30 -166/-674 -86/-594 35 50
aiStrategicArea.layer 1

aiStrategicArea.create 31 4/-674 84/-594 35 50
aiStrategicArea.layer 1

aiStrategicArea.create 32 174/-674 254/-594 35 50
aiStrategicArea.layer 1

aiStrategicArea.create 33 344/-674 424/-594 35 50
aiStrategicArea.layer 1

aiStrategicArea.create 34 514/-674 594/-594 35 50
aiStrategicArea.layer 1

aiStrategicArea.create 35 684/-674 764/-594 35 50
aiStrategicArea.layer 1

aiStrategicArea.create 36 854/-674 934/-594 35 50
aiStrategicArea.layer 1

aiStrategicArea.create 37 -1014/-504 -934/-424 35 50
aiStrategicArea.layer 1

aiStrategicArea.create 38 -844/-504 -764/-424 35 50
aiStrategicArea.layer 1

aiStrategicArea.create 39 -674/-504 -594/-424 35 50
aiStrategicArea.layer 1

aiStrategicArea.create 4 -504/-1014 -424/-934 35 50
aiStrategicArea.layer 1

aiStrategicArea.create 40 -506/-504 -426/-424 35 50
aiStrategicArea.layer 1

aiStrategicArea.create 41 -336/-504 -256/-424 35 50
aiStrategicArea.layer 1

aiStrategicArea.create 42 -166/-504 -86/-424 35 50
aiStrategicArea.layer 1

aiStrategicArea.create 43 4/-504 84/-424 35 50
aiStrategicArea.layer 1

aiStrategicArea.create 44 174/-504 254/-424 35 50
aiStrategicArea.layer 1

aiStrategicArea.create 45 344/-504 424/-424 35 50
aiStrategicArea.layer 1

aiStrategicArea.create 46 514/-504 594/-424 35 50
aiStrategicArea.layer 1

aiStrategicArea.create 47 684/-504 764/-424 35 50
aiStrategicArea.layer 1

aiStrategicArea.create 48 854/-504 934/-424 35 50
aiStrategicArea.layer 1

aiStrategicArea.create 49 -1014/-334 -934/-254 35 50
aiStrategicArea.layer 1

aiStrategicArea.create 5 -334/-1014 -254/-934 35 50
aiStrategicArea.layer 1

aiStrategicArea.create 50 -844/-334 -764/-254 35 50
aiStrategicArea.layer 1

aiStrategicArea.create 51 -674/-334 -594/-254 35 50
aiStrategicArea.layer 1

aiStrategicArea.create 52 -504/-334 -424/-254 35 50
aiStrategicArea.layer 1

aiStrategicArea.create 53 -336/-334 -256/-254 35 50
aiStrategicArea.layer 1

aiStrategicArea.create 54 -166/-334 -86/-254 35 50
aiStrategicArea.layer 1

aiStrategicArea.create 55 4/-334 84/-254 35 50
aiStrategicArea.layer 1

aiStrategicArea.create 56 174/-334 254/-254 35 50
aiStrategicArea.layer 1

aiStrategicArea.create 57 344/-334 424/-254 35 50
aiStrategicArea.layer 1

aiStrategicArea.create 58 514/-334 594/-254 35 50
aiStrategicArea.layer 1

aiStrategicArea.create 59 684/-334 764/-254 35 50
aiStrategicArea.layer 1

aiStrategicArea.create 6 -164/-1014 -84/-934 35 50
aiStrategicArea.layer 1

aiStrategicArea.create 60 854/-334 934/-254 35 50
aiStrategicArea.layer 1

aiStrategicArea.create 61 -1014/-164 -934/-84 35 50
aiStrategicArea.layer 1

aiStrategicArea.create 62 -844/-164 -764/-84 35 50
aiStrategicArea.layer 1

aiStrategicArea.create 63 -674/-164 -594/-84 35 50
aiStrategicArea.layer 1

aiStrategicArea.create 64 -504/-164 -424/-84 35 50
aiStrategicArea.layer 1

aiStrategicArea.create 65 -334/-164 -254/-84 35 50
aiStrategicArea.layer 1

aiStrategicArea.create 66 -166/-164 -86/-84 35 50
aiStrategicArea.layer 1

aiStrategicArea.create 67 4/-164 84/-84 35 50
aiStrategicArea.layer 1

aiStrategicArea.create 68 174/-164 254/-84 35 50
aiStrategicArea.layer 1

aiStrategicArea.create 69 344/-164 424/-84 35 50
aiStrategicArea.layer 1

aiStrategicArea.create 7 4/-1014 84/-934 35 50
aiStrategicArea.layer 1

aiStrategicArea.create 70 514/-164 594/-84 35 50
aiStrategicArea.layer 1

aiStrategicArea.create 71 684/-164 764/-84 35 50
aiStrategicArea.layer 1

aiStrategicArea.create 72 854/-164 934/-84 35 50
aiStrategicArea.layer 1

aiStrategicArea.create 73 -1014/6 -934/86 35 50
aiStrategicArea.layer 1

aiStrategicArea.create 74 -844/6 -764/86 35 50
aiStrategicArea.layer 1

aiStrategicArea.create 75 -674/6 -594/86 35 50
aiStrategicArea.layer 1

aiStrategicArea.create 76 -504/6 -424/86 35 50
aiStrategicArea.layer 1

aiStrategicArea.create 77 -336/6 -256/86 35 50
aiStrategicArea.layer 1

aiStrategicArea.create 78 -166/6 -86/86 35 50
aiStrategicArea.layer 1

aiStrategicArea.create 79 4/6 84/86 35 50
aiStrategicArea.layer 1

aiStrategicArea.create 8 174/-1014 254/-934 35 50
aiStrategicArea.layer 1

aiStrategicArea.create 80 174/6 254/86 35 50
aiStrategicArea.layer 1

aiStrategicArea.create 81 344/6 424/86 35 50
aiStrategicArea.layer 1

aiStrategicArea.create 82 514/6 594/86 35 50
aiStrategicArea.layer 1

aiStrategicArea.create 83 684/6 764/86 35 50
aiStrategicArea.layer 1

aiStrategicArea.create 84 854/6 934/86 35 50
aiStrategicArea.layer 1

aiStrategicArea.create 85 -1017/173 -934/256 35 50
aiStrategicArea.layer 1

aiStrategicArea.create 86 -844/176 -764/256 35 50
aiStrategicArea.layer 1

aiStrategicArea.create 87 -674/176 -594/256 35 50
aiStrategicArea.layer 1

aiStrategicArea.create 88 -506/176 -426/256 35 50
aiStrategicArea.layer 1

aiStrategicArea.create 89 -336/176 -256/256 35 50
aiStrategicArea.layer 1

aiStrategicArea.create 9 344/-1014 424/-934 35 50
aiStrategicArea.layer 1

aiStrategicArea.create 90 -166/176 -86/256 35 50
aiStrategicArea.layer 1

aiStrategicArea.create 91 4/176 84/256 35 50
aiStrategicArea.layer 1

aiStrategicArea.create 92 174/176 254/256 35 50
aiStrategicArea.layer 1

aiStrategicArea.create 93 344/176 424/256 35 50
aiStrategicArea.layer 1

aiStrategicArea.create 94 514/176 594/256 35 50
aiStrategicArea.layer 1

aiStrategicArea.create 95 684/176 764/256 35 50
aiStrategicArea.layer 1

aiStrategicArea.create 96 854/176 934/256 35 50
aiStrategicArea.layer 1

aiStrategicArea.create 97 -1014/346 -934/426 35 50
aiStrategicArea.layer 1

aiStrategicArea.create 98 -844/346 -764/426 35 50
aiStrategicArea.layer 1

aiStrategicArea.create 99 -676/346 -596/426 35 50
aiStrategicArea.layer 1

aiStrategicArea.setActive 1
AIStrategicArea.setOrderPosition Infantry -932.538/35/-935.289
AIStrategicArea.setOrderPosition Vehicle -935.184/35/-935.13
aiStrategicArea.setSide 0
aiStrategicArea.setTakeable 1 1
aiStrategicArea.setTakeable 2 1
aiStrategicArea.vehicleSearchRadius 0.4

aiStrategicArea.setActive 10
AIStrategicArea.setOrderPosition Infantry 598.447/35/-938.588
AIStrategicArea.setOrderPosition Vehicle 586.665/35/-939.03
aiStrategicArea.setSide 0
aiStrategicArea.setTakeable 1 1
aiStrategicArea.setTakeable 2 1
aiStrategicArea.vehicleSearchRadius 0.4

aiStrategicArea.setActive 100
AIStrategicArea.setOrderPosition Infantry -421.971/35/426.014
AIStrategicArea.setOrderPosition Vehicle -429.953/35/425.988
aiStrategicArea.setSide 0
aiStrategicArea.setTakeable 1 1
aiStrategicArea.setTakeable 2 1
aiStrategicArea.vehicleSearchRadius 0.4

aiStrategicArea.setActive 101
AIStrategicArea.setOrderPosition Infantry -251.969/35/425.998
AIStrategicArea.setOrderPosition Vehicle -260.032/35/425.962
aiStrategicArea.setSide 0
aiStrategicArea.setTakeable 1 1
aiStrategicArea.setTakeable 2 1
aiStrategicArea.vehicleSearchRadius 0.4

aiStrategicArea.setActive 102
AIStrategicArea.setOrderPosition Infantry -81.9137/35/426.008
AIStrategicArea.setOrderPosition Vehicle -90.0523/35/426.007
aiStrategicArea.setSide 0
aiStrategicArea.setTakeable 1 1
aiStrategicArea.setTakeable 2 1
aiStrategicArea.vehicleSearchRadius 0.4

aiStrategicArea.setActive 103
AIStrategicArea.setOrderPosition Infantry 88.027/35/425.977
AIStrategicArea.setOrderPosition Vehicle 80.0116/35/425.993
aiStrategicArea.setSide 0
aiStrategicArea.setTakeable 1 1
aiStrategicArea.setTakeable 2 1
aiStrategicArea.vehicleSearchRadius 0.4

aiStrategicArea.setActive 104
AIStrategicArea.setOrderPosition Infantry 258.009/35/426.009
AIStrategicArea.setOrderPosition Vehicle 249.966/35/425.972
aiStrategicArea.setSide 0
aiStrategicArea.setTakeable 1 1
aiStrategicArea.setTakeable 2 1
aiStrategicArea.vehicleSearchRadius 0.4

aiStrategicArea.setActive 105
AIStrategicArea.setOrderPosition Infantry 428.018/35/426.001
AIStrategicArea.setOrderPosition Vehicle 419.995/35/425.986
aiStrategicArea.setSide 0
aiStrategicArea.setTakeable 1 1
aiStrategicArea.setTakeable 2 1
aiStrategicArea.vehicleSearchRadius 0.4

aiStrategicArea.setActive 106
AIStrategicArea.setOrderPosition Infantry 598.024/35/425.968
AIStrategicArea.setOrderPosition Vehicle 589.997/35/426
aiStrategicArea.setSide 0
aiStrategicArea.setTakeable 1 1
aiStrategicArea.setTakeable 2 1
aiStrategicArea.vehicleSearchRadius 0.4

aiStrategicArea.setActive 107
AIStrategicArea.setOrderPosition Infantry 768.054/35/425.967
AIStrategicArea.setOrderPosition Vehicle 759.998/35/426.047
aiStrategicArea.setSide 0
aiStrategicArea.setTakeable 1 1
aiStrategicArea.setTakeable 2 1
aiStrategicArea.vehicleSearchRadius 0.4

aiStrategicArea.setActive 108
AIStrategicArea.setOrderPosition Infantry 938.016/35/425.973
AIStrategicArea.setOrderPosition Vehicle 930.023/35/425.996
aiStrategicArea.setSide 0
aiStrategicArea.setTakeable 1 1
aiStrategicArea.setTakeable 2 1
aiStrategicArea.vehicleSearchRadius 0.4

aiStrategicArea.setActive 109
AIStrategicArea.setOrderPosition Infantry -929.975/35/596.005
AIStrategicArea.setOrderPosition Vehicle -937.971/35/595.979
aiStrategicArea.setSide 0
aiStrategicArea.setTakeable 1 1
aiStrategicArea.setTakeable 2 1
aiStrategicArea.vehicleSearchRadius 0.4

aiStrategicArea.setActive 11
AIStrategicArea.setOrderPosition Infantry 763.641/35/-941.073
AIStrategicArea.setOrderPosition Vehicle 751.246/35/-940.867
aiStrategicArea.setSide 0
aiStrategicArea.setTakeable 1 1
aiStrategicArea.setTakeable 2 1
aiStrategicArea.vehicleSearchRadius 0.4

aiStrategicArea.setActive 110
AIStrategicArea.setOrderPosition Infantry -759.995/35/596.005
AIStrategicArea.setOrderPosition Vehicle -768.001/35/595.973
aiStrategicArea.setSide 0
aiStrategicArea.setTakeable 1 1
aiStrategicArea.setTakeable 2 1
aiStrategicArea.vehicleSearchRadius 0.4

aiStrategicArea.setActive 111
AIStrategicArea.setOrderPosition Infantry -589.999/35/595.983
AIStrategicArea.setOrderPosition Vehicle -597.979/35/595.999
aiStrategicArea.setSide 0
aiStrategicArea.setTakeable 1 1
aiStrategicArea.setTakeable 2 1
aiStrategicArea.vehicleSearchRadius 0.4

aiStrategicArea.setActive 112
AIStrategicArea.setOrderPosition Infantry -419.982/35/595.964
AIStrategicArea.setOrderPosition Vehicle -428.014/35/596.009
aiStrategicArea.setSide 0
aiStrategicArea.setTakeable 1 1
aiStrategicArea.setTakeable 2 1
aiStrategicArea.vehicleSearchRadius 0.4

aiStrategicArea.setActive 113
AIStrategicArea.setOrderPosition Infantry -249.977/35/595.99
AIStrategicArea.setOrderPosition Vehicle -257.98/35/596
aiStrategicArea.setSide 0
aiStrategicArea.setTakeable 1 1
aiStrategicArea.setTakeable 2 1
aiStrategicArea.vehicleSearchRadius 0.4

aiStrategicArea.setActive 114
AIStrategicArea.setOrderPosition Infantry -81.9769/35/595.993
AIStrategicArea.setOrderPosition Vehicle -90.0087/35/596.005
aiStrategicArea.setSide 0
aiStrategicArea.setTakeable 1 1
aiStrategicArea.setTakeable 2 1
aiStrategicArea.vehicleSearchRadius 0.4

aiStrategicArea.setActive 115
AIStrategicArea.setOrderPosition Infantry 88.0618/35/595.962
AIStrategicArea.setOrderPosition Vehicle 80.0587/35/595.966
aiStrategicArea.setSide 0
aiStrategicArea.setTakeable 1 1
aiStrategicArea.setTakeable 2 1
aiStrategicArea.vehicleSearchRadius 0.4

aiStrategicArea.setActive 116
AIStrategicArea.setOrderPosition Infantry 257.999/35/595.987
AIStrategicArea.setOrderPosition Vehicle 250.01/35/595.997
aiStrategicArea.setSide 0
aiStrategicArea.setTakeable 1 1
aiStrategicArea.setTakeable 2 1
aiStrategicArea.vehicleSearchRadius 0.4

aiStrategicArea.setActive 117
AIStrategicArea.setOrderPosition Infantry 428.03/35/595.982
AIStrategicArea.setOrderPosition Vehicle 420.009/35/595.987
aiStrategicArea.setSide 0
aiStrategicArea.setTakeable 1 1
aiStrategicArea.setTakeable 2 1
aiStrategicArea.vehicleSearchRadius 0.4

aiStrategicArea.setActive 118
AIStrategicArea.setOrderPosition Infantry -9.99951/0/-9.98877
AIStrategicArea.setOrderPosition Vehicle -9.99951/0/-9.98877
aiStrategicArea.setSide 0
aiStrategicArea.setTakeable 1 1
aiStrategicArea.setTakeable 2 1
aiStrategicArea.vehicleSearchRadius 0.4

aiStrategicArea.setActive 119
AIStrategicArea.setOrderPosition Infantry 768.029/35/595.96
AIStrategicArea.setOrderPosition Vehicle 759.979/35/596.01
aiStrategicArea.setSide 0
aiStrategicArea.setTakeable 1 1
aiStrategicArea.setTakeable 2 1
aiStrategicArea.vehicleSearchRadius 0.4

aiStrategicArea.setActive 12
AIStrategicArea.setOrderPosition Infantry 946.757/35/-935.592
AIStrategicArea.setOrderPosition Vehicle 929.235/35/-934.364
aiStrategicArea.setSide 0
aiStrategicArea.setTakeable 1 1
aiStrategicArea.setTakeable 2 1
aiStrategicArea.vehicleSearchRadius 0.4

aiStrategicArea.setActive 120
AIStrategicArea.setOrderPosition Infantry 938.085/35/595.996
AIStrategicArea.setOrderPosition Vehicle 930.036/35/595.996
aiStrategicArea.setSide 0
aiStrategicArea.setTakeable 1 1
aiStrategicArea.setTakeable 2 1
aiStrategicArea.vehicleSearchRadius 0.4

aiStrategicArea.setActive 121
AIStrategicArea.setOrderPosition Infantry -929.985/35/765.982
AIStrategicArea.setOrderPosition Vehicle -937.946/35/765.992
aiStrategicArea.setSide 0
aiStrategicArea.setTakeable 1 1
aiStrategicArea.setTakeable 2 1
aiStrategicArea.vehicleSearchRadius 0.4

aiStrategicArea.setActive 122
AIStrategicArea.setOrderPosition Infantry -759.94/35/766.022
AIStrategicArea.setOrderPosition Vehicle -767.983/35/766.012
aiStrategicArea.setSide 0
aiStrategicArea.setTakeable 1 1
aiStrategicArea.setTakeable 2 1
aiStrategicArea.vehicleSearchRadius 0.4

aiStrategicArea.setActive 123
AIStrategicArea.setOrderPosition Infantry -589.982/35/765.994
AIStrategicArea.setOrderPosition Vehicle -598.001/35/765.996
aiStrategicArea.setSide 0
aiStrategicArea.setTakeable 1 1
aiStrategicArea.setTakeable 2 1
aiStrategicArea.vehicleSearchRadius 0.4

aiStrategicArea.setActive 124
AIStrategicArea.setOrderPosition Infantry -419.992/35/765.998
AIStrategicArea.setOrderPosition Vehicle -427.994/35/766.008
aiStrategicArea.setSide 0
aiStrategicArea.setTakeable 1 1
aiStrategicArea.setTakeable 2 1
aiStrategicArea.vehicleSearchRadius 0.4

aiStrategicArea.setActive 125
AIStrategicArea.setOrderPosition Infantry -251.969/35/766.015
AIStrategicArea.setOrderPosition Vehicle -260.013/35/766.022
aiStrategicArea.setSide 0
aiStrategicArea.setTakeable 1 1
aiStrategicArea.setTakeable 2 1
aiStrategicArea.vehicleSearchRadius 0.4

aiStrategicArea.setActive 126
AIStrategicArea.setOrderPosition Infantry -81.9877/35/766.017
AIStrategicArea.setOrderPosition Vehicle -89.9995/35/766.038
aiStrategicArea.setSide 0
aiStrategicArea.setTakeable 1 1
aiStrategicArea.setTakeable 2 1
aiStrategicArea.vehicleSearchRadius 0.4

aiStrategicArea.setActive 127
AIStrategicArea.setOrderPosition Infantry 87.9988/35/766.04
AIStrategicArea.setOrderPosition Vehicle 80.0347/35/766.001
aiStrategicArea.setSide 0
aiStrategicArea.setTakeable 1 1
aiStrategicArea.setTakeable 2 1
aiStrategicArea.vehicleSearchRadius 0.4

aiStrategicArea.setActive 128
AIStrategicArea.setOrderPosition Infantry 258.02/35/766.009
AIStrategicArea.setOrderPosition Vehicle 249.999/35/765.988
aiStrategicArea.setSide 0
aiStrategicArea.setTakeable 1 1
aiStrategicArea.setTakeable 2 1
aiStrategicArea.vehicleSearchRadius 0.4

aiStrategicArea.setActive 129
AIStrategicArea.setOrderPosition Infantry 428.032/35/765.995
AIStrategicArea.setOrderPosition Vehicle 420.026/35/765.989
aiStrategicArea.setSide 0
aiStrategicArea.setTakeable 1 1
aiStrategicArea.setTakeable 2 1
aiStrategicArea.vehicleSearchRadius 0.4

aiStrategicArea.setActive 13
AIStrategicArea.setOrderPosition Infantry -928.494/35/-765.997
AIStrategicArea.setOrderPosition Vehicle -937.866/35/-765.573
aiStrategicArea.setSide 0
aiStrategicArea.setTakeable 1 1
aiStrategicArea.setTakeable 2 1
aiStrategicArea.vehicleSearchRadius 0.4

aiStrategicArea.setActive 130
AIStrategicArea.setOrderPosition Infantry 598.072/35/765.964
AIStrategicArea.setOrderPosition Vehicle 590.044/35/765.952
aiStrategicArea.setSide 0
aiStrategicArea.setTakeable 1 1
aiStrategicArea.setTakeable 2 1
aiStrategicArea.vehicleSearchRadius 0.4

aiStrategicArea.setActive 131
AIStrategicArea.setOrderPosition Infantry 768.024/35/765.951
AIStrategicArea.setOrderPosition Vehicle 760.036/35/765.95
aiStrategicArea.setSide 0
aiStrategicArea.setTakeable 1 1
aiStrategicArea.setTakeable 2 1
aiStrategicArea.vehicleSearchRadius 0.4

aiStrategicArea.setActive 132
AIStrategicArea.setOrderPosition Infantry 938.022/35/765.978
AIStrategicArea.setOrderPosition Vehicle 930.012/35/766.019
aiStrategicArea.setSide 0
aiStrategicArea.setTakeable 1 1
aiStrategicArea.setTakeable 2 1
aiStrategicArea.vehicleSearchRadius 0.4

aiStrategicArea.setActive 133
AIStrategicArea.setOrderPosition Infantry -929.98/35/936.009
AIStrategicArea.setOrderPosition Vehicle -937.964/35/935.974
aiStrategicArea.setSide 0
aiStrategicArea.setTakeable 1 1
aiStrategicArea.setTakeable 2 1
aiStrategicArea.vehicleSearchRadius 0.4

aiStrategicArea.setActive 134
AIStrategicArea.setOrderPosition Infantry -759.995/35/935.997
AIStrategicArea.setOrderPosition Vehicle -767.98/35/935.998
aiStrategicArea.setSide 0
aiStrategicArea.setTakeable 1 1
aiStrategicArea.setTakeable 2 1
aiStrategicArea.vehicleSearchRadius 0.4

aiStrategicArea.setActive 135
AIStrategicArea.setOrderPosition Infantry -589.98/35/935.994
AIStrategicArea.setOrderPosition Vehicle -598.014/35/936.007
aiStrategicArea.setSide 0
aiStrategicArea.setTakeable 1 1
aiStrategicArea.setTakeable 2 1
aiStrategicArea.vehicleSearchRadius 0.4

aiStrategicArea.setActive 136
AIStrategicArea.setOrderPosition Infantry -419.959/35/936.025
AIStrategicArea.setOrderPosition Vehicle -428.043/35/935.965
aiStrategicArea.setSide 0
aiStrategicArea.setTakeable 1 1
aiStrategicArea.setTakeable 2 1
aiStrategicArea.vehicleSearchRadius 0.4

aiStrategicArea.setActive 137
AIStrategicArea.setOrderPosition Infantry -250.014/35/936.007
AIStrategicArea.setOrderPosition Vehicle -258.013/35/935.99
aiStrategicArea.setSide 0
aiStrategicArea.setTakeable 1 1
aiStrategicArea.setTakeable 2 1
aiStrategicArea.vehicleSearchRadius 0.4

aiStrategicArea.setActive 138
AIStrategicArea.setOrderPosition Infantry -81.9958/35/936.014
AIStrategicArea.setOrderPosition Vehicle -89.9825/35/935.99
aiStrategicArea.setSide 0
aiStrategicArea.setTakeable 1 1
aiStrategicArea.setTakeable 2 1
aiStrategicArea.vehicleSearchRadius 0.4

aiStrategicArea.setActive 139
AIStrategicArea.setOrderPosition Infantry 88.0266/35/936.007
AIStrategicArea.setOrderPosition Vehicle 80.0261/35/936.008
aiStrategicArea.setSide 0
aiStrategicArea.setTakeable 1 1
aiStrategicArea.setTakeable 2 1
aiStrategicArea.vehicleSearchRadius 0.4

aiStrategicArea.setActive 14
AIStrategicArea.setOrderPosition Infantry -759.26/35/-768.01
AIStrategicArea.setOrderPosition Vehicle -769.574/35/-766.993
aiStrategicArea.setSide 0
aiStrategicArea.setTakeable 1 1
aiStrategicArea.setTakeable 2 1
aiStrategicArea.vehicleSearchRadius 0.4

aiStrategicArea.setActive 140
AIStrategicArea.setOrderPosition Infantry 258.037/35/936.064
AIStrategicArea.setOrderPosition Vehicle 250.047/35/936.035
aiStrategicArea.setSide 0
aiStrategicArea.setTakeable 1 1
aiStrategicArea.setTakeable 2 1
aiStrategicArea.vehicleSearchRadius 0.4

aiStrategicArea.setActive 141
AIStrategicArea.setOrderPosition Infantry 428.019/35/936.004
AIStrategicArea.setOrderPosition Vehicle 420.009/35/935.988
aiStrategicArea.setSide 0
aiStrategicArea.setTakeable 1 1
aiStrategicArea.setTakeable 2 1
aiStrategicArea.vehicleSearchRadius 0.4

aiStrategicArea.setActive 142
AIStrategicArea.setOrderPosition Infantry 598.034/35/936.004
AIStrategicArea.setOrderPosition Vehicle 590.038/35/936.001
aiStrategicArea.setSide 0
aiStrategicArea.setTakeable 1 1
aiStrategicArea.setTakeable 2 1
aiStrategicArea.vehicleSearchRadius 0.4

aiStrategicArea.setActive 143
AIStrategicArea.setOrderPosition Infantry 768.032/35/935.997
AIStrategicArea.setOrderPosition Vehicle 759.972/35/936.029
aiStrategicArea.setSide 0
aiStrategicArea.setTakeable 1 1
aiStrategicArea.setTakeable 2 1
aiStrategicArea.vehicleSearchRadius 0.4

aiStrategicArea.setActive 144
AIStrategicArea.setOrderPosition Infantry 938.029/35/935.995
AIStrategicArea.setOrderPosition Vehicle 930.013/35/936.015
aiStrategicArea.setSide 0
aiStrategicArea.setTakeable 1 1
aiStrategicArea.setTakeable 2 1
aiStrategicArea.vehicleSearchRadius 0.4

aiStrategicArea.setActive 15
AIStrategicArea.setOrderPosition Infantry -589.939/35/-765.651
AIStrategicArea.setOrderPosition Vehicle -597.464/35/-765.522
aiStrategicArea.setSide 0
aiStrategicArea.setTakeable 1 1
aiStrategicArea.setTakeable 2 1
aiStrategicArea.vehicleSearchRadius 0.4

aiStrategicArea.setActive 16
AIStrategicArea.setOrderPosition Infantry -417.464/35/-768.7
AIStrategicArea.setOrderPosition Vehicle -431.093/35/-768.337
aiStrategicArea.setSide 0
aiStrategicArea.setTakeable 1 1
aiStrategicArea.setTakeable 2 1
aiStrategicArea.vehicleSearchRadius 0.4

aiStrategicArea.setActive 17
AIStrategicArea.setOrderPosition Infantry -244.165/35/-769.984
AIStrategicArea.setOrderPosition Vehicle -263.354/35/-770.066
aiStrategicArea.setSide 0
aiStrategicArea.setTakeable 1 1
aiStrategicArea.setTakeable 2 1
aiStrategicArea.vehicleSearchRadius 0.4

aiStrategicArea.setActive 18
AIStrategicArea.setOrderPosition Infantry -81.8506/35/-763.984
AIStrategicArea.setOrderPosition Vehicle -89.9832/35/-764.089
aiStrategicArea.setSide 0
aiStrategicArea.setTakeable 1 1
aiStrategicArea.setTakeable 2 1
aiStrategicArea.vehicleSearchRadius 0.4

aiStrategicArea.setActive 19
AIStrategicArea.setOrderPosition Infantry 88.1926/35/-763.97
AIStrategicArea.setOrderPosition Vehicle 79.9803/35/-763.865
aiStrategicArea.setSide 0
aiStrategicArea.setTakeable 1 1
aiStrategicArea.setTakeable 2 1
aiStrategicArea.vehicleSearchRadius 0.4

aiStrategicArea.setActive 2
AIStrategicArea.setOrderPosition Infantry -761.696/35/-935.73
AIStrategicArea.setOrderPosition Vehicle -765.261/35/-934.893
aiStrategicArea.setSide 0
aiStrategicArea.setTakeable 1 1
aiStrategicArea.setTakeable 2 1
aiStrategicArea.vehicleSearchRadius 0.4

aiStrategicArea.setActive 20
AIStrategicArea.setOrderPosition Infantry 258.036/35/-764.013
AIStrategicArea.setOrderPosition Vehicle 249.998/35/-764.028
aiStrategicArea.setSide 0
aiStrategicArea.setTakeable 1 1
aiStrategicArea.setTakeable 2 1
aiStrategicArea.vehicleSearchRadius 0.4

aiStrategicArea.setActive 21
AIStrategicArea.setOrderPosition Infantry 428.064/35/-763.998
AIStrategicArea.setOrderPosition Vehicle 420.045/35/-764.088
aiStrategicArea.setSide 0
aiStrategicArea.setTakeable 1 1
aiStrategicArea.setTakeable 2 1
aiStrategicArea.vehicleSearchRadius 0.4

aiStrategicArea.setActive 22
AIStrategicArea.setOrderPosition Infantry 598.057/35/-764.045
AIStrategicArea.setOrderPosition Vehicle 590.04/35/-764.01
aiStrategicArea.setSide 0
aiStrategicArea.setTakeable 1 1
aiStrategicArea.setTakeable 2 1
aiStrategicArea.vehicleSearchRadius 0.4

aiStrategicArea.setActive 23
AIStrategicArea.setOrderPosition Infantry 768.05/35/-764.045
AIStrategicArea.setOrderPosition Vehicle 759.97/35/-764.04
aiStrategicArea.setSide 0
aiStrategicArea.setTakeable 1 1
aiStrategicArea.setTakeable 2 1
aiStrategicArea.vehicleSearchRadius 0.4

aiStrategicArea.setActive 24
AIStrategicArea.setOrderPosition Infantry 938.096/35/-763.994
AIStrategicArea.setOrderPosition Vehicle 930.187/35/-764.075
aiStrategicArea.setSide 0
aiStrategicArea.setTakeable 1 1
aiStrategicArea.setTakeable 2 1
aiStrategicArea.vehicleSearchRadius 0.4

aiStrategicArea.setActive 25
AIStrategicArea.setOrderPosition Infantry -929.958/35/-594.011
AIStrategicArea.setOrderPosition Vehicle -938.045/35/-594.016
aiStrategicArea.setSide 0
aiStrategicArea.setTakeable 1 1
aiStrategicArea.setTakeable 2 1
aiStrategicArea.vehicleSearchRadius 0.4

aiStrategicArea.setActive 26
AIStrategicArea.setOrderPosition Infantry -759.919/35/-594.044
AIStrategicArea.setOrderPosition Vehicle -767.994/35/-594.013
aiStrategicArea.setSide 0
aiStrategicArea.setTakeable 1 1
aiStrategicArea.setTakeable 2 1
aiStrategicArea.vehicleSearchRadius 0.4

aiStrategicArea.setActive 27
AIStrategicArea.setOrderPosition Infantry -589.927/35/-594.01
AIStrategicArea.setOrderPosition Vehicle -598.141/35/-594.025
aiStrategicArea.setSide 0
aiStrategicArea.setTakeable 1 1
aiStrategicArea.setTakeable 2 1
aiStrategicArea.vehicleSearchRadius 0.4

aiStrategicArea.setActive 28
AIStrategicArea.setOrderPosition Infantry -419.972/35/-594.09
AIStrategicArea.setOrderPosition Vehicle -428.005/35/-594.075
aiStrategicArea.setSide 0
aiStrategicArea.setTakeable 1 1
aiStrategicArea.setTakeable 2 1
aiStrategicArea.vehicleSearchRadius 0.4

aiStrategicArea.setActive 29
AIStrategicArea.setOrderPosition Infantry -251.966/35/-594.035
AIStrategicArea.setOrderPosition Vehicle -260.064/35/-594.091
aiStrategicArea.setSide 0
aiStrategicArea.setTakeable 1 1
aiStrategicArea.setTakeable 2 1
aiStrategicArea.vehicleSearchRadius 0.4

aiStrategicArea.setActive 3
AIStrategicArea.setOrderPosition Infantry -588.533/35/-937.21
AIStrategicArea.setOrderPosition Vehicle -598.997/35/-936.534
aiStrategicArea.setSide 0
aiStrategicArea.setTakeable 1 1
aiStrategicArea.setTakeable 2 1
aiStrategicArea.vehicleSearchRadius 0.4

aiStrategicArea.setActive 30
AIStrategicArea.setOrderPosition Infantry -81.9293/35/-594.067
AIStrategicArea.setOrderPosition Vehicle -90.0386/35/-594.093
aiStrategicArea.setSide 0
aiStrategicArea.setTakeable 1 1
aiStrategicArea.setTakeable 2 1
aiStrategicArea.vehicleSearchRadius 0.4

aiStrategicArea.setActive 31
AIStrategicArea.setOrderPosition Infantry 88.0222/35/-593.998
AIStrategicArea.setOrderPosition Vehicle 80.0084/35/-594.015
aiStrategicArea.setSide 0
aiStrategicArea.setTakeable 1 1
aiStrategicArea.setTakeable 2 1
aiStrategicArea.vehicleSearchRadius 0.4

aiStrategicArea.setActive 32
AIStrategicArea.setOrderPosition Infantry 258.093/35/-594.015
AIStrategicArea.setOrderPosition Vehicle 250.048/35/-594.084
aiStrategicArea.setSide 0
aiStrategicArea.setTakeable 1 1
aiStrategicArea.setTakeable 2 1
aiStrategicArea.vehicleSearchRadius 0.4

aiStrategicArea.setActive 33
AIStrategicArea.setOrderPosition Infantry 428.03/35/-594.018
AIStrategicArea.setOrderPosition Vehicle 419.984/35/-593.994
aiStrategicArea.setSide 0
aiStrategicArea.setTakeable 1 1
aiStrategicArea.setTakeable 2 1
aiStrategicArea.vehicleSearchRadius 0.4

aiStrategicArea.setActive 34
AIStrategicArea.setOrderPosition Infantry 598.083/35/-594.085
AIStrategicArea.setOrderPosition Vehicle 589.964/35/-594.089
aiStrategicArea.setSide 0
aiStrategicArea.setTakeable 1 1
aiStrategicArea.setTakeable 2 1
aiStrategicArea.vehicleSearchRadius 0.4

aiStrategicArea.setActive 35
AIStrategicArea.setOrderPosition Infantry 768.03/35/-594.008
AIStrategicArea.setOrderPosition Vehicle 760/35/-594.001
aiStrategicArea.setSide 0
aiStrategicArea.setTakeable 1 1
aiStrategicArea.setTakeable 2 1
aiStrategicArea.vehicleSearchRadius 0.4

aiStrategicArea.setActive 36
AIStrategicArea.setOrderPosition Infantry 938.013/35/-594.034
AIStrategicArea.setOrderPosition Vehicle 930.196/35/-594.131
aiStrategicArea.setSide 0
aiStrategicArea.setTakeable 1 1
aiStrategicArea.setTakeable 2 1
aiStrategicArea.vehicleSearchRadius 0.4

aiStrategicArea.setActive 37
AIStrategicArea.setOrderPosition Infantry -930.009/35/-424.015
AIStrategicArea.setOrderPosition Vehicle -938.061/35/-424.039
aiStrategicArea.setSide 0
aiStrategicArea.setTakeable 1 1
aiStrategicArea.setTakeable 2 1
aiStrategicArea.vehicleSearchRadius 0.4

aiStrategicArea.setActive 38
AIStrategicArea.setOrderPosition Infantry -759.962/35/-424.078
AIStrategicArea.setOrderPosition Vehicle -768.015/35/-424.089
aiStrategicArea.setSide 0
aiStrategicArea.setTakeable 1 1
aiStrategicArea.setTakeable 2 1
aiStrategicArea.vehicleSearchRadius 0.4

aiStrategicArea.setActive 39
AIStrategicArea.setOrderPosition Infantry -589.992/35/-423.993
AIStrategicArea.setOrderPosition Vehicle -597.995/35/-424.023
aiStrategicArea.setSide 0
aiStrategicArea.setTakeable 1 1
aiStrategicArea.setTakeable 2 1
aiStrategicArea.vehicleSearchRadius 0.4

aiStrategicArea.setActive 4
AIStrategicArea.setOrderPosition Infantry -420.255/35/-940.52
AIStrategicArea.setOrderPosition Vehicle -427.308/35/-940.516
aiStrategicArea.setSide 0
aiStrategicArea.setTakeable 1 1
aiStrategicArea.setTakeable 2 1
aiStrategicArea.vehicleSearchRadius 0.4

aiStrategicArea.setActive 40
AIStrategicArea.setOrderPosition Infantry -421.943/35/-423.997
AIStrategicArea.setOrderPosition Vehicle -430.026/35/-423.98
aiStrategicArea.setSide 0
aiStrategicArea.setTakeable 1 1
aiStrategicArea.setTakeable 2 1
aiStrategicArea.vehicleSearchRadius 0.4

aiStrategicArea.setActive 41
AIStrategicArea.setOrderPosition Infantry -251.968/35/-424.016
AIStrategicArea.setOrderPosition Vehicle -260.03/35/-424.008
aiStrategicArea.setSide 0
aiStrategicArea.setTakeable 1 1
aiStrategicArea.setTakeable 2 1
aiStrategicArea.vehicleSearchRadius 0.4

aiStrategicArea.setActive 42
AIStrategicArea.setOrderPosition Infantry -81.908/35/-424.076
AIStrategicArea.setOrderPosition Vehicle -90.1356/35/-424.018
aiStrategicArea.setSide 0
aiStrategicArea.setTakeable 1 1
aiStrategicArea.setTakeable 2 1
aiStrategicArea.vehicleSearchRadius 0.4

aiStrategicArea.setActive 43
AIStrategicArea.setOrderPosition Infantry 87.9965/35/-424.013
AIStrategicArea.setOrderPosition Vehicle 80.0721/35/-424.133
aiStrategicArea.setSide 0
aiStrategicArea.setTakeable 1 1
aiStrategicArea.setTakeable 2 1
aiStrategicArea.vehicleSearchRadius 0.4

aiStrategicArea.setActive 44
AIStrategicArea.setOrderPosition Infantry 258.029/35/-424.035
AIStrategicArea.setOrderPosition Vehicle 250.01/35/-424.04
aiStrategicArea.setSide 0
aiStrategicArea.setTakeable 1 1
aiStrategicArea.setTakeable 2 1
aiStrategicArea.vehicleSearchRadius 0.4

aiStrategicArea.setActive 45
AIStrategicArea.setOrderPosition Infantry 428.043/35/-424
AIStrategicArea.setOrderPosition Vehicle 419.985/35/-424.016
aiStrategicArea.setSide 0
aiStrategicArea.setTakeable 1 1
aiStrategicArea.setTakeable 2 1
aiStrategicArea.vehicleSearchRadius 0.4

aiStrategicArea.setActive 46
AIStrategicArea.setOrderPosition Infantry 598.033/35/-423.997
AIStrategicArea.setOrderPosition Vehicle 589.964/35/-424.021
aiStrategicArea.setSide 0
aiStrategicArea.setTakeable 1 1
aiStrategicArea.setTakeable 2 1
aiStrategicArea.vehicleSearchRadius 0.4

aiStrategicArea.setActive 47
AIStrategicArea.setOrderPosition Infantry 768.031/35/-424.026
AIStrategicArea.setOrderPosition Vehicle 760.014/35/-424.028
aiStrategicArea.setSide 0
aiStrategicArea.setTakeable 1 1
aiStrategicArea.setTakeable 2 1
aiStrategicArea.vehicleSearchRadius 0.4

aiStrategicArea.setActive 48
AIStrategicArea.setOrderPosition Infantry 938.03/35/-424.018
AIStrategicArea.setOrderPosition Vehicle 930.015/35/-423.996
aiStrategicArea.setSide 0
aiStrategicArea.setTakeable 1 1
aiStrategicArea.setTakeable 2 1
aiStrategicArea.vehicleSearchRadius 0.4

aiStrategicArea.setActive 49
AIStrategicArea.setOrderPosition Infantry -929.967/35/-254.033
AIStrategicArea.setOrderPosition Vehicle -937.99/35/-254.032
aiStrategicArea.setSide 0
aiStrategicArea.setTakeable 1 1
aiStrategicArea.setTakeable 2 1
aiStrategicArea.vehicleSearchRadius 0.4

aiStrategicArea.setActive 5
AIStrategicArea.setOrderPosition Infantry -248.641/35/-943.106
AIStrategicArea.setOrderPosition Vehicle -259.792/35/-943.153
aiStrategicArea.setSide 0
aiStrategicArea.setTakeable 1 1
aiStrategicArea.setTakeable 2 1
aiStrategicArea.vehicleSearchRadius 0.4

aiStrategicArea.setActive 50
AIStrategicArea.setOrderPosition Infantry -759.981/35/-254.007
AIStrategicArea.setOrderPosition Vehicle -767.995/35/-254.018
aiStrategicArea.setSide 0
aiStrategicArea.setTakeable 1 1
aiStrategicArea.setTakeable 2 1
aiStrategicArea.vehicleSearchRadius 0.4

aiStrategicArea.setActive 51
AIStrategicArea.setOrderPosition Infantry -589.947/35/-253.984
AIStrategicArea.setOrderPosition Vehicle -598.013/35/-254.01
aiStrategicArea.setSide 0
aiStrategicArea.setTakeable 1 1
aiStrategicArea.setTakeable 2 1
aiStrategicArea.vehicleSearchRadius 0.4

aiStrategicArea.setActive 52
AIStrategicArea.setOrderPosition Infantry -420.061/35/-254.025
AIStrategicArea.setOrderPosition Vehicle -427.967/35/-254.024
aiStrategicArea.setSide 0
aiStrategicArea.setTakeable 1 1
aiStrategicArea.setTakeable 2 1
aiStrategicArea.vehicleSearchRadius 0.4

aiStrategicArea.setActive 53
AIStrategicArea.setOrderPosition Infantry -251.988/35/-254.018
AIStrategicArea.setOrderPosition Vehicle -260.019/35/-253.998
aiStrategicArea.setSide 0
aiStrategicArea.setTakeable 1 1
aiStrategicArea.setTakeable 2 1
aiStrategicArea.vehicleSearchRadius 0.4

aiStrategicArea.setActive 54
AIStrategicArea.setOrderPosition Infantry -81.9733/35/-254.037
AIStrategicArea.setOrderPosition Vehicle -89.9825/35/-254.005
aiStrategicArea.setSide 0
aiStrategicArea.setTakeable 1 1
aiStrategicArea.setTakeable 2 1
aiStrategicArea.vehicleSearchRadius 0.4

aiStrategicArea.setActive 55
AIStrategicArea.setOrderPosition Infantry 88.0145/35/-254.01
AIStrategicArea.setOrderPosition Vehicle 80.0101/35/-254.014
aiStrategicArea.setSide 0
aiStrategicArea.setTakeable 1 1
aiStrategicArea.setTakeable 2 1
aiStrategicArea.vehicleSearchRadius 0.4

aiStrategicArea.setActive 56
AIStrategicArea.setOrderPosition Infantry 258.014/35/-254.037
AIStrategicArea.setOrderPosition Vehicle 249.962/35/-254.022
aiStrategicArea.setSide 0
aiStrategicArea.setTakeable 1 1
aiStrategicArea.setTakeable 2 1
aiStrategicArea.vehicleSearchRadius 0.4

aiStrategicArea.setActive 57
AIStrategicArea.setOrderPosition Infantry 428.018/35/-254.004
AIStrategicArea.setOrderPosition Vehicle 420.001/35/-254.024
aiStrategicArea.setSide 0
aiStrategicArea.setTakeable 1 1
aiStrategicArea.setTakeable 2 1
aiStrategicArea.vehicleSearchRadius 0.4

aiStrategicArea.setActive 58
AIStrategicArea.setOrderPosition Infantry 598.026/35/-253.99
AIStrategicArea.setOrderPosition Vehicle 590.003/35/-254.022
aiStrategicArea.setSide 0
aiStrategicArea.setTakeable 1 1
aiStrategicArea.setTakeable 2 1
aiStrategicArea.vehicleSearchRadius 0.4

aiStrategicArea.setActive 59
AIStrategicArea.setOrderPosition Infantry 768.021/35/-254.011
AIStrategicArea.setOrderPosition Vehicle 760.019/35/-254.016
aiStrategicArea.setSide 0
aiStrategicArea.setTakeable 1 1
aiStrategicArea.setTakeable 2 1
aiStrategicArea.vehicleSearchRadius 0.4

aiStrategicArea.setActive 6
AIStrategicArea.setOrderPosition Infantry -80.5629/35/-936.821
AIStrategicArea.setOrderPosition Vehicle -85.8587/35/-938.901
aiStrategicArea.setSide 0
aiStrategicArea.setTakeable 1 1
aiStrategicArea.setTakeable 2 1
aiStrategicArea.vehicleSearchRadius 0.4

aiStrategicArea.setActive 60
AIStrategicArea.setOrderPosition Infantry 938.018/35/-254.021
AIStrategicArea.setOrderPosition Vehicle 930.045/35/-254.048
aiStrategicArea.setSide 0
aiStrategicArea.setTakeable 1 1
aiStrategicArea.setTakeable 2 1
aiStrategicArea.vehicleSearchRadius 0.4

aiStrategicArea.setActive 61
AIStrategicArea.setOrderPosition Infantry -929.993/35/-83.9982
AIStrategicArea.setOrderPosition Vehicle -937.998/35/-84.0037
aiStrategicArea.setSide 0
aiStrategicArea.setTakeable 1 1
aiStrategicArea.setTakeable 2 1
aiStrategicArea.vehicleSearchRadius 0.4

aiStrategicArea.setActive 62
AIStrategicArea.setOrderPosition Infantry -759.963/35/-84.0248
AIStrategicArea.setOrderPosition Vehicle -767.971/35/-84.0168
aiStrategicArea.setSide 0
aiStrategicArea.setTakeable 1 1
aiStrategicArea.setTakeable 2 1
aiStrategicArea.vehicleSearchRadius 0.4

aiStrategicArea.setActive 63
AIStrategicArea.setOrderPosition Infantry -589.994/35/-84.0317
AIStrategicArea.setOrderPosition Vehicle -598.006/35/-84.0103
aiStrategicArea.setSide 0
aiStrategicArea.setTakeable 1 1
aiStrategicArea.setTakeable 2 1
aiStrategicArea.vehicleSearchRadius 0.4

aiStrategicArea.setActive 64
AIStrategicArea.setOrderPosition Infantry -419.986/35/-84.0042
AIStrategicArea.setOrderPosition Vehicle -427.994/35/-84.0021
aiStrategicArea.setSide 0
aiStrategicArea.setTakeable 1 1
aiStrategicArea.setTakeable 2 1
aiStrategicArea.vehicleSearchRadius 0.4

aiStrategicArea.setActive 65
AIStrategicArea.setOrderPosition Infantry -249.986/35/-84.0069
AIStrategicArea.setOrderPosition Vehicle -257.99/35/-84.0051
aiStrategicArea.setSide 0
aiStrategicArea.setTakeable 1 1
aiStrategicArea.setTakeable 2 1
aiStrategicArea.vehicleSearchRadius 0.4

aiStrategicArea.setActive 66
AIStrategicArea.setOrderPosition Infantry -81.9915/35/-83.9739
AIStrategicArea.setOrderPosition Vehicle -90.0094/35/-84.0193
aiStrategicArea.setSide 0
aiStrategicArea.setTakeable 1 1
aiStrategicArea.setTakeable 2 1
aiStrategicArea.vehicleSearchRadius 0.4

aiStrategicArea.setActive 67
AIStrategicArea.setOrderPosition Infantry 88.0079/35/-84.0001
AIStrategicArea.setOrderPosition Vehicle 80.0177/35/-84.0056
aiStrategicArea.setSide 0
aiStrategicArea.setTakeable 1 1
aiStrategicArea.setTakeable 2 1
aiStrategicArea.vehicleSearchRadius 0.4

aiStrategicArea.setActive 68
AIStrategicArea.setOrderPosition Infantry 258.009/35/-83.9991
AIStrategicArea.setOrderPosition Vehicle 249.985/35/-83.9967
aiStrategicArea.setSide 0
aiStrategicArea.setTakeable 1 1
aiStrategicArea.setTakeable 2 1
aiStrategicArea.vehicleSearchRadius 0.4

aiStrategicArea.setActive 69
AIStrategicArea.setOrderPosition Infantry 428.038/35/-84.0072
AIStrategicArea.setOrderPosition Vehicle 420.047/35/-84.0204
aiStrategicArea.setSide 0
aiStrategicArea.setTakeable 1 1
aiStrategicArea.setTakeable 2 1
aiStrategicArea.vehicleSearchRadius 0.4

aiStrategicArea.setActive 7
AIStrategicArea.setOrderPosition Infantry 86.1765/35/-934.045
AIStrategicArea.setOrderPosition Vehicle 82.0851/35/-933.918
aiStrategicArea.setSide 0
aiStrategicArea.setTakeable 1 1
aiStrategicArea.setTakeable 2 1
aiStrategicArea.vehicleSearchRadius 0.4

aiStrategicArea.setActive 70
AIStrategicArea.setOrderPosition Infantry 598.032/35/-83.9974
AIStrategicArea.setOrderPosition Vehicle 590.017/35/-84.0228
aiStrategicArea.setSide 0
aiStrategicArea.setTakeable 1 1
aiStrategicArea.setTakeable 2 1
aiStrategicArea.vehicleSearchRadius 0.4

aiStrategicArea.setActive 71
AIStrategicArea.setOrderPosition Infantry 768.032/35/-84.0175
AIStrategicArea.setOrderPosition Vehicle 760.036/35/-84.0299
aiStrategicArea.setSide 0
aiStrategicArea.setTakeable 1 1
aiStrategicArea.setTakeable 2 1
aiStrategicArea.vehicleSearchRadius 0.4

aiStrategicArea.setActive 72
AIStrategicArea.setOrderPosition Infantry 938.03/35/-84.0281
AIStrategicArea.setOrderPosition Vehicle 930.039/35/-83.9782
aiStrategicArea.setSide 0
aiStrategicArea.setTakeable 1 1
aiStrategicArea.setTakeable 2 1
aiStrategicArea.vehicleSearchRadius 0.4

aiStrategicArea.setActive 73
AIStrategicArea.setOrderPosition Infantry -929.964/35/85.974
AIStrategicArea.setOrderPosition Vehicle -937.981/35/85.9904
aiStrategicArea.setSide 0
aiStrategicArea.setTakeable 1 1
aiStrategicArea.setTakeable 2 1
aiStrategicArea.vehicleSearchRadius 0.4

aiStrategicArea.setActive 74
AIStrategicArea.setOrderPosition Infantry -760.007/35/85.9852
AIStrategicArea.setOrderPosition Vehicle -767.998/35/85.9884
aiStrategicArea.setSide 0
aiStrategicArea.setTakeable 1 1
aiStrategicArea.setTakeable 2 1
aiStrategicArea.vehicleSearchRadius 0.4

aiStrategicArea.setActive 75
AIStrategicArea.setOrderPosition Infantry -590.049/35/85.9741
AIStrategicArea.setOrderPosition Vehicle -597.969/35/85.9409
aiStrategicArea.setSide 0
aiStrategicArea.setTakeable 1 1
aiStrategicArea.setTakeable 2 1
aiStrategicArea.vehicleSearchRadius 0.4

aiStrategicArea.setActive 76
AIStrategicArea.setOrderPosition Infantry -419.988/35/85.9615
AIStrategicArea.setOrderPosition Vehicle -427.983/35/86.0072
aiStrategicArea.setSide 0
aiStrategicArea.setTakeable 1 1
aiStrategicArea.setTakeable 2 1
aiStrategicArea.vehicleSearchRadius 0.4

aiStrategicArea.setActive 77
AIStrategicArea.setOrderPosition Infantry -251.98/35/85.9941
AIStrategicArea.setOrderPosition Vehicle -260.014/35/85.9596
aiStrategicArea.setSide 0
aiStrategicArea.setTakeable 1 1
aiStrategicArea.setTakeable 2 1
aiStrategicArea.vehicleSearchRadius 0.4

aiStrategicArea.setActive 78
AIStrategicArea.setOrderPosition Infantry -81.9713/35/85.9808
AIStrategicArea.setOrderPosition Vehicle -89.9855/35/85.9985
aiStrategicArea.setSide 0
aiStrategicArea.setTakeable 1 1
aiStrategicArea.setTakeable 2 1
aiStrategicArea.vehicleSearchRadius 0.4

aiStrategicArea.setActive 79
AIStrategicArea.setOrderPosition Infantry 88.0331/35/86.0081
AIStrategicArea.setOrderPosition Vehicle 80.0197/35/85.9966
aiStrategicArea.setSide 0
aiStrategicArea.setTakeable 1 1
aiStrategicArea.setTakeable 2 1
aiStrategicArea.vehicleSearchRadius 0.4

aiStrategicArea.setActive 8
AIStrategicArea.setOrderPosition Infantry 256.126/35/-934.443
AIStrategicArea.setOrderPosition Vehicle 253.225/35/-934.479
aiStrategicArea.setSide 0
aiStrategicArea.setTakeable 1 1
aiStrategicArea.setTakeable 2 1
aiStrategicArea.vehicleSearchRadius 0.4

aiStrategicArea.setActive 80
AIStrategicArea.setOrderPosition Infantry 258.03/35/85.9695
AIStrategicArea.setOrderPosition Vehicle 250.003/35/85.967
aiStrategicArea.setSide 0
aiStrategicArea.setTakeable 1 1
aiStrategicArea.setTakeable 2 1
aiStrategicArea.vehicleSearchRadius 0.4

aiStrategicArea.setActive 81
AIStrategicArea.setOrderPosition Infantry 428.037/35/85.9886
AIStrategicArea.setOrderPosition Vehicle 420.016/35/85.9839
aiStrategicArea.setSide 0
aiStrategicArea.setTakeable 1 1
aiStrategicArea.setTakeable 2 1
aiStrategicArea.vehicleSearchRadius 0.4

aiStrategicArea.setActive 82
AIStrategicArea.setOrderPosition Infantry 598.063/35/85.9854
AIStrategicArea.setOrderPosition Vehicle 589.981/35/86.0029
aiStrategicArea.setSide 0
aiStrategicArea.setTakeable 1 1
aiStrategicArea.setTakeable 2 1
aiStrategicArea.vehicleSearchRadius 0.4

aiStrategicArea.setActive 83
AIStrategicArea.setOrderPosition Infantry 768.001/35/85.9817
AIStrategicArea.setOrderPosition Vehicle 760.003/35/85.9844
aiStrategicArea.setSide 0
aiStrategicArea.setTakeable 1 1
aiStrategicArea.setTakeable 2 1
aiStrategicArea.vehicleSearchRadius 0.4

aiStrategicArea.setActive 84
AIStrategicArea.setOrderPosition Infantry 937.998/35/85.9949
AIStrategicArea.setOrderPosition Vehicle 929.996/35/86.016
aiStrategicArea.setSide 0
aiStrategicArea.setTakeable 1 1
aiStrategicArea.setTakeable 2 1
aiStrategicArea.vehicleSearchRadius 0.4

aiStrategicArea.setActive 85
AIStrategicArea.setOrderPosition Infantry -929.936/35/255.961
AIStrategicArea.setOrderPosition Vehicle -937.952/35/255.947
aiStrategicArea.setSide 0
aiStrategicArea.setTakeable 1 1
aiStrategicArea.setTakeable 2 1
aiStrategicArea.vehicleSearchRadius 0.4

aiStrategicArea.setActive 86
AIStrategicArea.setOrderPosition Infantry -759.967/35/256.01
AIStrategicArea.setOrderPosition Vehicle -767.986/35/255.949
aiStrategicArea.setSide 0
aiStrategicArea.setTakeable 1 1
aiStrategicArea.setTakeable 2 1
aiStrategicArea.vehicleSearchRadius 0.4

aiStrategicArea.setActive 87
AIStrategicArea.setOrderPosition Infantry -590.014/35/256.028
AIStrategicArea.setOrderPosition Vehicle -9.9989/0/-10.0051
aiStrategicArea.setSide 0
aiStrategicArea.setTakeable 1 1
aiStrategicArea.setTakeable 2 1
aiStrategicArea.vehicleSearchRadius 0.4

aiStrategicArea.setActive 88
AIStrategicArea.setOrderPosition Infantry -421.96/35/255.988
AIStrategicArea.setOrderPosition Vehicle -429.981/35/255.993
aiStrategicArea.setSide 0
aiStrategicArea.setTakeable 1 1
aiStrategicArea.setTakeable 2 1
aiStrategicArea.vehicleSearchRadius 0.4

aiStrategicArea.setActive 89
AIStrategicArea.setOrderPosition Infantry -252.016/35/255.981
AIStrategicArea.setOrderPosition Vehicle -260.045/35/256.014
aiStrategicArea.setSide 0
aiStrategicArea.setTakeable 1 1
aiStrategicArea.setTakeable 2 1
aiStrategicArea.vehicleSearchRadius 0.4

aiStrategicArea.setActive 9
AIStrategicArea.setOrderPosition Infantry 429.758/35/-936.22
AIStrategicArea.setOrderPosition Vehicle 421.075/35/-934.749
aiStrategicArea.setSide 0
aiStrategicArea.setTakeable 1 1
aiStrategicArea.setTakeable 2 1
aiStrategicArea.vehicleSearchRadius 0.4

aiStrategicArea.setActive 90
AIStrategicArea.setOrderPosition Infantry -81.9817/35/255.995
AIStrategicArea.setOrderPosition Vehicle -89.9777/35/255.971
aiStrategicArea.setSide 0
aiStrategicArea.setTakeable 1 1
aiStrategicArea.setTakeable 2 1
aiStrategicArea.vehicleSearchRadius 0.4

aiStrategicArea.setActive 91
AIStrategicArea.setOrderPosition Infantry 88.052/35/255.968
AIStrategicArea.setOrderPosition Vehicle 80.0042/35/255.991
aiStrategicArea.setSide 0
aiStrategicArea.setTakeable 1 1
aiStrategicArea.setTakeable 2 1
aiStrategicArea.vehicleSearchRadius 0.4

aiStrategicArea.setActive 92
AIStrategicArea.setOrderPosition Infantry 258.027/35/255.98
AIStrategicArea.setOrderPosition Vehicle 249.99/35/255.965
aiStrategicArea.setSide 0
aiStrategicArea.setTakeable 1 1
aiStrategicArea.setTakeable 2 1
aiStrategicArea.vehicleSearchRadius 0.4

aiStrategicArea.setActive 93
AIStrategicArea.setOrderPosition Infantry 428.045/35/255.993
AIStrategicArea.setOrderPosition Vehicle 420.032/35/255.949
aiStrategicArea.setSide 0
aiStrategicArea.setTakeable 1 1
aiStrategicArea.setTakeable 2 1
aiStrategicArea.vehicleSearchRadius 0.4

aiStrategicArea.setActive 94
AIStrategicArea.setOrderPosition Infantry 597.982/35/255.971
AIStrategicArea.setOrderPosition Vehicle 590.048/35/255.973
aiStrategicArea.setSide 0
aiStrategicArea.setTakeable 1 1
aiStrategicArea.setTakeable 2 1
aiStrategicArea.vehicleSearchRadius 0.4

aiStrategicArea.setActive 95
AIStrategicArea.setOrderPosition Infantry 768.018/35/255.999
AIStrategicArea.setOrderPosition Vehicle 760.027/35/255.994
aiStrategicArea.setSide 0
aiStrategicArea.setTakeable 1 1
aiStrategicArea.setTakeable 2 1
aiStrategicArea.vehicleSearchRadius 0.4

aiStrategicArea.setActive 96
AIStrategicArea.setOrderPosition Infantry 938.021/35/256.021
AIStrategicArea.setOrderPosition Vehicle 930.019/35/255.979
aiStrategicArea.setSide 0
aiStrategicArea.setTakeable 1 1
aiStrategicArea.setTakeable 2 1
aiStrategicArea.vehicleSearchRadius 0.4

aiStrategicArea.setActive 97
AIStrategicArea.setOrderPosition Infantry -929.984/35/425.988
AIStrategicArea.setOrderPosition Vehicle -937.992/35/425.978
aiStrategicArea.setSide 0
aiStrategicArea.setTakeable 1 1
aiStrategicArea.setTakeable 2 1
aiStrategicArea.vehicleSearchRadius 0.4

aiStrategicArea.setActive 98
AIStrategicArea.setOrderPosition Infantry -759.952/35/426.002
AIStrategicArea.setOrderPosition Vehicle -767.967/35/425.976
aiStrategicArea.setSide 0
aiStrategicArea.setTakeable 1 1
aiStrategicArea.setTakeable 2 1
aiStrategicArea.vehicleSearchRadius 0.4

aiStrategicArea.setActive 99
AIStrategicArea.setOrderPosition Infantry -591.973/35/425.975
AIStrategicArea.setOrderPosition Vehicle -600/35/425.992
aiStrategicArea.setSide 0
aiStrategicArea.setTakeable 1 1
aiStrategicArea.setTakeable 2 1
aiStrategicArea.vehicleSearchRadius 0.4
This is a generic StrategicAreas template for 2K maps for the coop insurgency gamemode. Totally 144 (12x12) StrategicAreas. It can be used for all 2k maps.
The purpose of this is to not do it for each 2k map seperate.
The codelines must be added manually into the StrategicAreas.ai file :
aiStrategicArea.setTakeable 1 X (Team 1 / 0 = not takeable or 1 = takeable)
aiStrategicArea.setTakeable 2 X (Team 2 / 0 = not takeable or 1 = takeable)

Grozny
or

Kafr Halab
.... and all other 2k maps

- 8
-

- 8
entries - 11
comments - 8999
views
Recent Entries
Hey guys, it's been a long time no see around.
Finally i had encourage myself to write down some military things again, quite a challenge to be honest. I've been busy most of my time, but now i have time and hopefully this not going to be the last.
Today we'll be talking about the KTO Rosomak, the Polish 8x8 wheeled armored personnel carrier for Polish Land Forces that also appear in Project Reality for Polish faction. Let's get into it!


- What is KTO Rosomak? Why did it exist?
The KTO Rosomak (Kołowy Transporter Opancerzony Rosomak or in Polish lit. wheeled armored personnel carrier Wolverine) is an 8×8 multi-role military vehicle produced by Rosomak S.A. (formerly Wojskowe Zakłady Mechaniczne) in Siemianowice Śląskie (Upper Silesia), a Polish Armaments Group company. The vehicle is a licensed variant of Patria's armored modular vehicle. The vehicle were produced in many versions and successively modified in Poland based on the licensed base version of the Patria AMV XC-360P vehicle, designed by the Finnish company Patria. It is in service with the Polish Armed Forces. In the basic version, it is armed with a 30mm autocannon in the OTO-Melara HITFIST turret.

Base vehicle without the turret installed, note on how flat the upper part of the vehicle and missing smoke dischargers.
- History of the vehicle, what's the APC made for?
Designed to meet Polish criteria, including the buoyancy requirement, by the Finnish company Patria Vehicles, under the name Patria AMV (Armored Modular Vehicle). In December 2002, the construction was selected by Poland in a tender for wheeled armored personnel carriers. It was assumed that the basic version would be armed with an automatic cannon, being in fact an infantry fighting vehicle according to international agreements. The new APC were to replace the obsolete Czech OT-64 SKOT APC's and partially the BWP-1 IFV currently in service with the Polish Land Forces. The name "Rosomak" or "Wolverine" was chosen in a competition organized by the monthly magazine, Nowa Technika Wojskowa.


The old but gold, Polish OT-64 SKOT armored personnel carrier and BWP-1 infantry fighting vehicle.
In December 2002, the Polish Ministry of National Defense signed a contract to buy 690 Patria AMV vehicles, to be manufactured in Poland. The main competitors of the AMV were the MOWAG Piranha and Steyr Pandur. As part of the initial order, 690 vehicles were to be delivered in two basic variants: 313 combat IFVs and 377 transport-special base vehicles. In October 2013 the order increased to 997 for delivery between 2014 and 2019.


The competitors of Polish APC program, from left to right: Patria AMV from Finland (winner), MOWAG Piranha IV/V from Switzerland and Steyr Pandur II from Austria.
The contract for the supply of KTO Rosomak (a variant of the AMV XC-360P) in the years 2004-2013 was signed on April 15, 2003. 600 of the 690 ordered vehicles were produced in Wojskowe Zakłady Mechaniczne in Siemianowice Śląskie. The Ministry of National Defense was to pay almost 5 billion PLN (new Zloty, Polish monetary unit) for the delivery of 690 Rosomak armored personnel carriers in the years 2005–2012. This amount included the cost of 313 OTO-Melara HITFIST-30P (30 mm) turrets from Italy, for 308 million USD (including 241 ones that are license-produced in Poland). The actual cost turned out to be higher due to unplanned armor reinforcement and other modifications necessary mainly for Polish military contingents. The value of the HITFIST-30P turret supplied by Bumar is 53% of the value of the vehicle, and the price of a single vehicle was approximately 10 million PLN.

Patria AMV XC-360, tested in a field. Soon it renamed into XC-360P for Polish Armed Forces adoption and earned the nickname "Rosomak" or "Wolverine".
Note the Remote Weapon System mounted on top, could be what we would saw of cancelled Rosomak-1 with RWS module.
By the decision of the Chief of the General Staff of the Polish Armed Forces of December 31, 2004, the vehicle was accepted for armament. The first KTO Rosomak, made in 2004, were handed over to the Army on January 8, 2005 (three in the combat version with the HITFIST-30P turret and 6 basic without armament). In addition to these, in 2005, 82 Rosomaks were delivered to the Army, including 42 base chassis, and in 2006, 39 vehicles (only base chassis). The model became copy No. 41, on which minor corrections required by the Army were introduced. Ultimately, on the basis of the first contract, the Army received a total of 570 vehicles, including 359 in the IFV version.
The initial plans assumed the order of 690 vehicles, including:
- 313 Rosomak armored personnel carriers with a HITFIST-30P turret (for Infantry Fighting Vehicle or IFV role)
- 125 Rosomak-1 armored personnel carriers with a machine gun (possibly with mounted UKM, NSW, WKM-B in NATO 50 Cal. or automatic grenade launchers, such as Mk. 19 etc.)
- 78 command vehicles
- 41 medical evacuation vehicles
- 34 technical assistance vehicles
- 32 reconnaissance vehicles (6×6)
- 23 artillery vehicles
- 22 engineering vehicles
- 17 chemical reconnaissance vehicles
- 5 engineering reconnaissance vehicles


KTO Rosomak and Rosomak-1 APC's. Although Rosomak-1 didn't enter service in the Army, the successor Rosomak-M2 and M3 did enter, deployed and serve in Afghanistan.
At the same time, the Rosomak-1 APC and specialized versions were to be armed with a remotely controlled module with a 12.7 mm machine gun (249 vehicles in total), while 89 out of 313 HITFIST-30P turrets were to be integrated with Spike-LR anti-tank missile launchers. For a long time, other versions were not yet ready and the only variant actually produced was the Rosomak IFV with the HITFIST-30P turret and unarmed base chassis, mostly stored and awaiting selection of armament and equipment.
QuoteHowever, in mid-2007, decisions were made to change the number and types of ordered vehicles. First of all, the Rosomak-1 APC was abandoned, as well as the remotely controlled module with a machine gun for the other versions. Instead, it was planned to order 159 more vehicles with the HITFIST-30P turret with Spike-LR anti-tank missile launchers. The order for the HITFIST-30P turrets integrated by the Italian side with the Spike-LR launchers, however, ultimately did not take place due to the high cost and vehicles were only equipped with ordinary turrets.

Possibly a Rosomak-1 APC with mounted machine gun in a traversible turret (an UKM-2000 GPMG mounted as seen here). Unlike the later version (M2 and M3) that are fixed open turrets.
In 2007, the 6×6 armored personnel carriers were abandoned, and it was decided to base the Rosomak R1/R2 reconnaissance vehicle on the construction of an eight-wheeled infantry fighting vehicle. Finally, it was decided to use some of the basic chassis to develop a transport variant for two sections of Spike missiles (27) and a medical evacuation vehicle (33). Several more chassis were handed over to construct prototypes for other variants.
As a result, in 2008, the Army received 27 Rosomak S APC, easily adapted to transport Spike ATGM sections, and the first 6 Rosomak WEM medical evacuation vehicles with a raised superstructure in the rear part. The next Rosomak WEM's, delivered from 2009, differed in the target wider form of the superstructure, providing more space. In 2007, due to the involvement in peacekeeping missions, some of the basic vehicles were used to create a previously unforeseen logistics and transport variant, equipped with an open firing position with a cupola, shielded around. The first version, intended for the Chad contingent, had a lighter OSS-M (sort of open turret, light version) and 6 of them were built in the first half of 2008. The second version, intended for Afghanistan, had a heavier OSS-D (manufacturer's designation: M3) that are better protected. The first batch of 10 units was completed at the end of 2008, and further 11 are planned for the following year. These vehicles also received additional armor. In addition to the rebuilt, in 2008 the Army received 46 new combat Rosomaks. In 2012, a prototype version with a self-propelled Rak mortar was presented for the first time.

The interior of Rosomak-WEM.
In July 2013, Patria Land Service extended the license free of charge for another 10 years, recognizing the right to further Polish construction changes and exports as well as repairs for 40 years. Since 2013, the manufacturer has offered better armor for Rosomak, based on nanotechnology. In the same year, the delivery of another 307 vehicles was contracted. A total of 298 Rosomak chassis have been delivered under this contract by 2020. In 2015, the manufacturer and the Finnish side presented two more vehicles:
- Polish Rosomak M, with increased buoyancy
- the Finnish-Polish Rosomak XP, larger than its predecessors.
They were created with the use of components and the sum of experience gained during the construction and use of the Rosomak. The improved armor was developed in cooperation with IBD Deisenroth Engineering. In the same year, the manufacturer offered a version with a built-in 120 mm automatic mortar, presented as the Wilk fire support vehicle.

Rosomak-M and Rosomak-XP in a presentation.
In 2007, WZM signed a contract for the production of five transporters for export in 2008 for Patria, which, after extending them by 35 cm (to the AMV 8×8, L version) and equipping them, was to deliver them to the United Arab Emirates. Export orders have been carried out since 2016 and driver training is also conducted in simulators. In April 2016, the Ministry of National Defense decided to start purchasing Rosomak-based Rak vehicles.
From 2013, a version with a remotely controlled ZSSW-30 turret system, armed with a dual Spike LR ATGM launcher, a 30 mm caliber Bushmaster Mk. 44 S automatic cannon and a 7.62 mm caliber UKM-2000C coaxial machine gun, was developed by the HSW and WB Electronics consortium from 2013, at the request of the Army. A prototype of the turret was built in 2015; the program experienced delays for various reasons, but in 2020 the tower successfully passed military qualification tests. The turret is equipped with an automated fire control system by WB Electronics, Polish stabilized optoelectronic viewport GOD-1 (commander) and GOC-1 (gunner) by PCO, with thermal and television cameras and a laser rangefinder, and the SSP-1 Obra self-defense system with eight launchers of multispectral camouflage grenades. These turrets can also replace the older HITFIST-30P turrets, which are slightly lighter. The gun in the Bushmaster Mk. 44 S version allows the use of programmable ammunition. On July 5, 2022, the Ministry of National Defense signed a contract with the consortium worth about 1.7 billion PLN for the supply of 70 Rosomak wheeled IFVs equipped with ZSSW-30 turrets. They will be created from the reconstruction of the base vehicles, and the contract will be implemented in the years 2024-2027. However, due to the deterioration of the characteristics while sailing and the lack of an order for the manufacturer to improve this parameter, it was decided that the Rosomaks with the ZSSW-30 turret did not continue for production. In this version, they are equipped with six landing seats, including two on the starboard side.

Possible earlier prototypes in presentation of KTO Rosomak Heavy IFV, with ZSSW-30 turret system with Spike ATGM's mounted on left side of the turret.
In 2019, the Polish Army ordered two command vehicles (delivered in 2020), and eight more in 2020. In 2020, 60 base vehicles were also ordered to be converted to the Rosomak-S version for transporting Spike missiles. The license agreement for the production of vehicles was supposed to end in 2023, but at the end of September 2022 it was extended by an annex until the end of 2028.
- Main body construction, how strong is the chassis?
KTO Rosomak is built in an 8×8 system (with all-wheel drive). The combat Rosomak can carry 11 people (driver, commander, gunner and 8 passengers/troops). The hull is self-supporting, monocoque, welded from armor steel. Under the fuselage there is a suspension bracket in the form of a truss, to which suspension elements are attached, stiffening the structure.

The interior of basic KTO Rosomak. Passenger seats are being folded.
At the turn of 2005 and 2006, a gradual (although not complete) Polonization of Rosomak production was carried out. The first vehicles were mostly made in Finland and completed in Poland, and from Spring 2005 their hulls began to be welded at WZM. It was originally assumed that only 40 vehicles were to be of Finnish production, but the Polonization process was delayed and 9 vehicles were made in Finland in 2004 and 81 in 2005. On December 14, 2005, the first copy produced in Poland was presented. Initially, in 2005, 21% of the transporter's value came from Polish deliveries, in 2009 - 78%, and in 2011 - 94%. Chassis modules (frames with drive transmission) were initially manufactured in Finland, and from mid-2006 in Komas in Janów Lubelski (owned by the Finnish Komas Oy), using imported steel and components. Since 2009, armored steel has been supplied by HSW-Huta Stali Jakościowych SA from Stalowa Wola (earlier series of vehicles were made of imported steel). The bodies of the Rosomaks are welded from Armstal 500 (30PM) sheets with a hardness of 500HB (except for the floor from Armstal 450 sheets), external armor elements (in the floating version) are also made of Armstal 500 steel. Additional armor was made of Armstal 550 steel with a hardness of approx. 580HB. OTO-Melara HITFIST-30P turrets were initially imported complete from Italy, since 2007 they have been assembled by Bumar Łabędy, and as Polonization progresses, they have been produced there since 2010 (welded from aluminum).
QuoteCompared to the BTR-60, the vehicle is over 30 cm taller. Despite this, due to the use in asymmetric conflicts, where the side has an advantage in armour, weapons, artillery and aviation (e.g. the invasion of Afghanistan in the 21st century), most losses were recorded from fugas and sabotage, e.g. electronics.


Closer interior view of KTO Rosomak, for gunner seat (left) and driver seat (right).
The HITFIST-30P turret itself was made of armored aluminum and equipped with additional ceramic armor. The armament is controlled by a fire control system equipped with a DNRS-288 day/night sight, a 2nd generation TILDE FC thermal imaging camera and a laser rangefinder. Since 2016, thermal imaging cameras can be replaced during renovations with new Polish third-generation cameras KLW-1R by PCO. Additional equipment is a set of sensors of the SSP-1 Obra-3 system and a smoke grenade launcher. The curb weight of the turret is 2350 kg, and the combat weight is 2850 kg. The turret traverse is possible in the full range of 360 degrees, and the armament elevation angles are between -10 and +60 degrees. The stock of ready-to-use 30 mm ammunition is 220 rounds, another 250 rounds are stored in two magazines under the turret. The equipment includes Pimco's chemical and radioactive contamination detection system CHERDES I, and since 2009 CHERDES II.
- Armor packages, what's the APC offers?
Controversy after the choice of armored personnel carrier aroused the issue of its armor. The political and media debate on this subject led to the destruction of one copy of the vehicle during firing tests in Poland. However, the armoring of the vehicle is typical for armored personnel carriers of this weight category, with the requirement of buoyancy. The armor is modular and can be reinforced. The main layer of the self-supporting hull was made of 8 mm thick steel sheet. At a distance of 35 mm from the main armour, an outer armour, 6 mm thick, is mounted. It can be replaced - as in the Finnish prototype - with ceramics or a composite, thus improving the armor ballistic resistance, but sacrificing the buoyancy. The level of protection of the Rosomak against 14.5 mm rounds from the front and 7.62 mm from other directions is typical and does not differ from, for example, the Stryker vehicles used by the US Army or other similar vehicles. The basic version of the vehicle has ballistic protection of the hull in the front 120 degrees at level IV according to the NATO STANAG 4569 standard (against 14.5 mm caliber ammunition at a distance of 200 m), and in the remaining range at level III (against 7.62×54 mm at a distance of 30 m or a 155 mm round burst at a distance of 60 m). The HITFIST-30 turret is welded from 17 to 25 mm thick aluminum plates and protects against 12.7 mm rounds in the forward range of 120 degrees, and against 7.62 mm rounds in the remaining range. Resistance against explosives and mines is up to 6 kg of explosive. The interior of the vehicle is lined with an aramid spall lining.

KTO Rosomak in Polish service. Standard armored personnel carrier for the Army.
The Ministry of National Defense accepted the buoyancy requirement as a priority, except for the version intended for Afghanistan. For vehicles intended for the Polish contingent in Afghanistan, in mid-2007, sets of additional armor were purchased from the Israeli company Rafael, mounted on the side, rear and front surfaces of the upper plate, ensuring resistance above level IV of the STANAG 4569 standard. 56 of such sets were ordered, the first of which were assembled in field conditions in Afghanistan before the end of July this year. The assembly time of the set by trained personnel is approx. 4 hours.

Rosomak M3 with OSS-D open turret. Also in service for Polish Army in Afghanistan.
Since 2010, Rosomaks have received Polish secondary armour, manufactured at HSW-Huta Stali Jakościowych, along with lightweight anti-HEAT screens. The front upper hull plate was covered with a 130 mm thick composite module, made of several plates of different thickness and hardness, probably sandwiched with aramid and other materials, with air gaps, providing protection against HEAT warheads equivalent to 330 mm of armor (RHA), and taking into account the slope - about 500 mm. It should also provide resistance against e.g. the older 30 mm ammunition of the Russian 2A42 cannons (used e.g. in the BMP-2). The sides received 8 mm modules of two layers of 10 mm thick steel, separated by a 75 mm air gap, which provided protection according to STANAG level IV. The turret received 40 mm thick composite armor modules made of ceramic tiles on an aramid base, also raising the shield to level IV. The combat weight of the armored Rosomak does not exceed 26 tons.

Possible Rosomak-M3 version in Polish service at Afghanistan with 3 soldiers carrying Beryl assault rifle. Note the OSS-D open turret (with no mounted gun).
In the M3 version, the OSS-D open turret had Tier III armor. Together with the use of modern RPGNet mesh side screens with metal elements at the intersection of wires, the additional armor provided a very high level of protection against the most common HEAT rocket launchers. It is even estimated in the literature that the Rosomak was the best protected wheeled combat vehicle in the theater of operations in Afghanistan until the appearance of the heavier GTK Boxer APC's. Explosions of mines, as a rule, only led to the destruction of repairable suspension elements, while the loss of vehicles and crews was mainly caused by large gaps, against which there is no effective protection. Despite this, it is estimated that the Rosomak performed relatively well in terms of crew protection against fugas explosions. After the return of about 100 Rosomaks used there from Afghanistan, additional armor was dismantled during repairs, apart from 6 reserve vehicles for subsequent missions.
- Variants of KTO Rosomak, what are the roles?
- Rosomak - Infantry fighting vehicle variant with an OTO-Melara HITFIST-30P gun turret armed with a 30 mm ATK Mk 44 chain gun and 7.62mm NATO UKM-2000C coaxial machine gun. The turret has advanced fire control systems with thermal sights and an Obra laser warning system SSP-1 OBRA-3 manufactured by Bumar Soldier SA, connected to six 81 mm 902A ZM Dezamet smoke grenade launchers. The standard supply of ammunition is 80 APFSDS-T armor-piercing rounds and 120 MP-T multi-purpose fragmentation-incendiary-tracer rounds (only multi-purpose rounds can be used). Vehicles of this version used on missions outside the country had reinforced ballistic armor (Rosomak-M1) and with protection against HEAT rounds (RPG-7 and similar) with QinetiQ RPGNet (Rosomak-M1M).
QuoteInfantry fighting vehicle variant modified for war in Afghanistan was called "Rosomak-M1M", it was equipped with additional steel-composite armor, upgraded communications, wire cutters in front of driver and commander hatch, video cameras showing back and sides of vehicle on two LCD screens in troop compartment, Pilar system that detects the direction of fire. Because of additional armor this variant cannot float and has no water propellers. This variant was further upgraded to standard known as M1M. Most noticeable change is addition of QinetiQ RPGNet anti RPG cages and new "sand" camouflage.

Polish Rosomak-M1M in Afghanistan with RPGNet cages installed around the vehicle.
Other changes include installation of Duke anti IED system and Blue Force Tracking BMS system (systems on loan from US Army). All older ("green") Rosomaks in M1 standard also received RPG Net. Since 2022 Rosomak will be produced with ZSSW-30 unmanned turret armed with 30mm gun, UKM-2000 machine gun and Spike ATGM.

The original Rosomak, this one in particular is amphibious. Note the water propellers on the rear of the vehicle.
- Rosomak-M2 and M3 - Armored personnel carrier variant modified for mission in Afghanistan equipped with similar task equipment (including additional armor) as M1 variant. The main difference is that this variant is equipped with OSS-D open turret with 40 mm Mk-19 grenade launcher or 12.7 mm NSW/WKM-B heavy machine gun. It's also possible to be mounted with other small arms (they could be 7.62 mm PKM or UKM-2000 GPMG). This patrol version of the Rosomak was also used in Chad; with the same additional armor, similar to the vehicles with the Hitfist-30P turret.


Rosomak M2 (left) and M3 (right). Note on how different the open turret configurations. M3 has larger size turret than the M2. Both mounted guns on these APC's seem to be absent.
- Rosomak-S - Armored personnel carrier variant for two anti-tank teams armed with Spike anti-tank guided missile. Essentially a basic version of the carrier without armament, equipped with seats as in the combat version and racks for transporting Spike ATGMs in the passenger compartment. Unveiled in 2007, it carries two sections with a regular and additional fire unit (8 missiles in total).

The Rosomak-S with 2 Spike missiles deployed in a presentation. Very similar to earlier Rosomak's without any turret installed.
- Rosomak-WEM - (WEM for Wóz Ewakuacji Medycznej – lit. "medical evacuation vehicle") – armored ambulance vehicle with crew of 3, capable of transporting 3 injured soldiers on stretchers and an additional four in sitting position. The WEM-M variant for Afghanistan was equipped with additional armor and RPGNet same as in M1M variant. Vehicle role is for providing first aid, including resuscitation and stabilization of life functions in hazardous areas, and evacuation of the most seriously injured to the zone where it is possible to land medical rescue helicopters, which then transport the injured to field hospitals. Rebuilt from the base variant, it is distinguished mainly by a raised superstructure in the rear part (interior height up to 190 cm) and a folding observation and lighting mast. The height is 3331 mm. It carries three wounded on stretchers and three seated, the crew consists of four people. The first 6 vehicles were handed over on January 9, 2008. These vehicles were characterized by leaving the central plate of the ceiling and a slightly narrower superstructure. Further vehicles delivered from 2009 were built in the final modified version, with the central slab of the ceiling removed, which increased the amount of space, and a new superstructure, the walls of which are extensions of the sides.

The Rosomak-WEM, note on elongated roof structure for more passenger rooms and lack of smoke dischargers. Also seem to be amphibious with water propeller in the rear.
- Rosomak-WRT - (WRT for Wóz Rozpoznania Technicznego – lit. "technical reconnaissance vehicle")

The Rosomak-WRT with engineering accessories installed in top and smoke dischargers. Also amphibious with the water propeller on the rear.
- Rosomak-WSRiD - (WSRiD for Wielosensorowy System Rozpoznania i Dozoru – lit. "multisensory reconnaissance and supervision system")

Rosomak-WSRiD for reconaissance purposes in a presentation. Note on devices on rear roof structure above passenger seats.
- Rosomak-AWD - (AWD for Artyleryjski Wóz Dowodzenia – lit. "artillery command vehicle") – Command vehicle for M120K Rak mortar company fire module.

The Rosomak-AWD, note on flat top, 3 antennas for mortar team communication devices and different placements of smoke dischargers.
- Rosomak-WD - (WD for Wóz Dowodzenia – lit. "command vehicle"). The first 7 were commissioned in 2018.

The Rosomak-WD along with other 2 Rosomaks on a convoy with camouflage net installed, note the elongated roof top (same as Rosomak-WEM), smoke dischargers and antenna (folded) for communication devices.
- Rosomak M120K "Rak" - 120 mm mortar artillery vehicle, first delivered in July 2017. Essentially a 120mm self-propelled field gun designed at Huta Stalowa Wola, mounted on the KTO Rosomak chassis (wheeled version).

The Rak mortar vehicle, with a completely new designed 120 mm mortar turret and smoke dischargers, with other 2 Raks following in a convoy.
- Rosomak-NJ - (NJ for Nauka Jazdy – lit. "driving school")

Rarely seen Rosomak-NJ, for drive training vehicle. Possibly just a prototype.
There was other planned versions that may be delivered to the military in the future, they are:
- An infantry carrier vehicle (Rosomak-1) with a remotely controlled weapon module with a 12.7 mm machine gun and a passive day/night or thermal vision sight. The vehicle selection program was launched only in mid-2005. The Israeli remote weapons station Rafael RCWS-12.7 won the competition. But after repetition of the last stage, the Polish Kobuz RCWS developed by OBR SM was selected, and after another repetition in 2006 - the Italian OTO-Melara HITROLE won. Finally, in 2007, this version was abandoned.

This isn't exactly KTO Rosomak, it's just a KTO Rys, a vehicle based and developed from Polish OT-64 SKOT's. The image purpose is for showing the Kobuz RWS, note on roof by the rear.
- General military reconnaissance vehicles: Rosomak-R1 (Rosomak-WDR) in the command and reconnaissance and Rosomak-R2 (Rosomak-WR) in reconnaissance versions - initially a shorter (by about 60 cm) six-wheeled version of the Rosomak (Patria AMV in 6×6) was ordered for reconnaissance units, which was first presented at MSPO in September 2005, then the decision was changed and an eight-wheel reconnaissance vehicle was chosen.
- Technical assistance vehicle (Rosomak-WPT), a prototype built in 2020.

The Rosomak-WPT, note the recovery crane and dozer blade installed for vehicle recovery purposes and road service in battlefield.
- Contamination reconnaissance vehicle or NBC reconnaissance vehicle (Rosomak-RSK).
- Artillery reconnaissance vehicle (Rosomak-AWR) - part of the M120K Rak company fire module. Equipped with an on-board observation and reconnaissance set with the SR Hawk (V)2 battlefield radar and the FLIR Systems TacFLIR 280-HD optoelectronic head on a foldable 4-meter mast, and a portable observation and reconnaissance set. It is armed with a remotely controlled 7.62 mm UKM-2000C station and has the Obra-3C self-defense system. The prototype was created in 2020, and the qualification tests were completed in March 2021.

The Rosomak AWR, a part of Rak mortar vehicle module. Note the battlefield radar and reconaissance mast on rear, with an RWS with 7.62 mm GPMG also installed.
- Rosomak Heavy Infantry Fighting Vehicle with the ZSSW-30 unmanned turret armed with a 30 mm ATK Mk 44S automatic cannon, UKM-2000C machine gun and a dual Spike LR missile launcher. In July 2022, a contract was signed for the delivery of 70 vehicles in the years 2024-2027.

The present production of KTO Rosomak Heavy IFV, with ZSSW-30 unmanned turret. Possibly in production and delivered for 2024.
- Rosomak Scipio - created in 2015 by mounting on the platform of the KTO Rosomak 8×8 vehicle in the base version the Turra 30 unmanned turret produced by the group of Slovak companies DMD and EVPU. The turret was originally developed for the modernization of Slovakian BMP-1/BMP-2 vehicles. According to other sources, the turret was created to meet the requirements of the Slovak army for the successor of the OT-64 SKOT transporters.


Rosomak Scipio, for Slovakian Army. Note the turret is very different from standard KTO Rosomak. Equipped with Turra 30 mm turret (2A42 cannon and 2 banks of Fagot ATGM)
The turret is armed with a 30 mm caliber 2A42 cannon of Russian design, manufactured in Slovakia, a 7.62-mm PKT machine gun and two Fagot anti-tank guided missiles launchers, a sighting and targeting system with a TV and thermal imaging camera, a laser rangefinder, a stabilization system and an automatic tracking a marked target. The weight of the tower is less than 1500 kg. According to the manufacturer of the turret, it can be adapted to mount other sets of armament or equipment, for example the American Bushmaster II cannon used in Poland or the Spike LR missile. The first public presentation of the Scipio transporter took place during MSPO in Kielce, in September 2015.
- Rosomak-M - presented in September 2015 during the MSPO in Kielce as a proposal of the Rosomak SA company. As part of the modernization, the hull was modified to increase the buoyancy of the vehicle in order to ensure the ability to overcome water obstacles by swimming with an increased gross vehicle weight (GVM) (from 22.5 to 23 .5 tons), while it was indicated that the transporter's hull will undergo further modernization in order to ensure the ability to float at GVW increased to 24 tons. In addition, e.g. the Rosomak turret was integrated with two Spike ATGM launchers, a battlefield control system (BMS) was installed, the fire control system was modified by providing the "hunter-killer" capability, the air conditioning/heating system was improved, the armor was changed, seats were installed to reduce the effects of mine explosions or IED's (improvised explosive device).


Rosomak-M in presentation with extendable bows used (left) and folded (right). Note the water propeller on the rear for swimming purposes.
- Rosomak-XP - presented in September 2015 during the MSPO in Kielce as a proposal from Patria and Rosomak SA. As part of the modernization, the GVW was increased from 26 to about 30-32 tons. In addition, a new 450 kW engine, a new drive system, new 16.00 R20 wheels, a new rear landing ramp were installed, and the degree of ballistic and anti-mine protection was also increased. Based on Polish experience, the Finnish company prepared a new version called Patria AMV2 Havoc with a maximum permissible weight of 32 tons, offered to the USMC.


A turretless Rosomak XP (left) with passenger interior view (right). Also called Patria AMV2 Havoc.
- Rosomak-MLU - proposal from Rosomak SA to modernize and improve the APC's parameters. In 2022, a demonstrator was presented, marked MLU or Mid-Life Upgrade.


A concept drawing of Rosomak MLU, lengthened chassis, new armor layouts. Vehicle seemed to be amphibious-oriented by looking at swimming bows folded at front.
- MLU level 1 includes a renovation with an extension of the service life from 30 to 40 years and minor improvements to increase functionality (e.g. LED lighting).
- MLU level 2 introduces, above all, an increase in the volume of the hull and load capacity of the existing transporters by extending the chassis and hull in the middle part by 40 cm. It enables an increase in the permissible total weight by two tons, up to 28 tonnes, and for swimming - up to 25.5 tonnes. In this variant, external armor with a changed structure was used, without the side plates breaking in the lower part, increasing the width to 3 metres. At the rear, a hydraulically lowered ramp with a single door was used instead of a double door.
- MLU level 3 proposal is analogous to MLU level 2, but assumes the production of vehicles immediately in this standard.

KTO Rosomak MLU in MSPO 2022 presentation, with lengthened chassis and turret upgrades as seen here.
- Combat History of KTO Rosomak, is it battle proven?
- War in Afghanistan (2001–present)
The Polish Land Forces contingent, which was a part of the International Security Assistance Force operated over 100 KTO Rosomak vehicles (including five medevac versions) during the Afghanistan War. The APCs were equipped with additional steel-composite armor. In early 2008 a Polish Rosomak serving in Afghanistan (the version with upgraded armor) was attacked by the Taliban. The vehicle was hit by RPG-7 rockets, but it managed to fire back and then returned to base without any help required.[5] In June 2008, a Rosomak was attacked by Taliban and was hit in its frontal armor with an RPG. The armour was not penetrated. In 2009, the first soldier was reported killed while traveling in a Rosomak after an improvised explosive device exploded under the vehicle, which rolled over and crushed the gunner who had been standing in the open turret. Similar attacks had occurred before but had failed to inflict casualties.

Standard KTO Rosomak in dark green color, patrolling in Afghanistan.
In May 2007, the first 24 Rosomaks with the Hitfist turret were sent to support the Polish Military Contingent in Afghanistan and from mid-June they entered combat operations. It was also the combat debut of the AMV family armored personnel carriers. From the end of July 2007, they were equipped with additional armor on site. The vehicles were highly rated by soldiers and specialists, having a large firepower (greater, for example, than the American M2 Bradley IFVs). In the first half of the year, they traveled over 85,000 km and several were damaged, including two seriously on grouches , but the crews were not seriously injured. Later fights were also associated with relatively few losses in crews, primarily in vehicles destroyed by high-power fugas. As a result of intense fighting, the number of Rosomaks in Afghanistan increased and in 2010 there were 89 of them, and the largest number was 134 (a total of 181 vehicles were sent). According to unconfirmed estimates, almost all of the vehicles were hit by small arms or anti-tank weapons at least once, and more than half required repairs. They were most often attacked with anti-tank rocket launchers of the RPG-7 family and large-caliber machine guns (12.7 mm and 14.5 mm). Despite this, irretrievable losses on the spot amounted to 8 Rosomak M1M and 6 M3, and after damage tests in Poland, a total of over 30 vehicles were struck from the stock. The secondary armor fulfilled its function against the anti-tank agents used in this conflict and it is estimated that the use of armored Rosomaks allowed to save the health or lives of over a hundred soldiers.


Rosomak-M1M's in service at Afghanistan. They are used for patrolling the villages, convoy with infantry in MRAP's. Humvee's (Tumak's in service) etc.
- European Union mission in Chad (2007–2008)
The European Union Force Chad/CAR was the moment where Polish Armed Forces provided assistance with 400 troops deployed, 16 KTO Rosomak APCs, three Mi-17 helicopters and one C-295 transport aircraft.

Some place in Chad, a soldier with Mini-Beryl carbine with EoTech Holographic sight. Along with Tarpan Honker light jeep and 2 units of Rosomak vehicles convoy, following behind.
- Operators of KTO Rosomak, who are the users?
Poland is the sole user of the KTO Rosomak, but as the first export customer of Patria, AMV & WZM SA has the right to export the KTO Rosomak in some markets. In 2006 the KTO Rosomak was tested in Malaysia.
- Poland
Polish Land Forces - 903 in different versions (as of 2020). The first Rosomak APC's were handed over to the army on January 8, 2005 - the first user was the 17th Mechanized Brigade from Międzyrzecz.
KTO Rosomak vehicles are currently used in 4 brigades and 1 regiment of the Land Forces:
- 17th Greater Poland Mechanized Brigade

- 12th Szczecin Mechanized Brigade

- 15th Giżycko Mechanized Brigade
 Quote
QuoteIn 2018, only 120mm RAK mortars, Medical Evacuation Vehicles (WEM) and KMO RAK command vehicles were adopted for the brigade - ultimately, versions with an unmanned turret and a 30mm cannon are also to be adopted for the unit.
- 21st Podhale Rifles Brigade
 Quote
QuoteIn 2018, only 120mm RAK mortars, Medical Evacuation Vehicles (WEM) and KMO RAK command vehicles were adopted for the brigade - ultimately, versions with an unmanned turret and a 30mm cannon are also to be adopted for the unit.
- Command Support Regiment of the Multinational Division North East Headquarters (Command and IT support vehicles only)
 Quote
QuoteIn the fall of 2006, four APCs with a turret, repainted in white, were prepared for deployment as part of the UN peacekeeping mission ( UNIFIL ) to Lebanon, but their deployment there was suspended.
On January 9, 2008, the Army took over the first 6 Rosomaks-WEM.

Polish Army infantry unit disembarking from a KTO Rosomak. Note the split doors, possibly some earlier Rosomak's in service.
In the Polish service, the size of a motorized infantry team transported on Rosomaks was assumed to be eight or nine soldiers, of which the crew consists of three soldiers that are vehicle operators (driver, gunner, crew commander). This resulted in the reduction of the team's fire section to five or six soldiers (criticized in the professional press). As a result, two passenger seats were removed from the APCs used in Afghanistan to increase the space for equipment. The motorized platoon consists of four cars, three of which carry the motorized team and the fourth the support section. The fire section of the motorized team consists of six (or five) soldiers, including the team leader, general purpose machine gunner (UKM-2000P), anti-tank rocket launcher (RPG-7W) and cupola gunners. In addition to team weapons, the fire section has carbines (Beryl or Mini-Beryl), one of them with a Pallad grenade launcher; the crew commander also has a carbine. In addition to them, the platoon commander and his radio operator (both with carbines) occupy the transporters, or according to a different structure, four soldiers of the platoon command. The support section also has five soldiers, armed with a 60mm LM-60 mortar and a 40mm Mk 19 automatic grenade launcher, in addition to carbines.
- United Arab Emirates
About 40 AMV Patria vehicles manufactured in Poland.
- Specifications of a KTO Rosomak

Rosomak na wodzie? O kurwa!

- Mass: 22,000 kg (49,000 lb)
- Length: 7.7 m (25 ft)
- Width: 2.8 m (9 ft 2 in)
- Height: 2.3 m (7 ft 7 in)
- Crew: 3 (commander, driver, gunner) + 8 passengers.
- Main armament: - 1 × 30×173 mm ATK Mk44 Bushmaster II gun
- 1 × 12.7 mm WKM-B or 1 × 40mm Mk 19 in Rosomak M3
- Secondary armament: 1 × 7.62×51mm NATO UKM-2000C coaxial general purpose machine gun.
- Engine: DI 12 Scania diesel 360 kW (480 hp) or 405 kW (543 hp)
- Power/weight: 15.6 kW/t (21.2 PS/t) (max weight)
- Suspension: 8×8 wheeled.
- Operational range: 800 km (500 mi)
- Maximum speed: - over 100km/h (60 mph) on land
- up to 10 km/h (6.2 mph) in water
- Your references for vehicle comparison (IRL and Project Reality-oriented)
Project Reality in-game equivalent:
- M1126 Stryker ICV, featured in US Army.

- LAV III, featured in Canadian Forces.

- LAV-25 and Coyote Reconaissance Vehicle, featured in US Marine Corps and Canadian Forces.


- Boxer AFV, featured in Dutch Forces.

- VBCI, featured in French Forces.

In-Real Life equivalent:
- Patria AMV (the "OG vehicle") from Finland.

- K808 White Tiger from South Korea.

- Tusan AFV from IR Iran.

- Freccia IFV from Italy.

- BTR-90 from Russia.

- CM-32 Clouded Leopard from Taiwan.

- Type 96 APC from Japan.

- BTR-4 from Ukraine.

- Saur 2 from Romania.

- FNSS Pars from Turkiye.

- MOWAG Piranha from Switzerland.

Sources: wikipedia.com/pl, tanks-encyclopedia.com, defence24.pl etc.
Thank you for reading! Happy holidays.
Regards,
- Inch

Wolvie mówi: dziękuję za przeczytanie.
PS: More images coming soon. Because i'm in a hurry, i have to save the work here, since i'm afraid of this disappearing and have to start over.
PS2: Published for early sneak peek, still finding some images...
PS3: DONE! Enjoy reading! Might add some more stuff, so stay tuned.
- Read more...
-
- 0 comments
- 8
-

 Latest Entry
Important Changes and New Features in BMS 4.36
From the BMS forums:
Required fixes!
Following the following the report of multiple issues:
- Loss of flight performance in MP with some loadouts
- Graphical bug on missile trail launch
Please apply the following lines on your “falcon BMS user.cfg” (User/config folder):
Quoteset g_sNonCompatibleChanges "all-DURANDAL-NC_CHANGE_DEAGGED_LOADOUT"
set g_sCompatibleChanges "all-C_CHANGE_DYNAMIC_SMART_SCALING"https://forum.falcon-bms.com/topic/22302/temporary-fixes-for-4-36-0
There is also a setting to enable a click sound for the afterburner detent:
Quoteset g_bAfterburnerDetentClick 1
A-G Radar Changes (-34)
The basic A-G systems have been made more realistic. They need range information in order to work correctly. The system can calculate the information it needs by using altitude information, or it can rely on a ranging sensor (A-G radar lock, TGP) to get the information it needs. (2.4.6, 4.2.9, 4.2.18)
For visual modes (CCIP, DTOS), FCR slant range calculation uses either barometric altitude or the radar altimiter (BARO or RALT).
For CCRP it will be best to use either precision steerpoints, or a sensor (A-G radar lock, TGP).
The air to ground radar now has antenna elevation and azimuth control modeled. The A-G FCR will change the elevation automatically based on the cursor position and the plane's current altitude, but it is pilot adjustable if required. Antenna elevation can be calculated using either barometric altitude or the radar altimeter. (2.4.7)
CCRP Changes (-34, 4.2.2, 4.2.13)
Bomb lofting cues have been added.

Laser Mavericks (-34, 4.3.10)
The AGM-65L recreates the traditional Maverick MFD cues, despite not having an imaging sensor. The Maverick laser code must match the emitting laser, and the normal launch constraints of the AGM-65 still apply. The target must be lased for the entirety of the missiles flight.
To change the laser code:
- Set the missile to BORE.
- Unlock the laser code by slewing the gimbal indicator over the "L" and pressing TMS Up. The L will change to a U.
- Using either TMS Left or OSB 7 (right side, second button), cycle through the polarity and after a few presses you will get to select the first number.
- The number will cycle automatically, select the correct number by pressing TMS Left or OSB 7 at the correct time.
- For each number you must cycle through the polarity again.
Afterwards, press TMS Up again to lock the laser code. The U will be replaced by an L.

HARM threat tables (-34, 4.4.1)
Threat Tables are now customizable through either the DED or the data cartridge.

HMCS RWR indicator (-34, 2.11.6.10)
The HMCS now includes a directional RWR indicator. The gap in the circle represents your view, and the diamond represents the direction of the emitting radar.

HMCS Alignment, A/G Markpoints (-34, 2.11.2, 2.11.6)
The HMCS must now be aligned using the HMCS DED page (List->0->RCL->SEQ)
For coarse alignment, press M-Sel (0), then align the HMCS cross with the cross on the hud and press Cursor Enable (Insert). Press M-Sel again to exit.
For the other two alignments, press M-Sel to start, then slew the cross with the cursor until it is lined up, and then press M-Sel again to exit.
https://www.youtube.com/watch?v=acciwGQDlVE
Lighting
The exterior lighting panel is now fully implemented.
Anti-Collision now supports all settings. 1 through 4 are flashes in sequence, A through C are in Morse code.
Wing/Tail and Fuselage settings are now separate, and both bright and dim settings are supported.
Formation light brightness is implemented.
Covert settings are implemented. ALL sets all lights to covert, A-C sets the anti-collision light to covert, FORM sets the formation and Wing-Tail lights to covert.
The Aerial Refueling light will activate when the knob is turned up and the refueling door is open.
Gunsight Changes (-34, 2.4.5)
https://www.youtube.com/watch?v=6-Ma3l9onjw
Drogue refuelling
https://www.youtube.com/watch?v=mjlUeAStyzw
JTAC
Too long to cover here, see BMS-Training.pdf Mission 27.
- Read more...
-
- 0 comments
-

- 6
entries - 97
comments - 11652
views
Recent Entries

I have written a new voice control profile called 'AVCS SENS' for VoiceAttack specifically dealing with sensors and weather commands. I wanted to use the Shared Memory feature of the AIDA64 Extreme sensor monitoring program to enable my VoiceAttack profile to speak the requested computer sensor value when asked over text-to-speech.
Once I had sensor values from AIDA64 Extreme in VoiceAttack, I then added a DHT11 Temperature & Humidity sensor to the Arduino Uno on my prototype breadboard, connected to my PC through USB. Now reading this as well from my VoiceAttack profile, I could do a little math to get a more absolute and objective value from the computer sensors, a CPU temperature in "degrees over ambient", for example, or "delta-T over ambient" as you may hear it called in analysis videos such as this one here talking about case testing methodology used by Gamers Nexus. This is the true means to understand what computer sensors for temperature are reporting at any given time, by first accounting for the temperature of the room.
Finally, with this relative sensor data now available, I've been able to write a simple diagnostic algorithm which can identify & flag atypical sensor values, as compared to stored baseline values on file, for voice commands in VoiceAttack. Without an AVCS-DHT1, outdoor weather and sensor report commands are still available, yet indoor weather & sensor diagnostic commands will be unavailable. I wanted to make it possible for anyone using my new AVCS SENS profile for VoiceAttack to either be able build their own AVCS-DHT1 USB external temperature & humidity sensor,
or buy one designed & built by me, according to this simple Arduino project build guide, and therefore unlock these additional voice command features for AVCS SENS.
My DIY USB Temperature & Humidity Sensor 'AVCS-DHT1' - for use in my AVCS Voice Sensors & Weather Profile
parts list below contains links to specific items which I directly purchased myself for this project on Amazon only, but any store will do, and also any equivalent part which performs the same will work (brand names/quantities do not matter!)
if you are using a different case than the exact one linked below, or other components, please see the note in the AVCS SENS Wiki page regarding Sensor Calibration

Project Required Parts List
(all prices listed in USD - price and availability may be different past last publish date of this guide)
Arduino Nano (or equivalent clone) - with NO header pins soldered on!
(HiLetgo Nano v3.0 5V) (3 pack) - $24.49
https://www.amazon.com/dp/B01DLIJQA2
$8.16 per boardUSB Cable - USB 2.0 Type A to Mini-B (3ft. or 1 meter, at least) (or equivalent part)
(iSeekerKit Nylon Braided 3ft.) (3 pack) - $8.99
https://www.amazon.com/dp/B08LL272SK
$3.00 per cableDHT11 Temperature Humidity Sensor Module 3.3V-5V (or DHT22, or equivalent part)
(HiLetgo w/Dupont Wires) (5 pack) - $10.29
https://www.amazon.com/dp/B01DKC2GQ0
$2.06 per sensorPlastic Electronics Project Case @ 1.97" x 1.10" x 0.59" (50mm x 28mm x 15mm)
(Zulkit ABS Project Boxes) (5 pack) - $7.99
https://www.amazon.com/dp/B07PZ24LFD
$1.60 per itemMetal Film Fixed Resistor 10K ohm (0.5Watt) - just one will be needed
(EDGELEC Pack of Resistors) (100 pack) - $5.99
https://www.amazon.com/dp/B07QJB31M7
$0.06 per resistorStrong Double-Sided Foam Adhesive Tape (or equivalent product) - only need a few inches
(Gorilla Brand Heavy Duty Mounting Tape) (1" x 120" roll) - $11.34
https://www.amazon.com/dp/B082TQ3KB5
$0.20 approx. amount usedNeodymium Magnet 8mm x 2mm (round, size is important!) - just one will be needed
(FINDMAG Box of Magnets) (100 pack) - $9.99
https://www.amazon.com/dp/B09BB1VT4J
$0.10 per magnetTotal:
$15.18 (USD) (for 1 sensor*) - (total if all parts purchased with amounts above: $79.08)
*(also required - drill/rotary tool, solder and soldering iron, electrical tape, tweezers, scissors, 'nippers', 'spudger' type tool, and SuperGlue)This project requires the following skills & knowledge:
- Basic understanding of Arduino (what it is/what it does)
- Basic experience with electrical soldering
- Basic skills with drill or Dremel/rotary tool and bits
- Use of and precautions relating to SuperGlue type adhesive
- Ability to make precise cuts with scissors within 1-2mm
- Ability to carefully follow instructions (some are crucial)
- Entry level experience with VoiceAttack (import profile, etc.)
- Ability to work w/ tiny parts in a small space in timely manner
-
A positive attitude and willingness to adapt and overcome (not exactly required, but always recommended
 )
)
Part 1 - Preparing the Sensor

preparing the DHT sensor and stripping the braided wires - image a1
1. Separate the DHT11 (or DHT22) from the breakout board it is mounted on (if not supplied without one). Either snip the wires from the DHT as close to the board as possible with "nippers" (image a1), or de-solder them from the breakout board. If supplied with the Dupont ribbon wires, remove the plastic ends and prepare the wire ends by cutting them even and strip the wires leaving at least 1.5cm bare. We want around 75-100mm (2.95-3.93") of flexible braided wire so we can zig-zag the excess, allowing us to remove the plastic lid with sensor and not risk yanking the soldered wires out.

solder wire ends - image a2
2. Twist the wire ends and tint them with solder to make them stiff, yet not so much as to increase their width with too much solder & slag - three of them must fit through the holes on the Arduino.
3. Once the DHT has been separated from the breakout board, with the side with holes facing you and pins down, cut the third pin from the left, or second from the right, as in image a1.

gently bending the pins, resistor legs, and wires - image a4
4. Prepare the DHT pins by gently curving them into hooks facing away from the side of the sensor with holes. Gently bend the legs of the 10K ohm resistor (as shown in image a4) so that it will sit in the hooks of the two DHT pins closest together, as seen with the sensor face down (holes down, as in image a5).

resistor placement - image a5
5. Bend two of the three wire ends away laterally away from the third wire, into a gentle hook shape, and the third wire opposite those in the same manner. Lay the 10K ohm resistor into the right two wire-hooks of the DHT sensor (face down - image a5).

final goal for the resistor, legs, and wires: flat & straight - image a3
NOTE: The Resistor should be offset in a manner where its bulk and width can mostly lay flat along side the wires and not on top of them once completed (image a3).
gently crimping the DHT pins around resistor legs & wires - image a6
6. Lay the wire "hooks" into their corresponding DHT wire "hooks" over the resistor, and if able, use a tweezers to gently compress these DHT wire hooks to contain the wires and resistor for soldering, as well as the wire "hooks" themselves. If this is not possible, you may want to secure the DHT to the table with scotch tape, lay the three wires in place in their "hooks", and scotch tape down the wires to the table with a gentle pull, to ensure they remain in place while soldering them firmly in place as one connection.

soldering to the DHT - image a7
7. Solder each connection so that the wire, the wire "hook" from the DHT, and the resistor are fully encased, and not touching each other.

trimming legs from resistor, and any protruding slag - image a8
8. When cooled, use "nippers" to nip any protruding slag or wire ends, and the trailing legs of the resistor as it exits the solder as in image a8. The wires should travel flat following the rear plane of the sensor, so that later, the front face of the sensor (with holes) can protrude out of a hole we will cut in the case lid. Refer to images a3 and a8 to see the resistor in-line with wires, as an example.

wrap wires separately - image a9
9. Finally, wrap each exposed solder point with a separate small piece of electrical tape to ensure each cannot bridge contact with another in the event that something gets bent. Just sandwiching a small rectangle of tape over each one will do, even if each has a tail of tape hanging off. These bits of tape will be covered and held in place permanently once the sensor is mounted into the lid later.
SAFETY SAVES LIVES - SAFETY GOGGLES SAVE EYES! BE SMART AND USE APPROPRIATE SAFETY GEAR WHILE WORKING!
Part 2 - Preparing the Case

drill 12 tiny air holes - image b1
1. Carefully remove the lid from the case - while holding the base in one hand, lid up, with the notch in the lid away from you, use a fingernail in the notch along with pressure from your finger to pry that side of the lid upwards. If using a tool, be careful not to use too much pressure or the soft ABS plastic may deform or scratch if the tool jumps too fast once the lid becomes free.

keep notch at bottom - image b2
2. For the lid, we want to create a rectangular hole that will allow the front face of the DHT sensor to protrude. The tapered sides of the blue sensor case widen towards its back which will keep it from protruding farther. The lid is 25.9mm wide & 47.75mm tall. The approximate width of the hole will be at or under 16mm tall and 12.60mm wide. For this to work well, it is best to cut a slightly smaller hole than desired and slowly widen it with hand tools or low speed rotary tool - stopping and testing the fit until just right (as shown in image b6 below). It is not easy to get exact, I've tried. Just accept any slight tilt, it is a DIY after all.
 port is upside down - image b3
The goal for the USB hole is to make it flush with the bottom of the case as it exits, and as wide as the USB port itself (8mm). The port is 4mm tall, but as you can see in image b3, even I could not quite keep that height with that limit as I drilled and widened the hole. Again, stop and check the fit - first dusting out any bits of plastic from the process, and sliding the Arduino Nano upside down as shown for a test fit. It must slide flat with the case bottom and through the case wall as shown.
3. With the lid removed from the base, use a drill bit between 1mm-2mm at low speed to create 4 holes in the 'top', and 4 holes on each side near the top (as shown in image b1), for 12 total air holes. The passthrough hole for the USB mini-B port will require drilling and widening with hand tools or a rotary tool at a low speed. The port is about 4mm tall & 8mm wide. High speeds may heat and melt the ABS plastic, so if you are working at an area for too long, back off and let it cool down.

place one small drop of SuperGlue at the arrow for magnet - image b4
4. Once all the holes are drilled and the rough edges cleaned up as much as possible, wipe the interior clean of plastic dust. Using a strong SuperGlue, place a very small drop inside the case at the top near the four holes you drilled, as shown by the arrow in image b4. Carefully place the tiny magnet over the drop of glue; non-magnetic tip tweezers or even chopsticks can really help - just be sure not to touch the SuperGlue as you position the magnet.

test fit the sensor into lid - image b6
5. Finally, cut a strip of the double-sided adhesive foam tape about 25mm wide and 8mm tall - do not remove the backing yet! Once the SuperGlue has dried (give it a few minutes) place the strip of tape over the magnet (image b5, below).

fully cover magnet with tape, do not remove backing (yet) - image b5
Part 3 - Preparing the Arduino

setting the board to "Arduino Nano" and its COM Port - image c1
1. Open the Arduino IDE v1.8 (latest) (download and install first, if not already done) and make sure it is updated to current release version. Place the Arduino Nano on a hard, non-conductive surface, and connect the USB cable to the device and then to the PC. Refer to device instructions (per brand/model/type) as required, if the device driver is not installed automatically. Under the 'Tools' Menu along the top, select the COM Port of this device, and set the board to Arduino Nano (as shown in image c1), and unless directed by device instructions, leave the Processor as "ATmega328P".

opening and uploading the Arduino Basics "Blink" sketch - image c2
2. Under the 'File' Menu along the top, select Examples > Basics > Blink to open this sketch (see image c2). Next, click the Upload button (
 ) to send this sketch to the Arduino Nano. Verify that the onboard LED slowly blinks on and off repeatedly to ensure this board is functioning, and that sketches are uploading properly. If you have any problems at this stage, you will want to stop and perform other troubleshooting steps to verify that the Arduino IDE is set up properly to communicate with this board, and that the board itself is not faulty. See Addendum at the bottom of this guide for help.

installing or updating the "Adafruit Unified Sensor" library - image c3
3. To get data from the DHT sensor, we will be using an open source DHT Sensor Library by Adafruit, which requires the Adafruit Unified Sensor Library, as well. In the Arduino IDE, under the 'Tools' Menu, select 'Manage Libraries...' (or press CTRL+i) to open this window - it takes a few seconds to open. First, select the Type of "All" (if not already selected), and the Topic of "Sensors". In the search field, type "Adafruit Unified Sensor". The list will be long, scroll down until you find the Adafruit Unified Sensor library (as pictured in image c3) - install it or update with the latest version, if not already.

installing or updating the Adafruit "DHT sensor library" - image c4
4. Next, in that same search field, type "DHT sensor library". Again, the list will be long, scroll down until you find the item with the title "DHT sensor library" by Adafruit (as pictured in image c4) - again, install or update it if it is not installed with the latest version.
When you are finished, close the Library Manager and disconnect the Arduino from the computer.If desired, use a light grit sandpaper on the edges of the Arduino Nano PCB board to make them smooth.

AVCS-DHT1 Wiring Diagram (your resistor color may be different!) - image c5
5. Once you have verified that the Blink sketch is working from earlier steps, and that the Arduino IDE can properly upload to the Arduino Nano board, it's time to solder the wires from the DHT sensor to the Arduino. Follow the wiring diagram (shown in image c5), separating the ribbon cable to individual wires for flexibility, as needed.

later, mounting will be upside down, as shown here - image c6
NOTE: As stated before, the Arduino Nano MUST be upside down (shown in image c6) in the end. You may wish to do as I have done, and push the wires through from the other (top) side of the board, soldering them into place on the underside (now facing up, like image c6).
Unlike the diagram, the brown wire from these pictures is the black/ground wire, the red wire is the yellow/signal wire, and the orange wire is the red VCC/5V from image c5! Your wires may differ in color as well, if using those supplied with your DHT module as I have done. Do not get them mixed up - follow any wire back to the DHT to identify it properly.
When complete, trim any protruding slag, or excess length from the wires as they exit the board, once cooled.
Part 4 - Final Assembly

gently press down on areas such as those noted with arrows - image d1
1. Cut a piece of the double-sided adhesive foam tape 23mm wide and 45mm tall, with a small notch cut out to allow wires to pass as shown in image d1. Do not remove the backing to expose the second adhesive side, this backing will remain on permanently as an additional barrier between the sensor, the Arduino, and the wires in the case.
2. Place the completed sensor and wires assembly into its slot you cut out in the lid, from the inside. Cover the entire unit with the tape you cut out, allowing the wires to fit through the notch. Use a dull plastic "spudger" type tool (image d1) to gently but thoroughly press down at all contact points, bends, and flat areas where the tape should make full contact with the lid and sensor. Avoid the area of the wires and resistor, and the soldering points - use only a finger or thumb and gentle pressure in the area over wires to ensure a light contact. We don't want to break any of the solder or unintentionally bridge the contacts.
Do the same for the tape covering the magnet in the case - press into the bends and flat areas to ensure permanent contact. Do not compress the part on the top of the magnet too much - we need this pile to be between 3-5mm to make contact with the Arduino Nano when it is finally in place.
first remove backing from tape, then apply the SuperGlue - image d2
3. Before proceeding, with the protective backing still on the tape covering the magnet (still "un-sticky"), test fit the Arduino Nano into the case one last time - make sure the USB port sits flush with the base of the case as it exits, and the PCB board is flush with the edge of the case with the USB port hole (such as in image d3). Ensure that the back of the Arduino overlapping the magnet touches the tape and the peel covering it - this is the last chance to make it taller with another bit of tape, if you used a different or thinner type of tape not recommended by this guide. It should be a foam type tape with some give, and adding to the height of the magnet enough to make contact with the Arduino (about as tall as the USB port on the other side, 4mm).
When ready, first remove the backing peel entirely from the double-sided adhesive covering the magnet - a sharp pair of tweezers can help here, it is NOT EASY and your luck may vary (condolences, I use this stuff all the time because it is so great, but for this one flaw - actually getting the backing off once it's in place can be painful!).
Once you're done fighting the Gorilla tape and got the backing peel off, place a small dot of SuperGlue inside the case near the USB port passthrough hole. In the example image d2 there is almost too much, half this much would do - you can use a cotton swab to soak up some of the glue before it dries, but this entire procedure must be done swiftly.
Before the SuperGlue dries, very carefully slot the Arduino Nano into the case at an angle, with the USB port first, keeping the back from touching the tape yet - slide the Arduino USB port through the hole and then lower the back end down into position above the tape, keeping the PCB flush with the case wall, and the USB port through the hole as it makes contact with and compresses the SuperGlue. Quickly dab up any SuperGlue that may leak out of the hole and outside the case.

apply light pressure on right and strong pressure on left - image d3
4. Referring to image d3, with light & gentle finger pressure, press down on the area noted by the arrow on the right, while also using a more firm finger pressure to press down on the area noted by the arrow on the left (over the tape/magnet). Be sure not to put a lot of pressure on the right where those components are, it is not necessary - the SuperGlue will do its job, we just need to give it light pressure to help spread the SuperGlue and ensure flush contact as we put greater pressure on the left where there are no components and we want full contact with that tape.

fully assembled - image d4
5. Before closing the lid, allow up to several minutes for the SuperGlue to dry. Take this time to plan the bends or separations in the ribbon wire (if using one) so that each wire can sit in a sort-of zig-zag fashion once we do close the lid. In image d3, the wires are actually a bit long and will require an extra 'zag' to fit, so I have separated the wires nearly to the first bend. The first bend by the lid and notch in the tape must be acute & firm without crimping!
Once the SuperGlue is dry, carefully guide the wires into places they won't impede as you close the lid - start from the far end away from the wires, and lower it into place over the USB port side lastly. Be careful not to force it closed, adjust as needed to ensure a tight fit without jamming the wires into hard crimps or bends which could sever tiny wires in the braid inside the wire jacket.

The Official AVCS-DHT1 sticker label - image d5
6. The AVCS-DHT1 Sensor (being magnetic) is designed to stick to a PC case in a vertical orientation somewhere not far from the intake, but far enough from intake fans to not be 'cooled by the wind'. The back of the ABS plastic case on the sensor can potentially mar or scuff softer paint on a PC case, so it is advised to place a piece of black electrical tape or even Scotch Tape along this surface simply to ensure a softer contact with the PC.
All AVCS-DHT1 sensors built by me and sold in the VG Store will have this sticker label (shown in image d5), which also serves this purpose as a softer backing to help avoid minor scuffing over time. If using one of these labels, carefully cut around the grey box on the label leaving about a 1-2mm margin as shown. You may consider peeling back and folding a crease in the wax paper backing, then folding back into place over the adhesive surface, before cutting the label to size - this will help more easily remove the backing once you've trimmed off the edges of the label.
Unlike the high cost of shipping pre-built sensors around the world, I can offer these cool little AVCS-DHT1 sticker labels to anyone following this DIY Build Guide for a fairly low price in the VG Store including free domestic and international shipping to around 180 countries. It's much cheaper to mail a small envelope than a box, of course.
 Click Here to open the VG Store in a new browser tab to check out these sticker labels.
Part 5 - Uploading the Code
AVCS_DHT1_DIY_Sensor_v3
7. At long last, we can upload the Arduino sketch to the device and get some sensor data onto the computer! Start by connecting the AVCS-DHT1 sensor to the computer with the USB cable, and mount it as noted, on the front or side of the computer near the intake but not within range of wind created by intake fans. The area of the panel where the sensor sits should not be near any internal components which get hot under heavy PC use.
8. Open the Arduino IDE program again. Under the 'File' Menu, select 'New' (or press CTRL+N) to create a new sketch called "AVCS_DHT1_DIY_Sensor_v3". Select the entire contents of this new sketch and delete them so you have a blank text area to paste into.
Next, Expand Contents of the code block above - copy the entire contents of the code block here from line number 1 through line number 86. You can copy the code block to your clipboard more easily by clicking the "Download Raw" button provided by Pastebin, and select all the text on that page & copy it. Finally, paste the entire code into your sketch in the Arduino IDE (overwriting any contents) and save the sketch (CTRL+S). Now we can upload the sketch from the Arduino IDE program to the Arduino Nano by pressing the (
 ) upload button just as we did with the Blink sketch above. When uploading is done, close the Arduino IDE program and proceed with testing at step 9 below.
If you see any problems in the errors and information window below the sketch when trying to upload and if the title bar over this information window at the bottom of the sketch does not show the words (
 ) when done, stop and get Help or Support from the links in the Addendum at the bottom of this guide.

AVCS SENS profile version shown above may differ from latest - image e1
9. Launch the VoiceAttack program and switch to the AVCS Sensors & Weather Profile (if not already running and loaded). When voice commands are available, say, "Open the Sensor Menu". The AVCS SENS Main Menu will pop up. Press the "OPTIONS" button, and then press the "Sensor Options" button.
In the Sensor Options screen, press the "Test Arduino DHT11 Sensor" button - there will be a voice reply of either "Test Succeeded" or, of course, "Failed". Upon a successful test, the VoiceAttack Event Log (shown in image e1) will display several text messages, including a sample of the data received such as:
AVCS-DHT1 Data: [AVCS,22.75,65.00,72.95,73.00,DHT1]


DHT Monitoring in AVCS SENS is a
secondary monitor tied to the Sensor
and/or Weather Monitor. If either of
these are started, DHT Monitoring
will try to start. If no DHT sensor is
detected, indoor weather & sensor
diagnostic commands will not work.
If both Sensor & Weather Monitoring
are turned off while DHT Monitor is on,
the DHT Monitor will also turn off.Congratulations on successfully building an AVCS-DHT1 Sensor! Enjoy the indoor weather & PC sensor diagnostic voice commands!
*alternatively, if you were not so successful, please see links below in the addendum for help & support on a variety of topics. I am also happy to provide assistance here if you would like to reply below, or through private message here or on Discord - whatever is preferrableAddendum - Help & Support for this DIY Arduino Project
If you need help, post up a reply below and I'll answer as soon as I see it. Otherwise, here are some helpful links pertaining to this project:"AVCS SENS", including the Profile Package for VoiceAttack, the AVCS SENS Wiki page, the AVCS-DHT1 Sensor and Sticker Label, and this DIY build guide, comprise creative works by SemlerPDX shared under CC BY-NC-ND 4.0 March/June 2022
AIDA64 is not affiliated with AVCS or this DIY project. Images and text depicting the AID64 program(s), title, logo, or other elements belonging to AIDA64 or FinalWire Ltd. are used only for educational and/or instructional purposes, relating to demonstration & use, in this DIY project guide.
AIDA64 is a Registered Trademark of FinalWire Ltd. ©2010-2023 All rights reserved. - 6
-
-
Click here to upload pictures of your own PC! (100MB size limit, format for web in .jpg or .png for good quality and lower file size)
-
Show off pics of your PC here!
-
Articles
-
- 3 comments
- 9,496 views
-

- Comment by =VG= SemlerPDX
-
- 1 comment
- 12,608 views
-

- Comment by =VG= SemlerPDX
-
- 1 comment
- 9,652 views
-

- Comment by =VG= BLuDKLoT
-
- 1 comment
- 7,647 views
-

- Comment by aSeptik
-
- 2 comments
- 7,847 views
-

- Comment by =VG= SemlerPDX
-
-
Pics from the Front
-
Featured Downloads
-
Who's Online 4 Members, 0 Anonymous, 36 Guests (See full list)
-
Member Statistics

.thumb.gif.ed10621c301b920f22bce51e1e1609b9.gif)
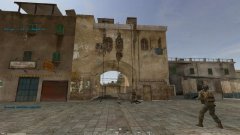






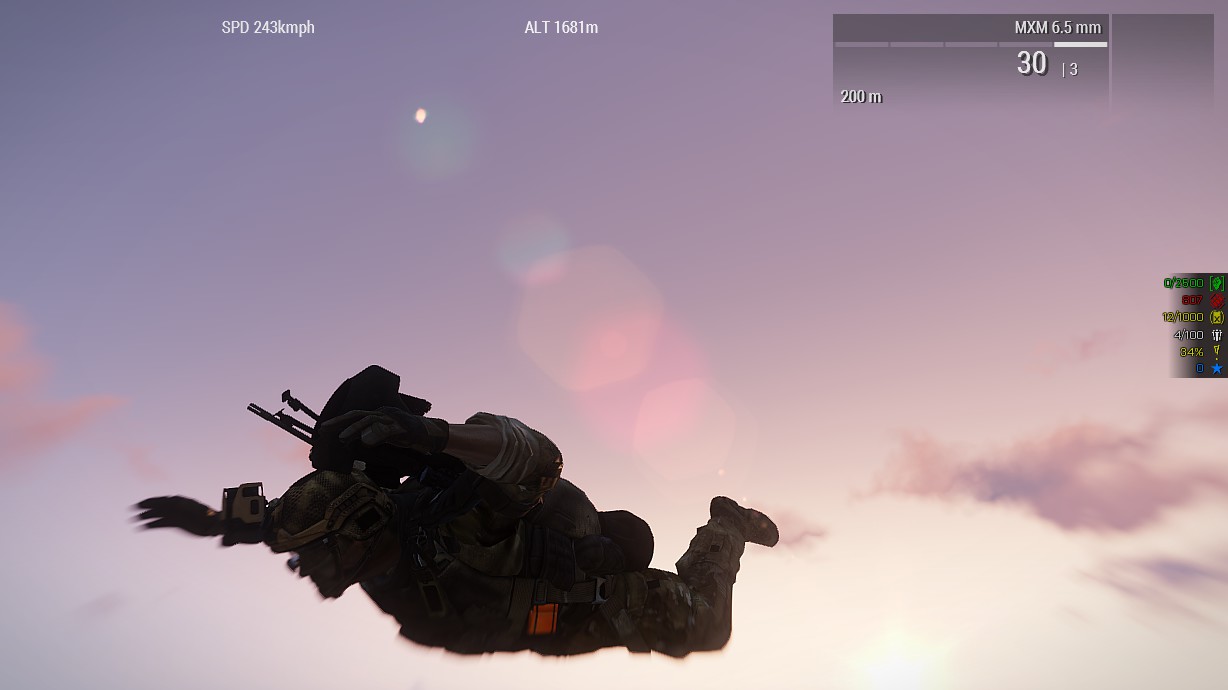


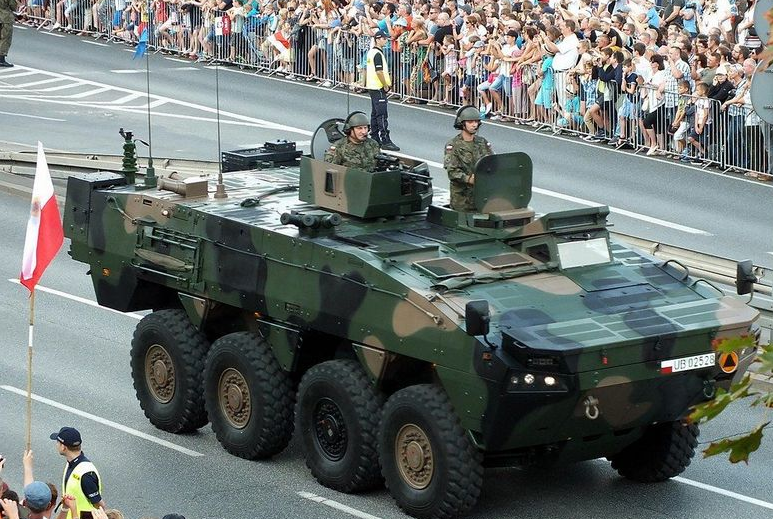
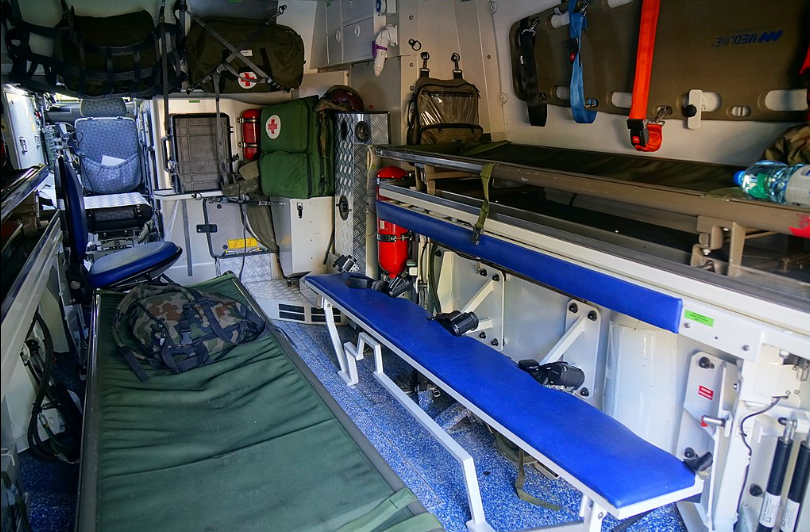
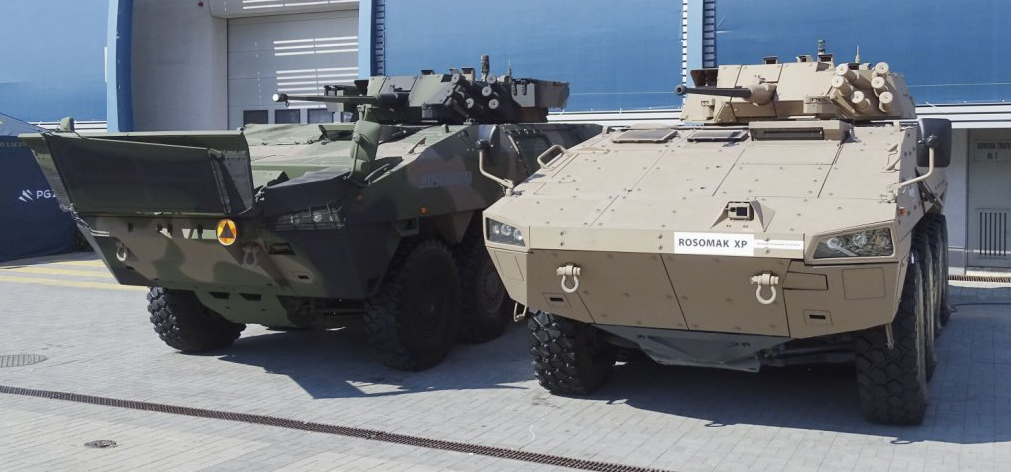
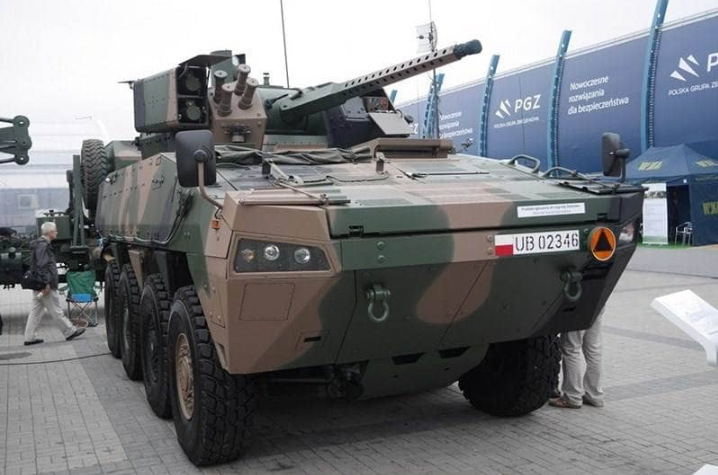
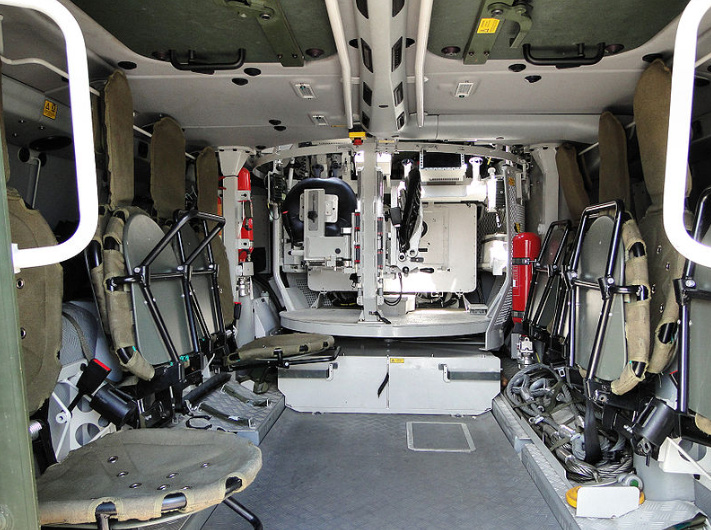
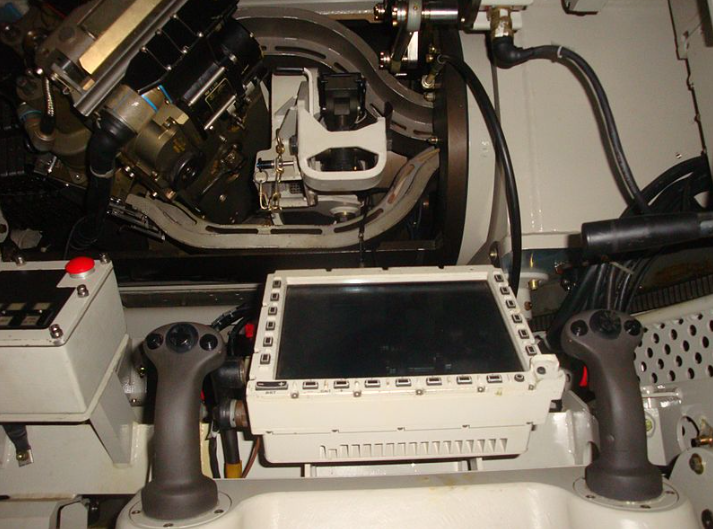
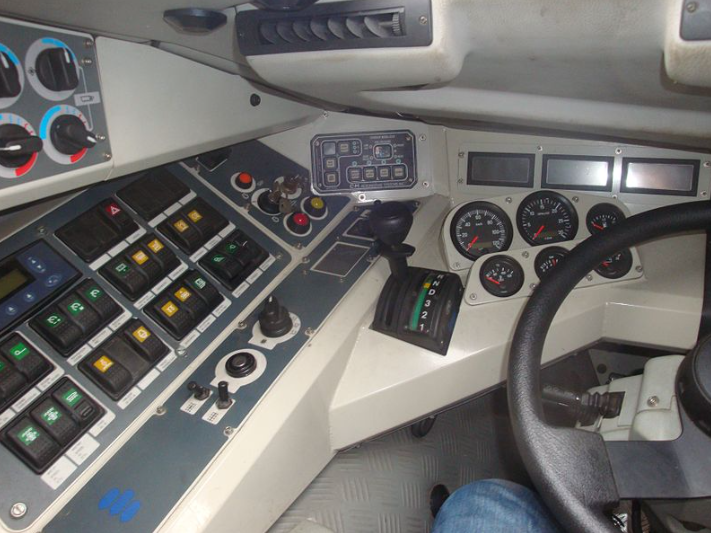
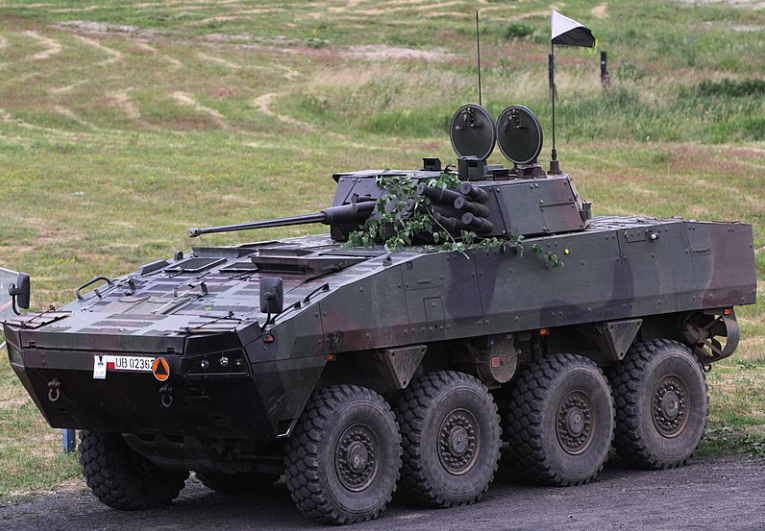
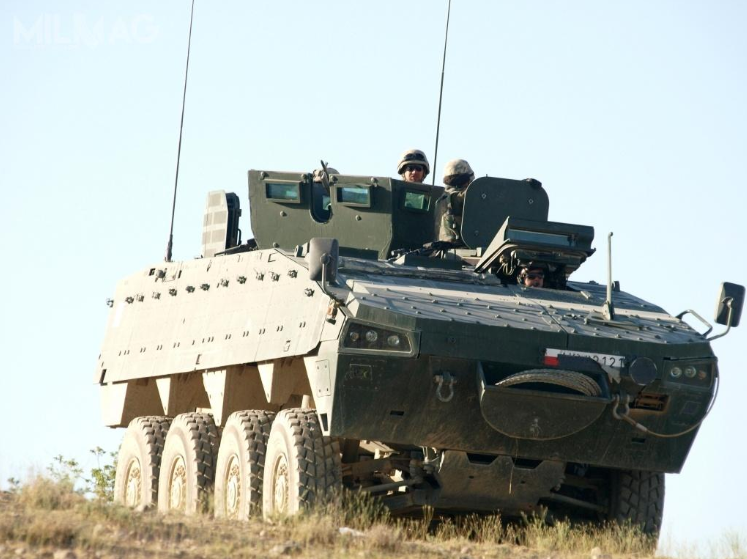
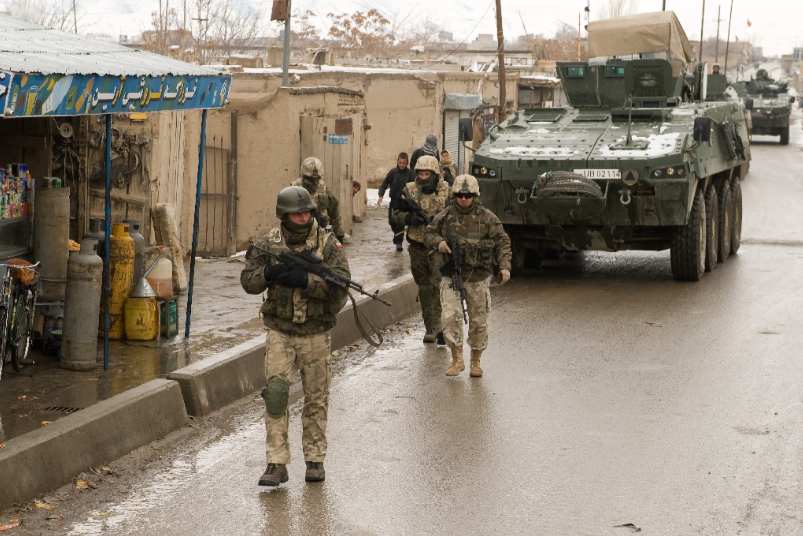
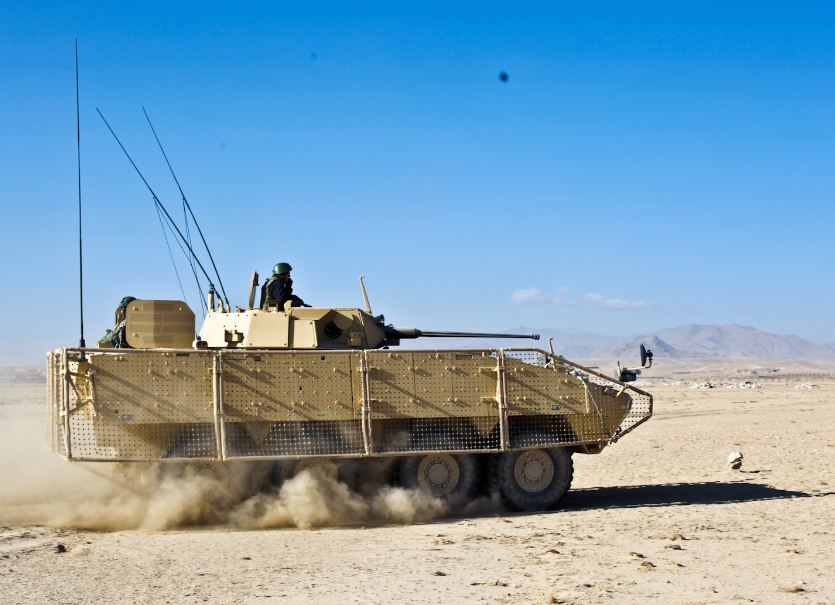
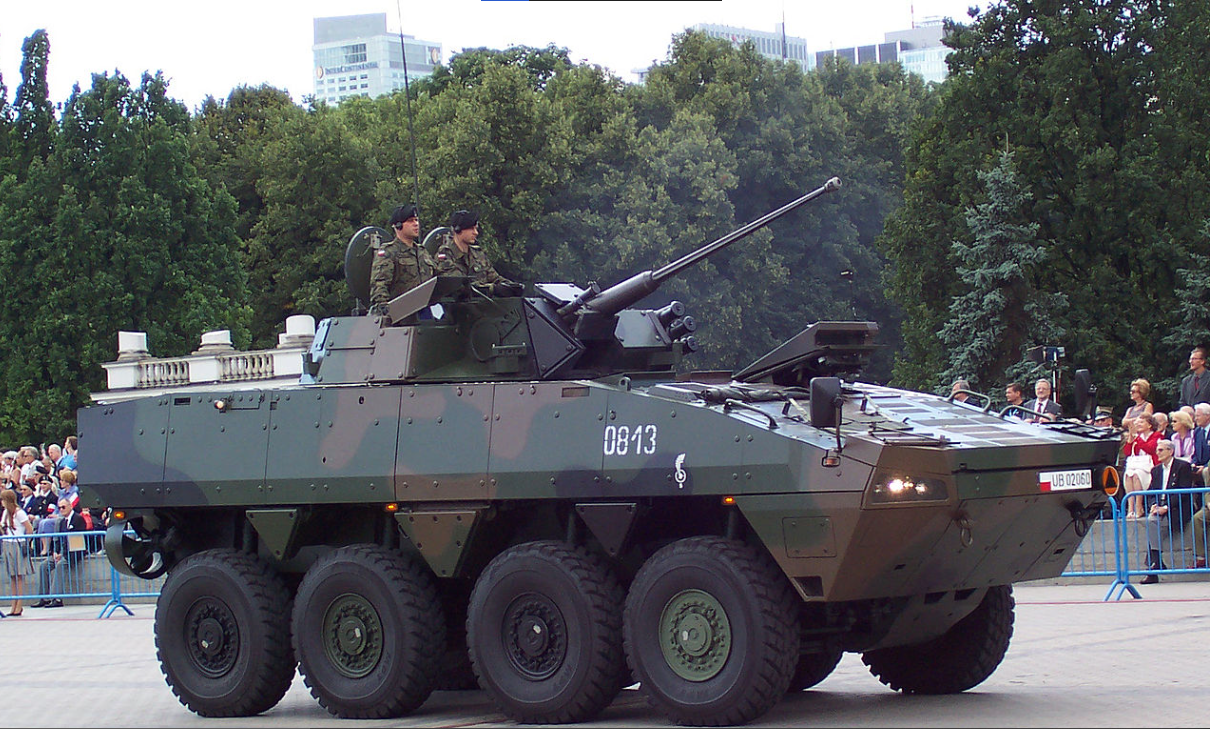
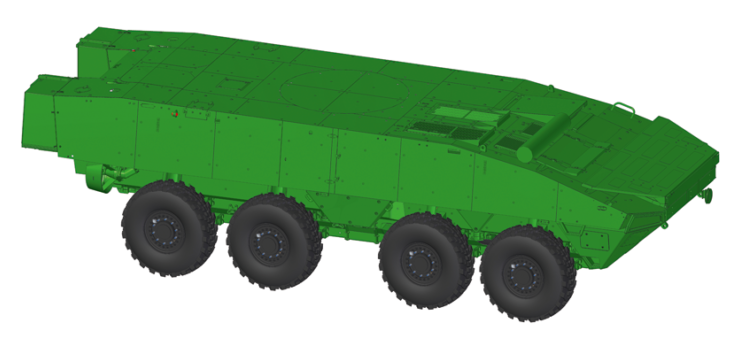
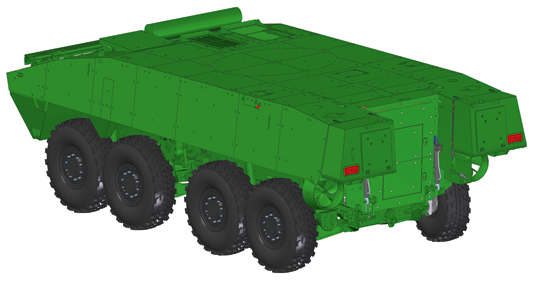
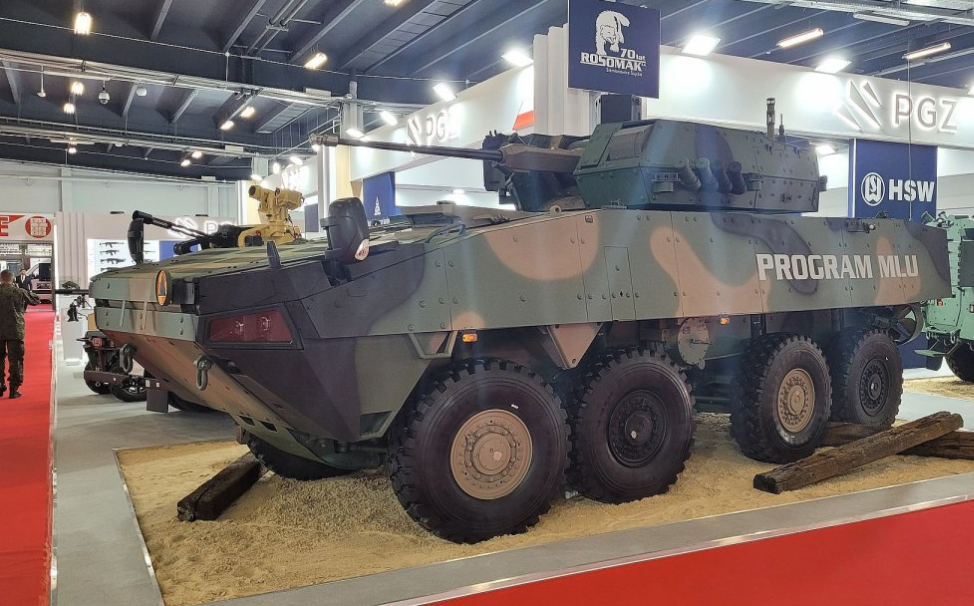
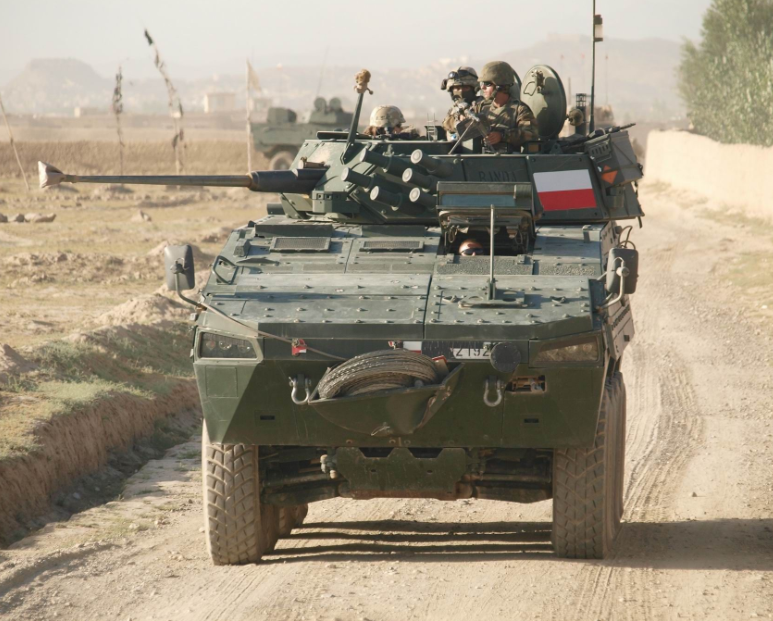




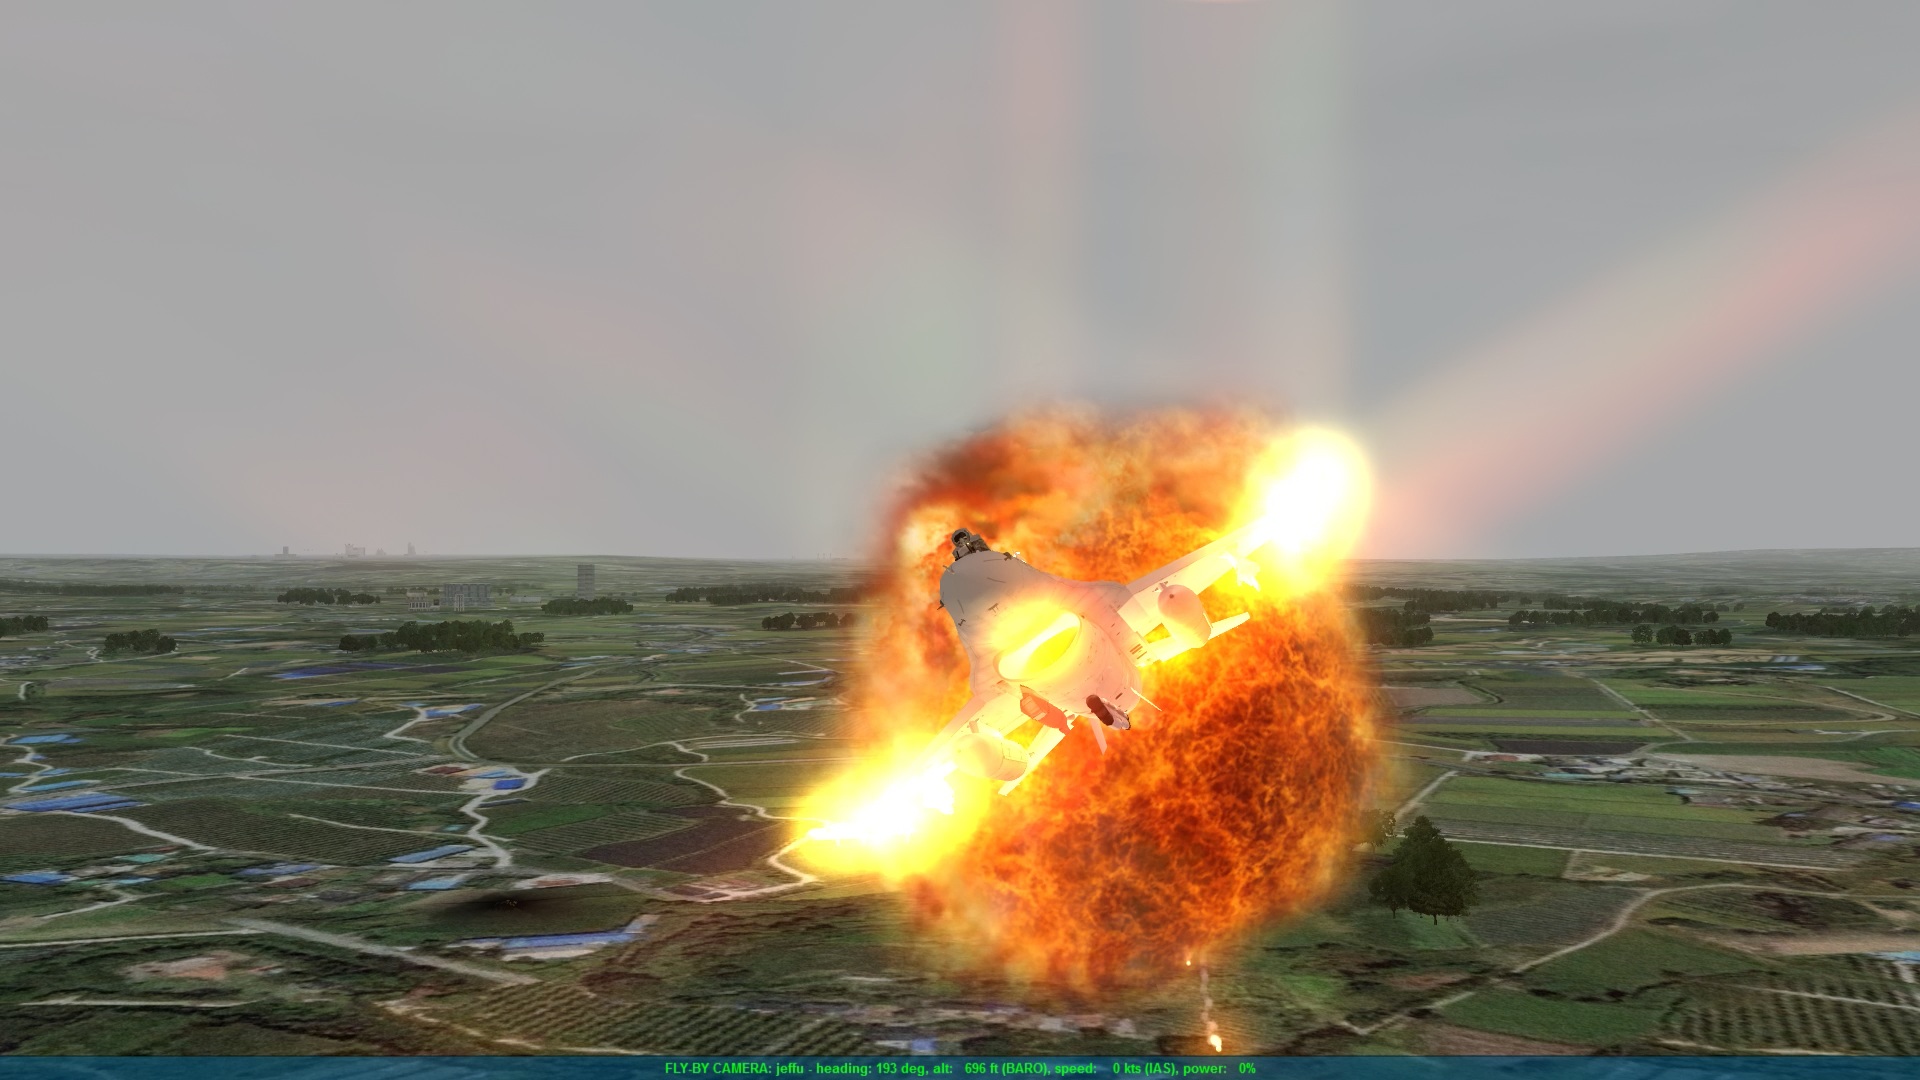
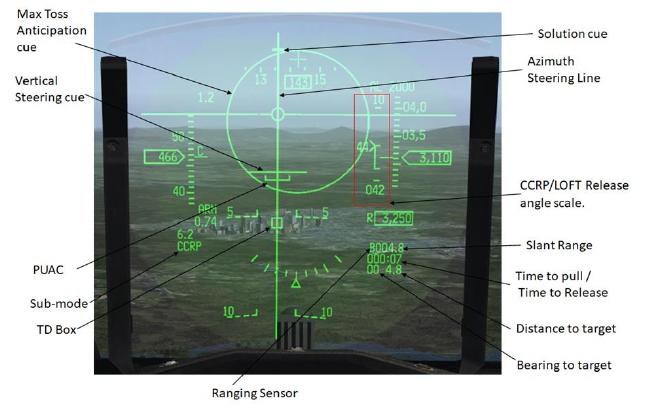
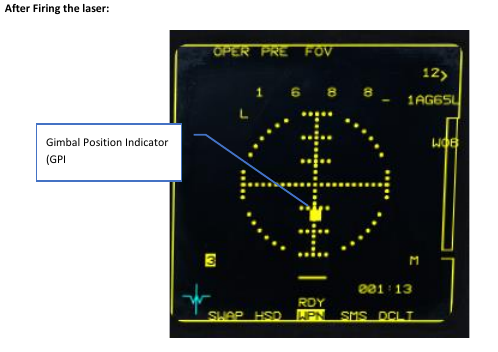
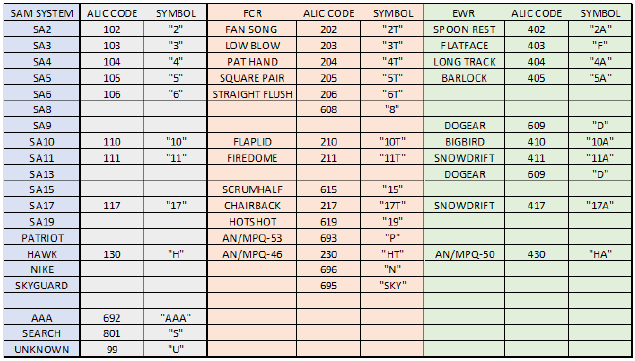
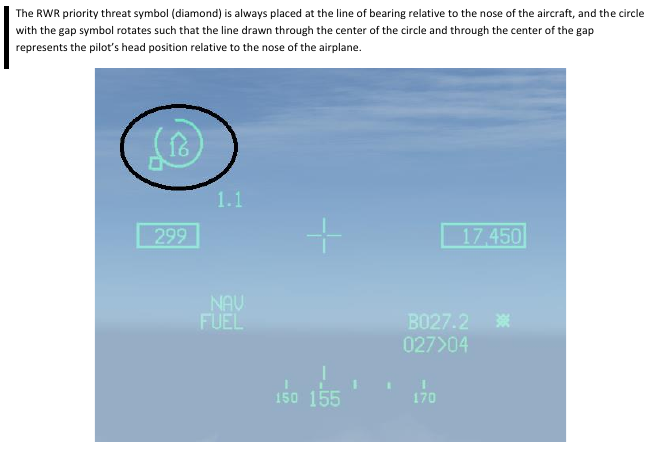
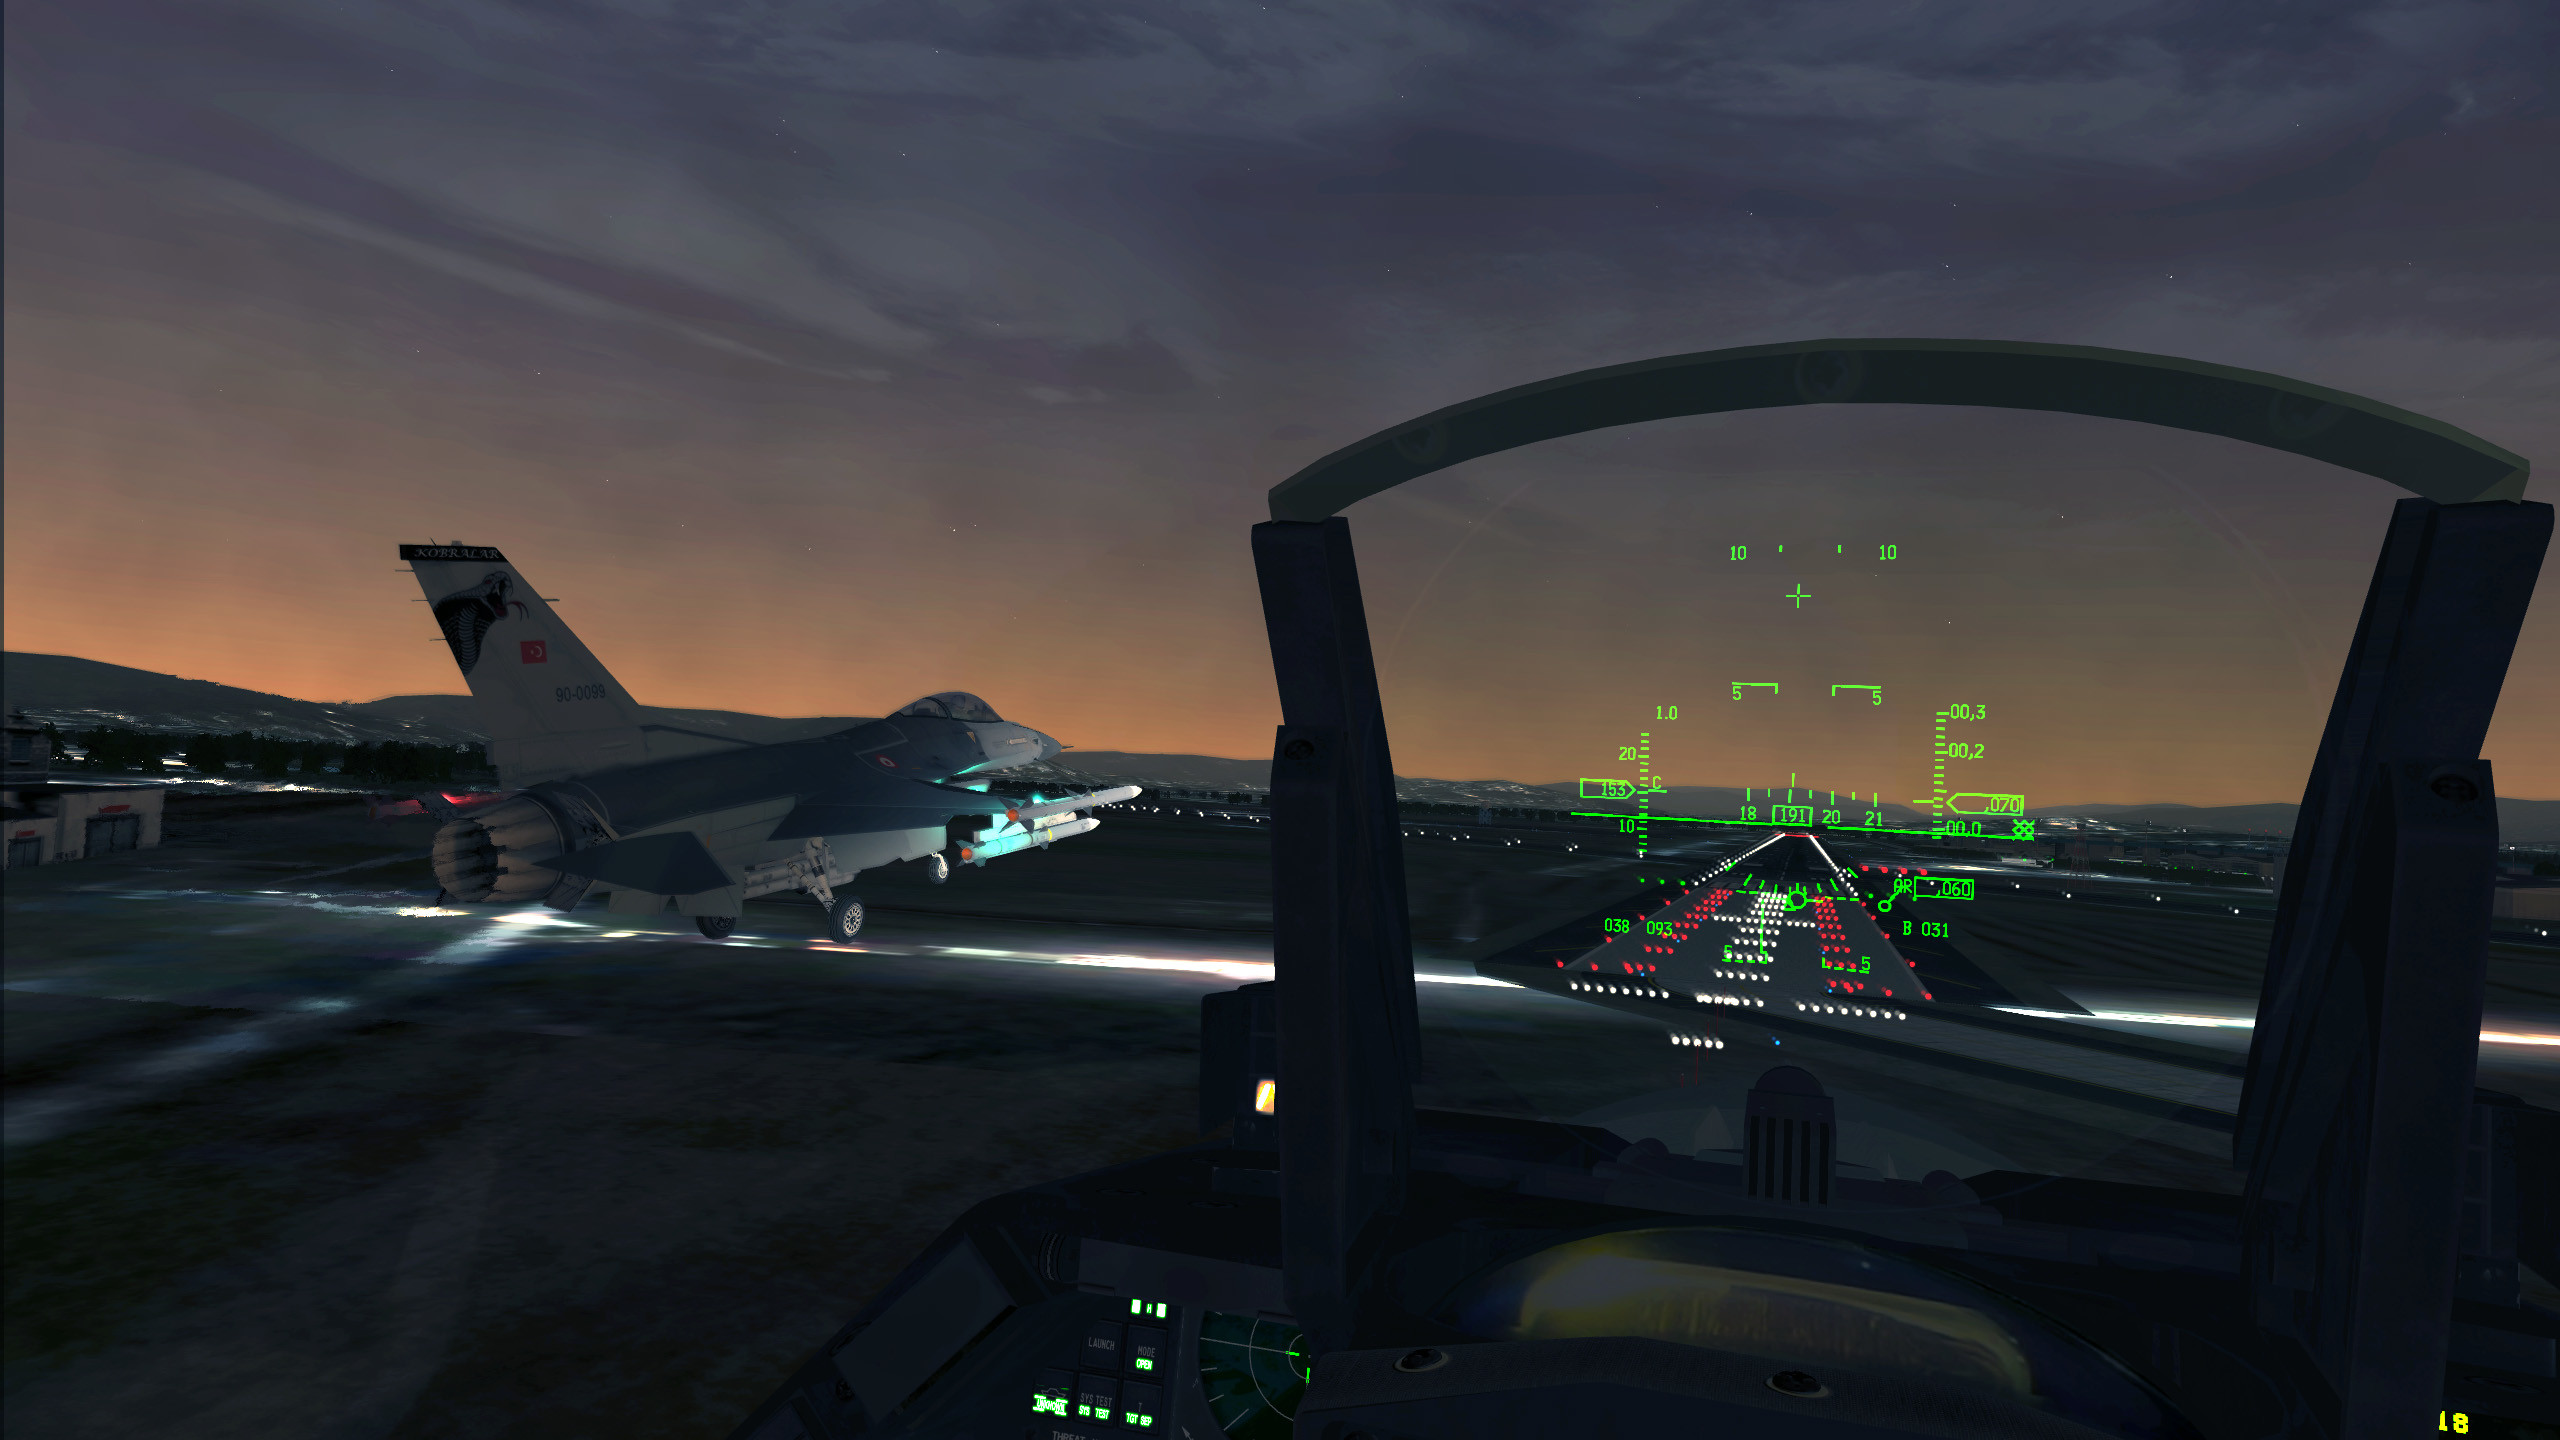
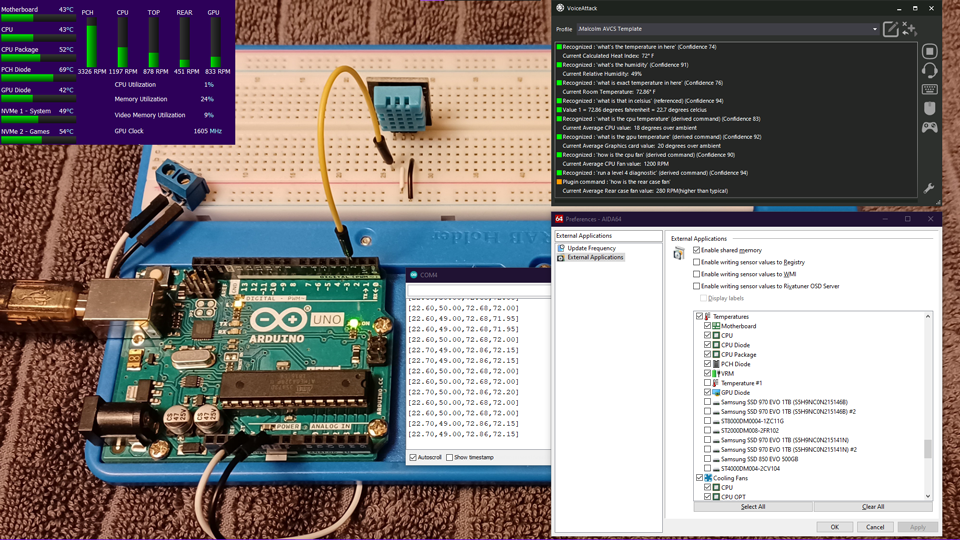
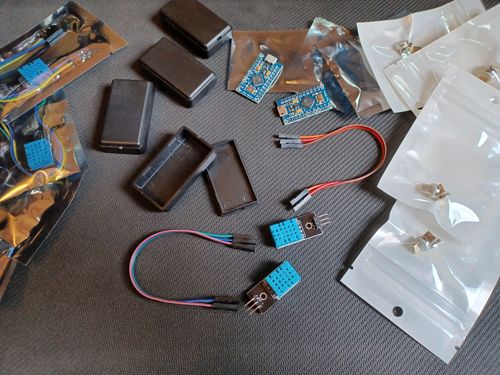
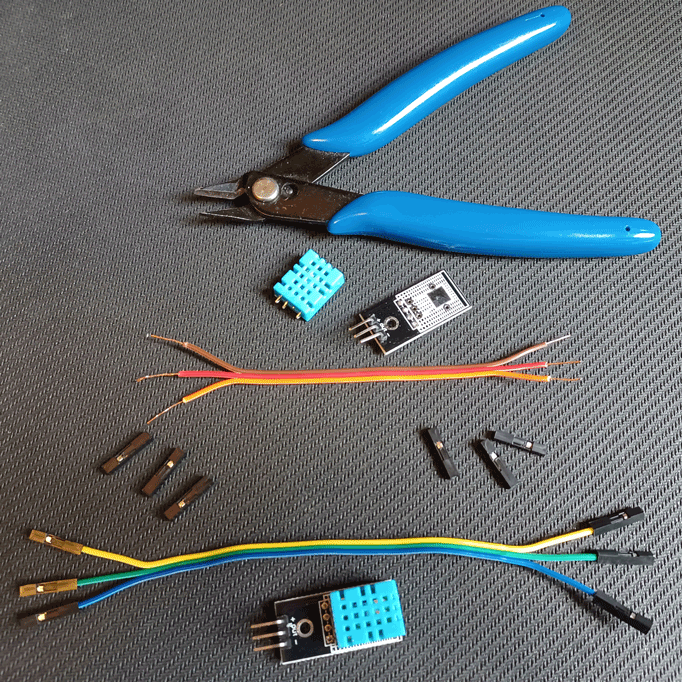
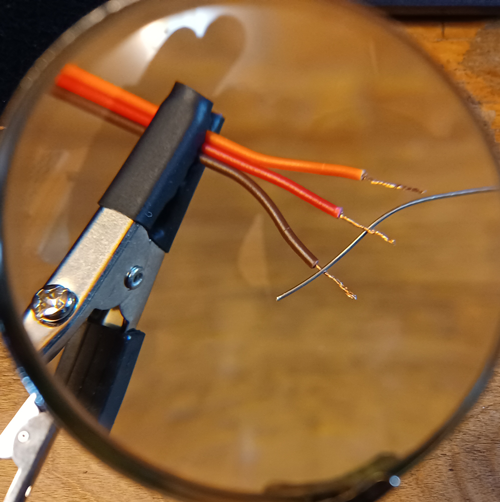
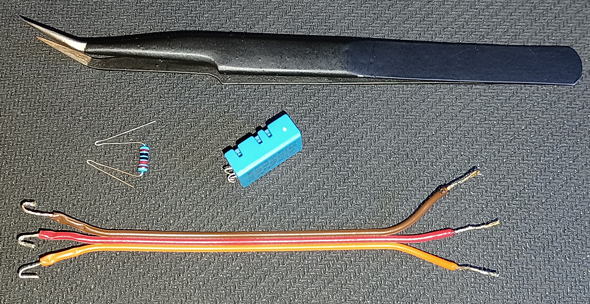
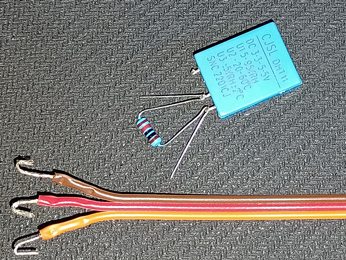

 port is